

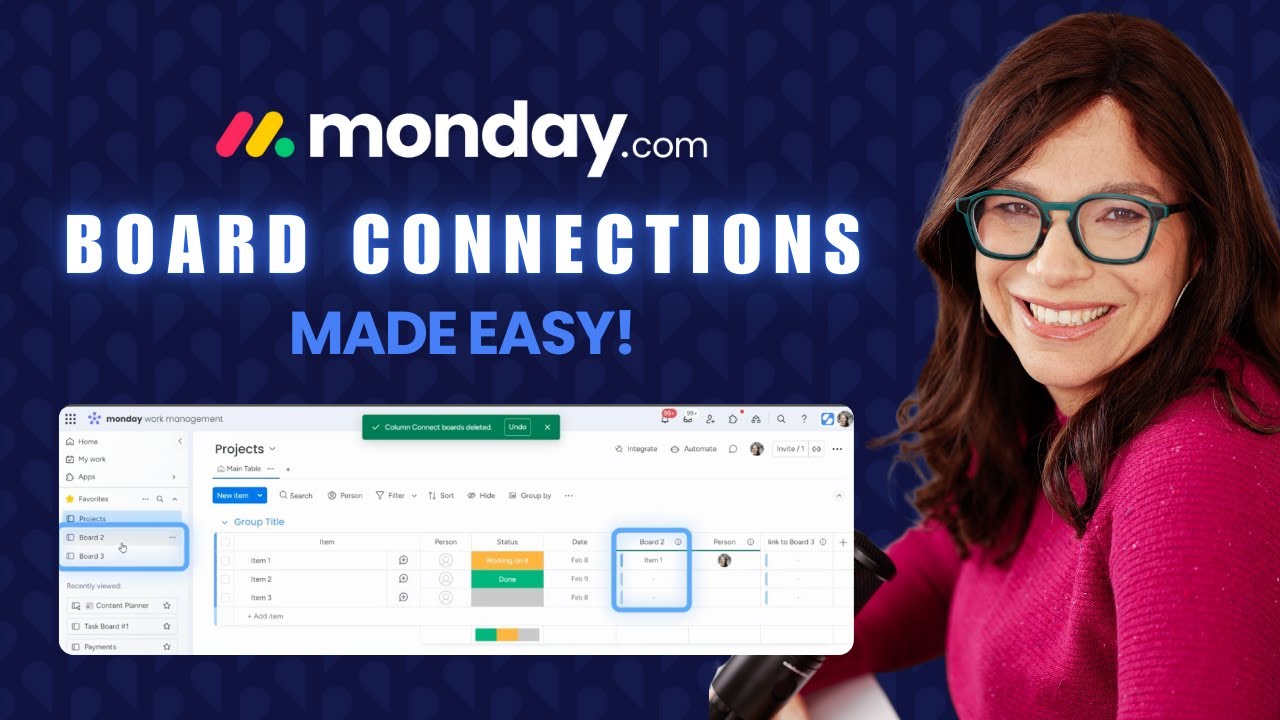
Board connections in monday.com help teams organize and track work efficiently. They allow data to flow between different boards, keeping everyone on the same page.
However, improper setup can lead to cluttered boards and confusion.
In this blog post, I’ll walk you through the right way to connect boards, use mirror columns, and avoid common mistakes.
To watch this how-to tutorial on connecting boards, check below:
How to Connect Boards in monday.com
First, create two boards. Let’s call them Board 1 and Board 2. Follow these steps to connect them:
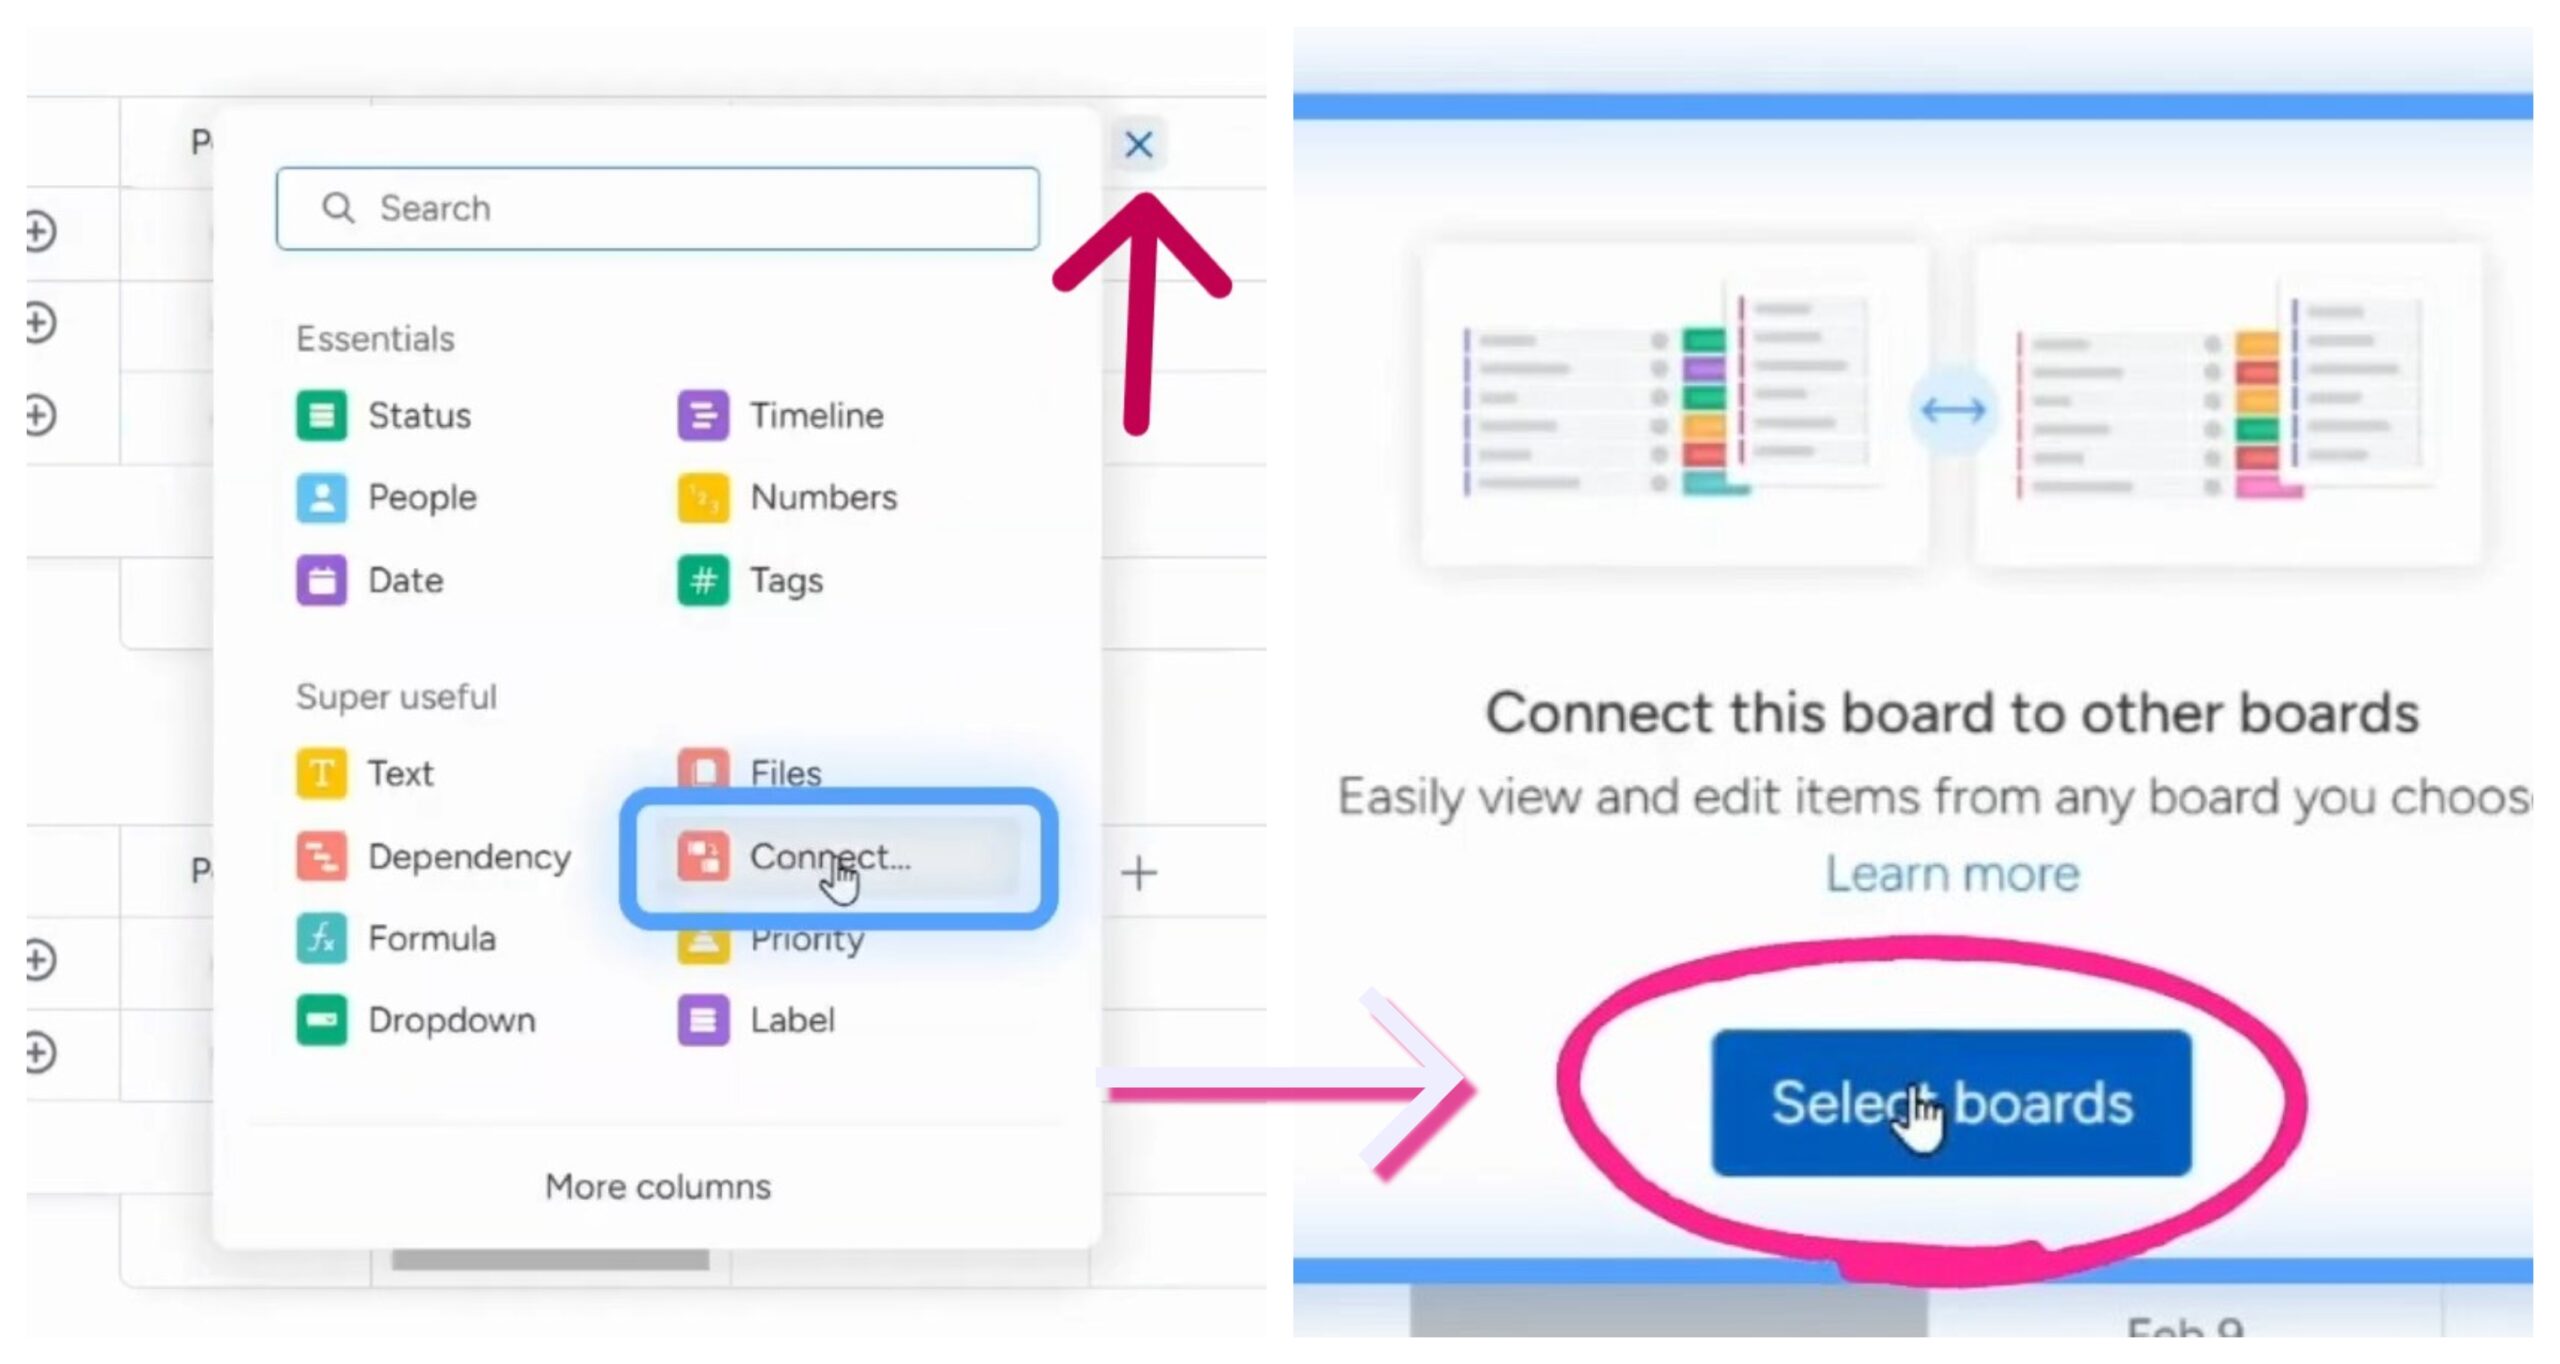
- Click the + button on Board 1 and click on the option “Connect.”
- A pop-up will appear with the option “Select boards.” Click on it.
- Another pop-up will appear where you can select the board(s) you want to connect the Board 1 to.
- Choose Board 2 from the list.
- Also, choose whether you want a one-way or two-way connection.
- A one-way connection will only show the data from Board 2 on Board 1.
- A two-way connection makes data visible on both boards.
- Click Create Boards to complete the setup.
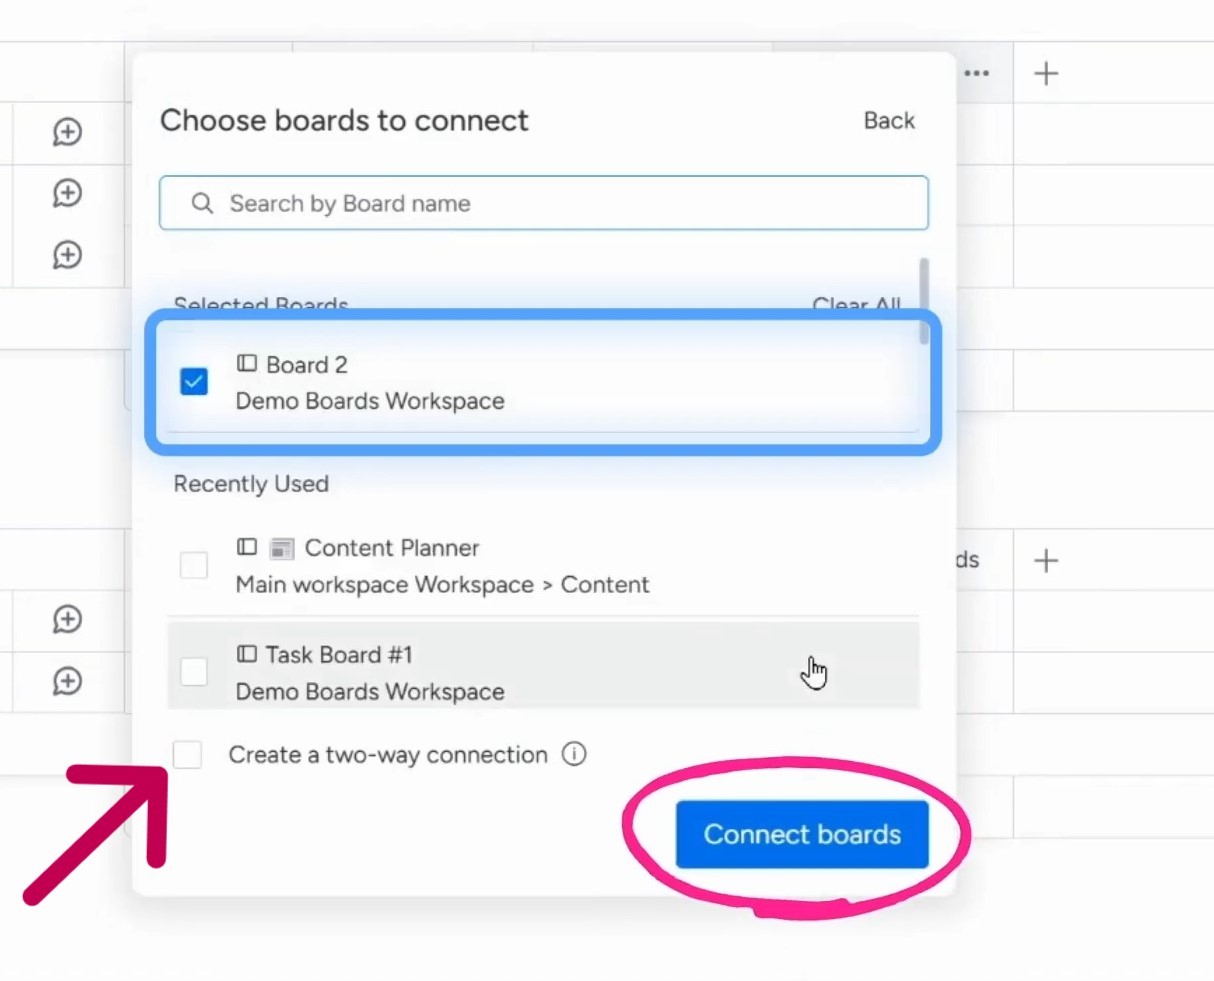
PRO TIP: You cannot change this two-way setting later, so choose wisely.
Once you’ve decided on the two-way connection, click “Create Boards.” You’ll notice a new column appears on both boards. This shows that the boards are now linked.
You can also add a mirror column if you need to, but you can always do that later.
What is a Two-Way Board Connection?
A two-way connection allows data to be visible on both connected boards. This is useful when multiple teams need access to the same information. Here’s how to set it up:
- When connecting Board 1 to Board 2, check the box for two-way connection before clicking Create Boards.
- Once created, a new column appears on both boards, linking them together.
- Connect specific items by selecting them in the newly created column.
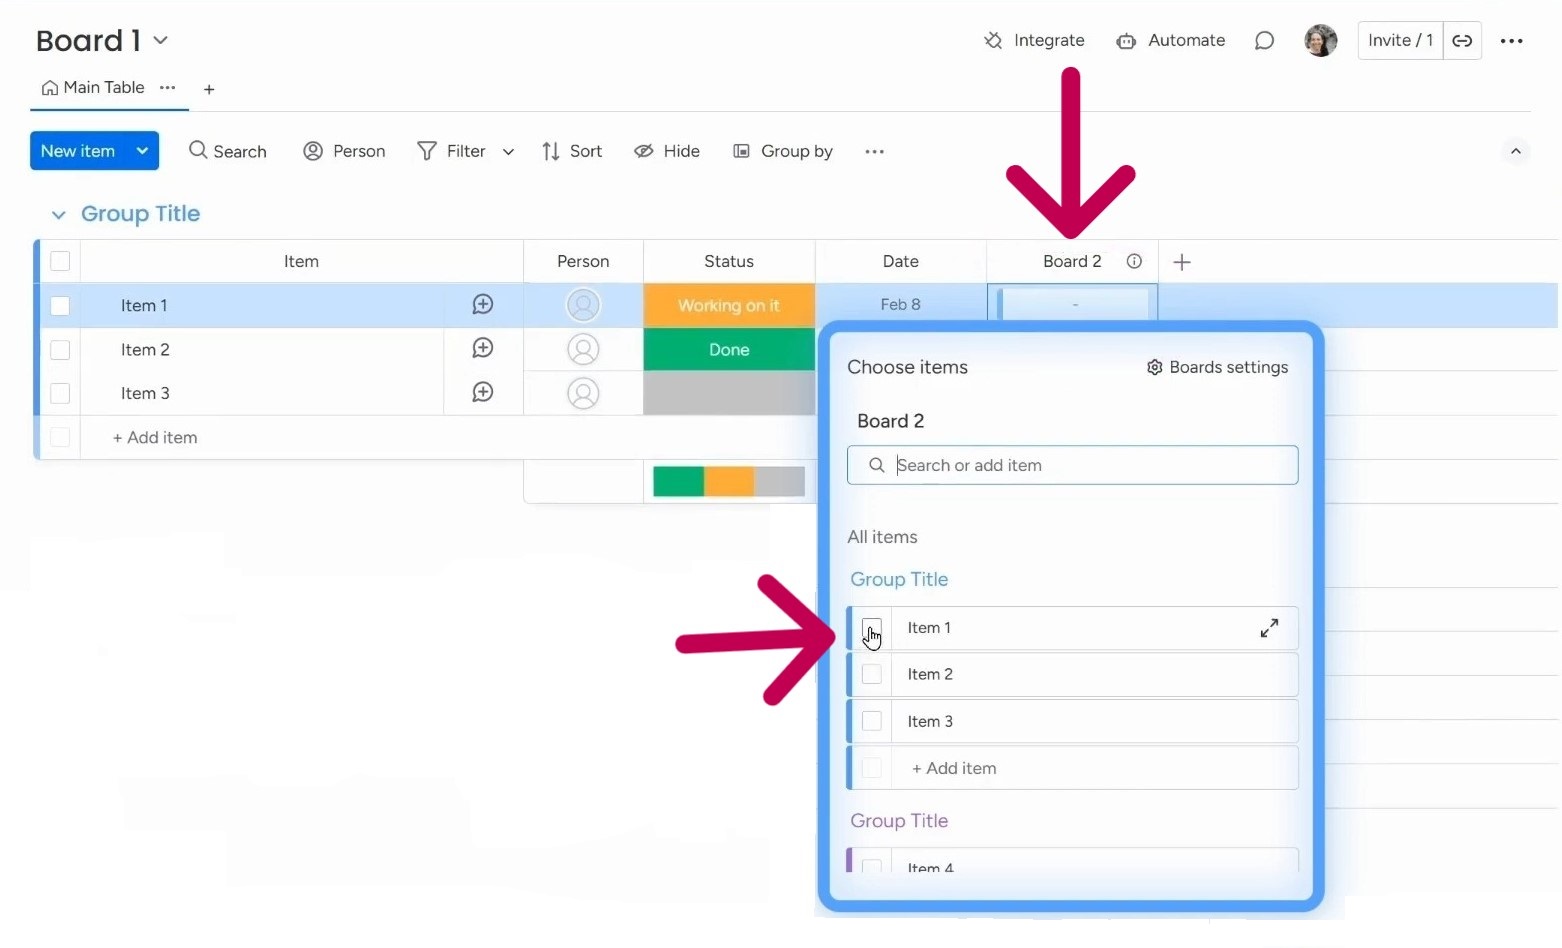
On Board 1, you’ll see the option to choose items from board two. You can link item one from Board 1 to another item on Board 2.
And here’s the cool part: because you created a two-way connection, any changes you make on one board will show up on the other. This makes it easy to stay updated on both boards at the same time!
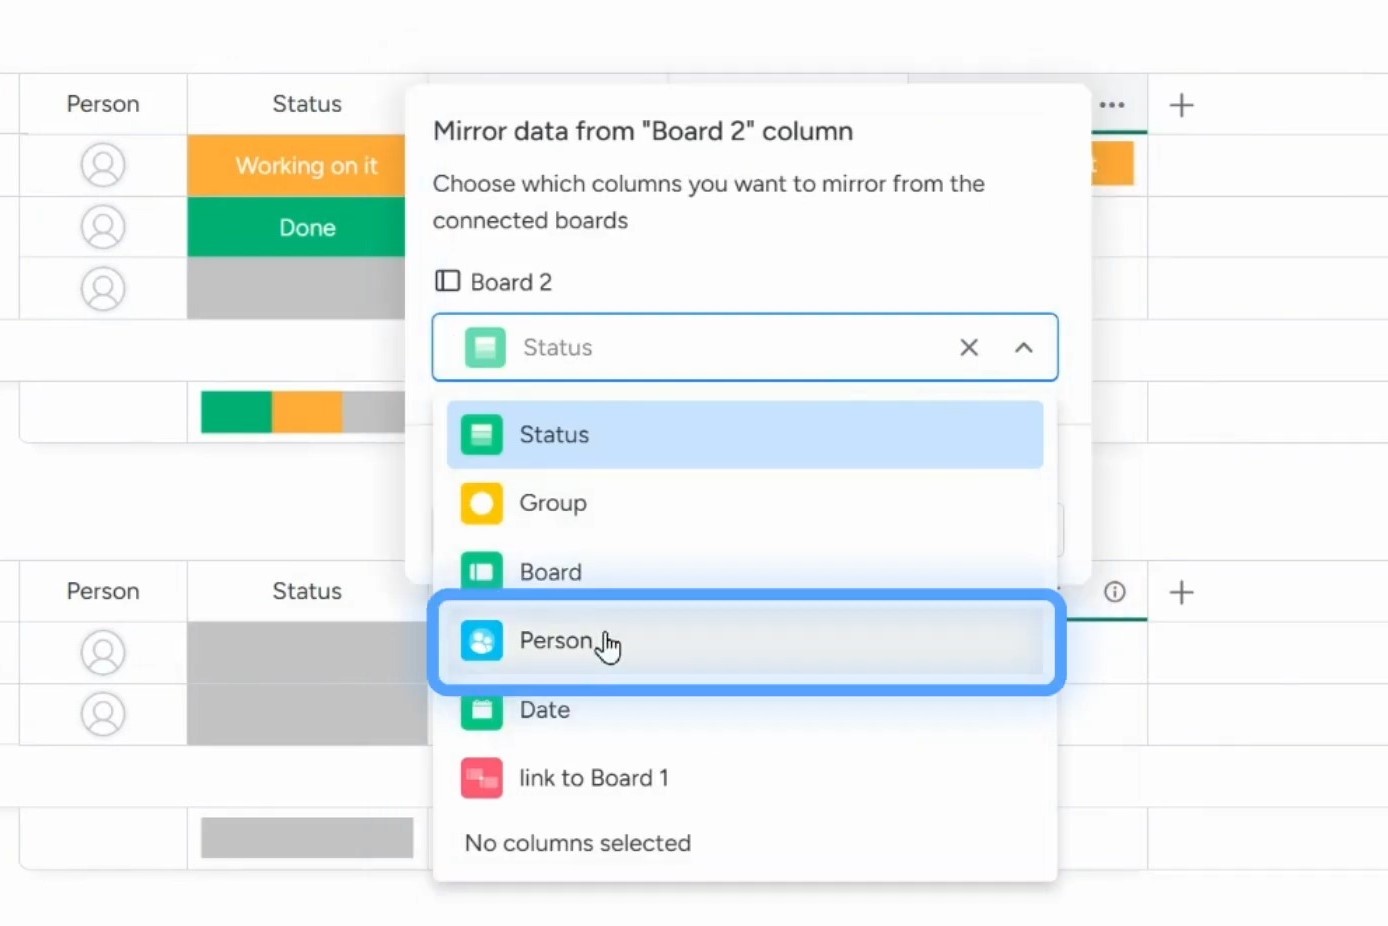
How to Do Mirror Columns
Mirror columns let you display data from a connected board without duplicating it. This helps keep information up-to-date across different boards. Here’s how to set up a mirror column:
- Click the three dots on a connected board column.
- Select Settings > Customize Connect Boards.
- Click Add Mirror Column.
- Choose the column you want to mirror (e.g., Status, Person, Date).
Once you add the mirror column, it will pull data from the original board and display it on your current board. Any updates made to the mirrored column on the source board will instantly reflect in the mirrored version.
However, remember that the data is technically located on the original board; you’re just viewing it in another place.
For example, if you mirror a Person column from Board 2 to Board 1, assigning someone to a task in Board 1 will also show up in Board 2.
If you want to mirror data on multiple boards, repeat the same steps for each board where you need the mirrored information.
Using mirror columns correctly can streamline workflows and eliminate unnecessary data entry. It’s a simple way to keep everything in sync without overwhelming your boards with duplicate information.
Best Practices for Multiple Board Connections
If you’re connecting multiple boards, you need to do it from a high-level board. Doing this will summarize data from multiple low-level boards.
In this case, you can connect Board 2 and Board 3 to Board 1 (I’ve changed its name to Projects) to create a high-level low-level structure.
Just like I’ve connected Board 1 and 2, I’ll follow the same procedure to connect Board 1 and 3. Don’t forget to select the two-way connections when linking to the new board.
This ensures that information flows back and forth between boards seamlessly.
In summary, when connecting multiple boards:
✅ Right Way: Connect Board 2 and Board 3 from Board 1 or the Projects (to a high-level board). This keeps all connections in a single column.
❌ Wrong Way: Don’t connect the low-level boards with each other, as it’ll create multiple connected columns, making the board cluttered and hard to manage.
Struggling to set up monday.com the right way? Simpleday can help! Our team ensures your boards stay organized and easy to manage. Book a free call to learn more.