

If you want to get started with monday.com and don’t know where to begin, you’re in the right place! The platform helps teams of all sizes manage their work, projects, and tasks in one place. You can use it whether you’re planning a big project or just keeping track of daily tasks.
The best part? You don’t need to be a tech expert to get started. In this blog post, I’ll walk you through the basics so you can get an idea about its primary features and functions.
If you want to watch the detailed tutorial, check the following video:
Choosing the Right Product and Plan on monday.com
Monday.com has several products and plans that you should know about to pick the right one.
The Product Breakdown
There are four main products to suit different needs. Here’s a quick overview:
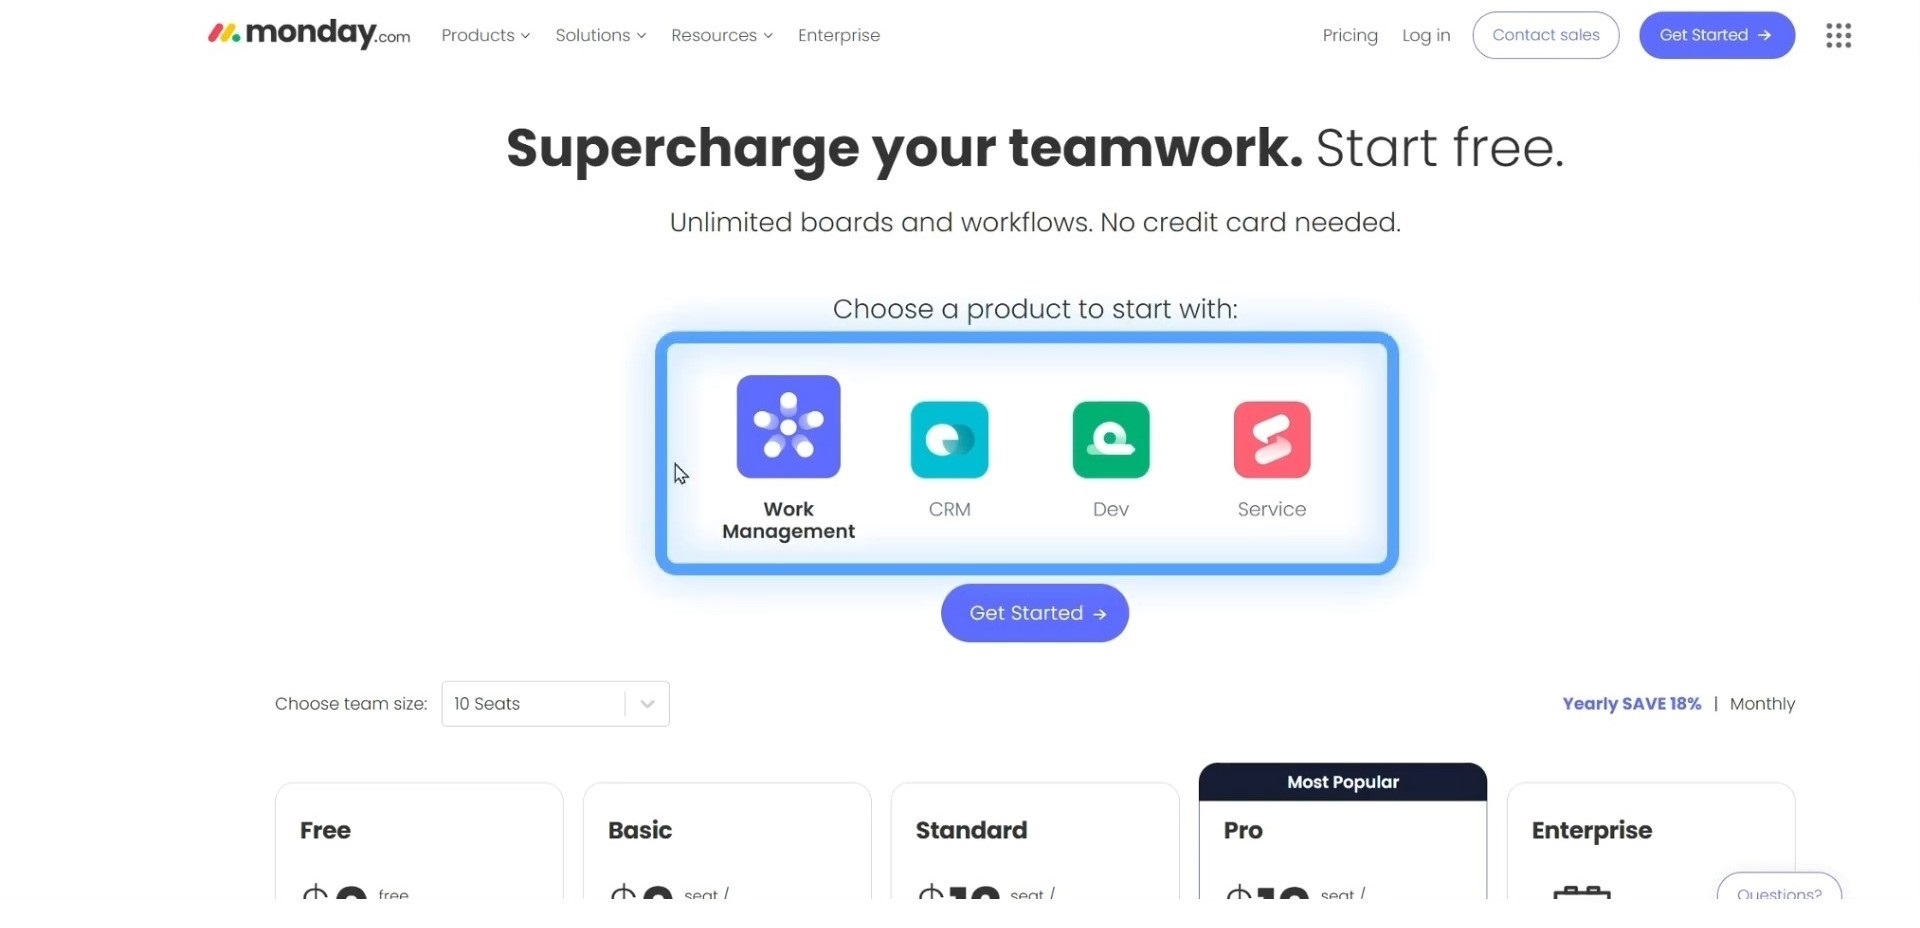
- Work Management: It’s all about managing tasks, projects, and everything related to your team’s work. If you’re organizing projects, tracking to-dos, or managing workloads, this is the product you’ll want.
- CRM (Customer Relationship Management): If you need to manage customers—whether it’s tracking new leads, deals, or current clients—this product is for you. A CRM helps you stay organized and improve your relationship with your customers.
- Monday Dev: This product is designed for development teams. If you’re building apps, websites, or products within a development framework, Monday Dev will help keep your projects on track.
- Monday Service: This is a newer product that helps you manage service ticketing. If your team handles customer support or service requests, this tool will help you track and manage tickets more efficiently.
The Plans
Once you’ve figured out which product suits your team’s needs, you’ll have to choose a plan and the number of seats (users). The plans start with a minimum of 3 seats, and you can add more in increments of 5.
Pro Tip: If you sign up for an annual plan, you can save up to 18%. It’s definitely worth considering if you plan to use the service for a long time.
There are several plans to choose from, but I recommend going with the Pro or Enterprise plans. These plans give you access to essential features like dashboards and automations. If you’re serious about using the platform to get valuable insights and automate your workflows, these plans are the way to go.
The lower-tier plans don’t offer the advanced features you might need for your business. But of course, the final choice depends on your specific needs and team size.
Setting up Your monday.com Account
Getting started with the platform is easy. Just follow these simple steps to sign up and begin using the platform:
- Each plan has a “Try for Free” option. Click on it to begin the sign-up process.
- Enter your email address and choose a password to create your account.
Next, you’ll be asked for a few more details, like your company name and how many people are on your team. This helps monday.com understand your needs and set things up just right for you.
Introduction to Workspaces and Boards
When you start using the platform, it’s important to understand how things are organized. The main building blocks are Workspaces and Boards.
Let’s break them down so you can start using them like a pro.
What is a Workspace?
Think of a workspace as a large folder that holds everything you need. It’s a place where you can organize all your projects, tasks, and team activities. If you’ve ever used Google Drive or a file system on your computer, it’s kind of like that, but much more organized and interactive.
Workspaces help you separate different types of projects, teams, or departments. For example, if you have a marketing team, a development team, and a sales team, you can create separate workspaces for each group. This keeps everything in the right place.
When you log into monday.com, you’ll see the Main workspace screen. From here, you can click around to find different workspaces you’ve created or that you have access to. You can also create new workspaces if needed.

What Are Boards?
Boards are where the real work happens. Think of them as the sheets of paper inside your large folder (workspace). A board is where you’ll track and manage tasks, projects, or any work your team is doing.
Boards are essential because they allow you to organize tasks, set deadlines, assign responsibilities, and see what’s going on at a glance. They give you a clear view of the progress your team is making.
The Different Types of Boards
There are three main types of boards. Each one serves a different purpose depending on who needs to see or interact with the information.
- Main Board: The board is visible to everyone in your workspace. It’s perfect for tracking work that all team members need to see. For example, a project board where everyone on the team is involved and needs to keep track of tasks, deadlines, and progress.
- Shareable Board: It can be shared with people outside of your workspace. This is great for collaborating with clients, partners, or anyone who isn’t part of your core team.
- Private Board: A private board is restricted to specific team members. Only the people you invite will be able to see and work on this board.
Setting up Your First Task Board
When you’re creating the account, you’ll get the option to create your first task board. Besides that option, you can create new boards from your workspace.
- Choose a name for your board (e.g., “Marketing Tasks” or “Project XYZ”).
- You can start adding tasks now. Each task will be listed as an item on the board.
- You’ll see columns appear on the board. These columns can include things like:
- Task Name
- Due Date
- Status (e.g., In Progress, Completed, or To-Do)
- Assigned To (who’s responsible for each task)
You can customize the board further by adding more columns, changing the colors, or adjusting the layout to fit your team’s needs.
How to Customize a Board
Once you’ve created your board, it’s time to make it work for your team. Customizing your board is easy and gives you full control over how your tasks are organized.
Adding Columns and Groups to Your Board
Boards in monday.com are made up of columns and groups. Columns let you track different types of data for each task, and groups help you organize those tasks into sections.
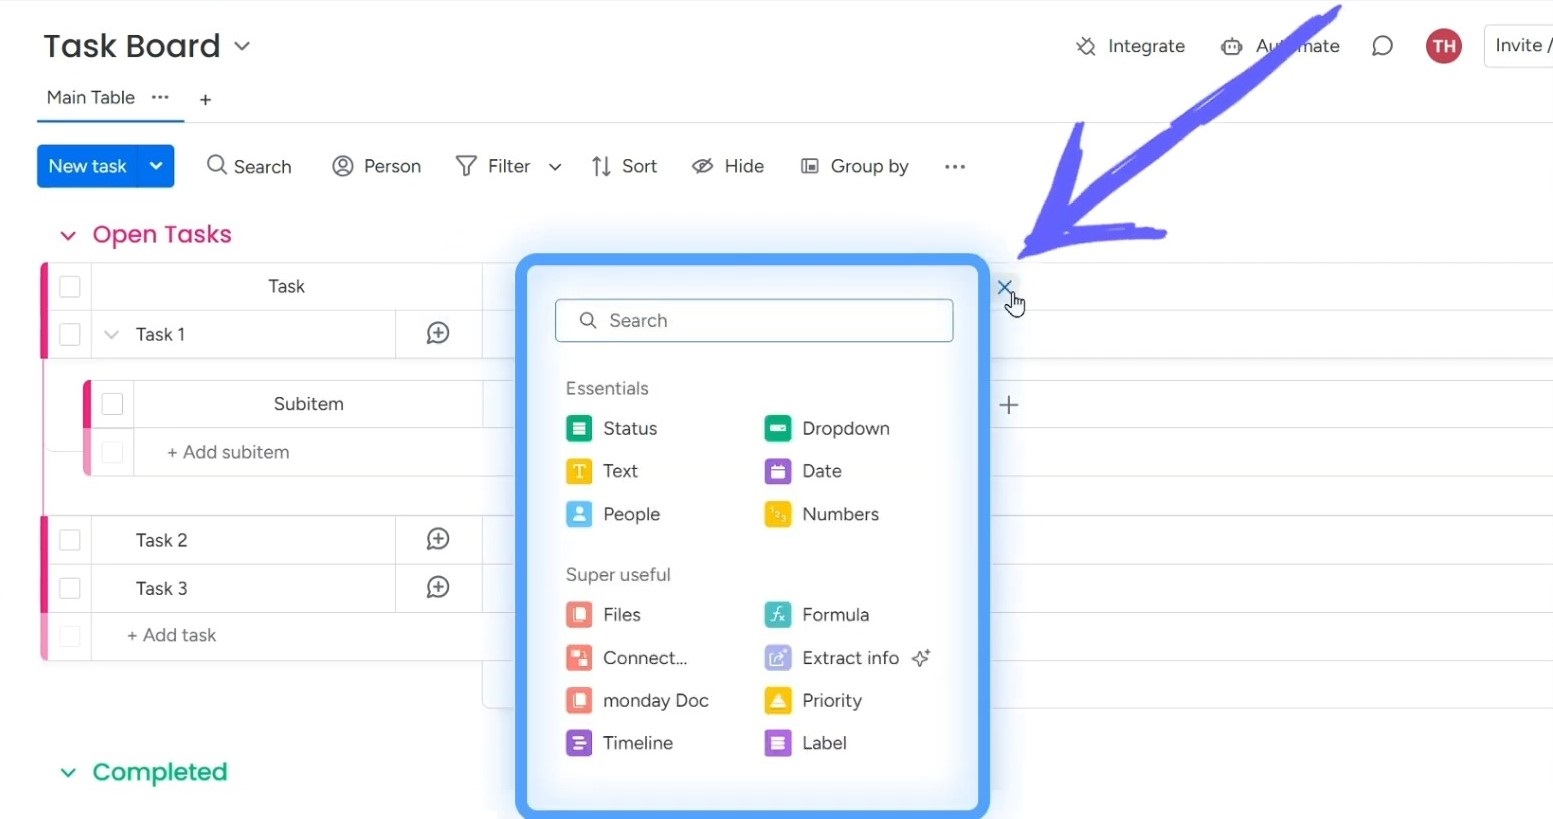
To add columns:
- Click the “+” button beside the existing columns in a group.
- Choose the type of column you want, like Status, Text, Date, or Number. For example, a Status column lets you mark tasks as “To Do,” “In Progress,” or “Completed.”
- You can also go to the Column Center to choose from a variety of options.
You can change the name of the task board’s groups based on the section it will hold, such as “Design Tasks” or “Marketing Campaigns.”
You can also create sub-items under each task. Sub-items are smaller tasks or steps that need to be completed for the main task. This gives you a detailed breakdown of what’s going on.
Colors, Filters, and Views for Easy Customization
You can visualize your board with colors, filters, and different views.
- Colors: You can change the color of columns or groups to make your board easier to read and more fun to use.
- Filters: If you have a lot of tasks, use filters to narrow down the view. For example, you can filter tasks by due date, status, or assigned person.
- Views: Switch between different views, like a Kanban view for visualizing tasks or a Table view for a detailed list. You can even add a Chart view to see data in a more visual format.
All these features let you customize your board to fit your team’s workflow.

More Board Features
When using these boards, you have a wide range of customization options at your fingertips.
You can easily access an activity log to track progress, engage in board discussions, and adjust notification settings to stay up-to-date. If needed, you can modify permission settings, giving different users various levels of access.
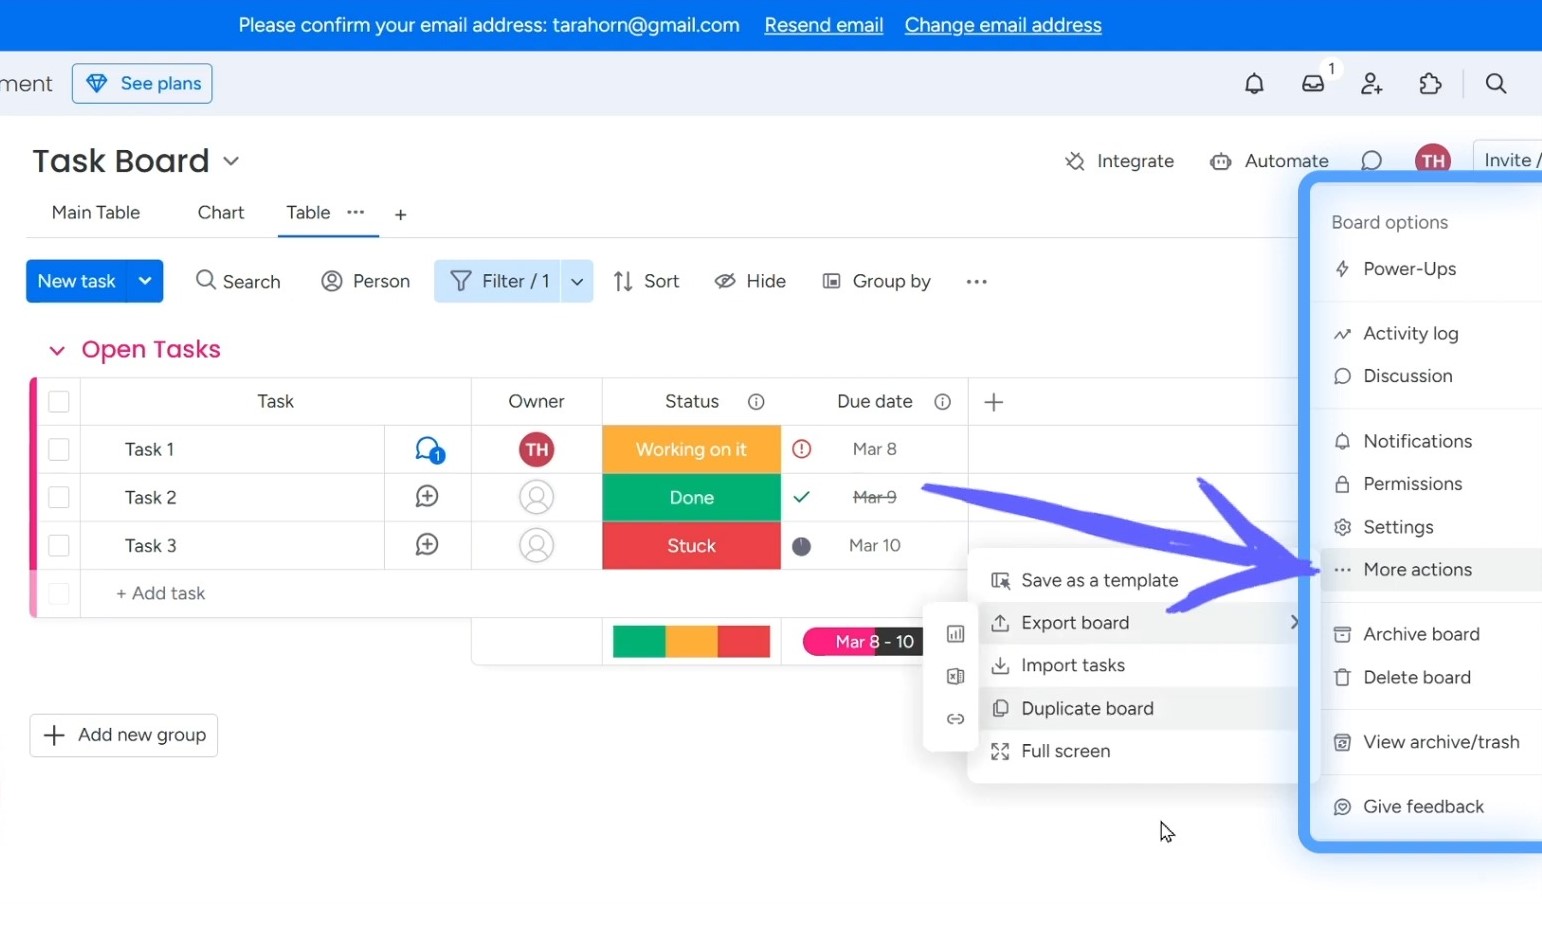
Also, there are plenty of settings to fine-tune how your board works. You can even export your board or save it as a template for future use, making it super flexible and adaptable to your needs.
You can check this tutorial for more insights if you’re a beginner to monday.com.
Adding Automations and Integrations
Once your board is set up, it’s time to supercharge your productivity with automations and integrations.
Automations: What Are They?
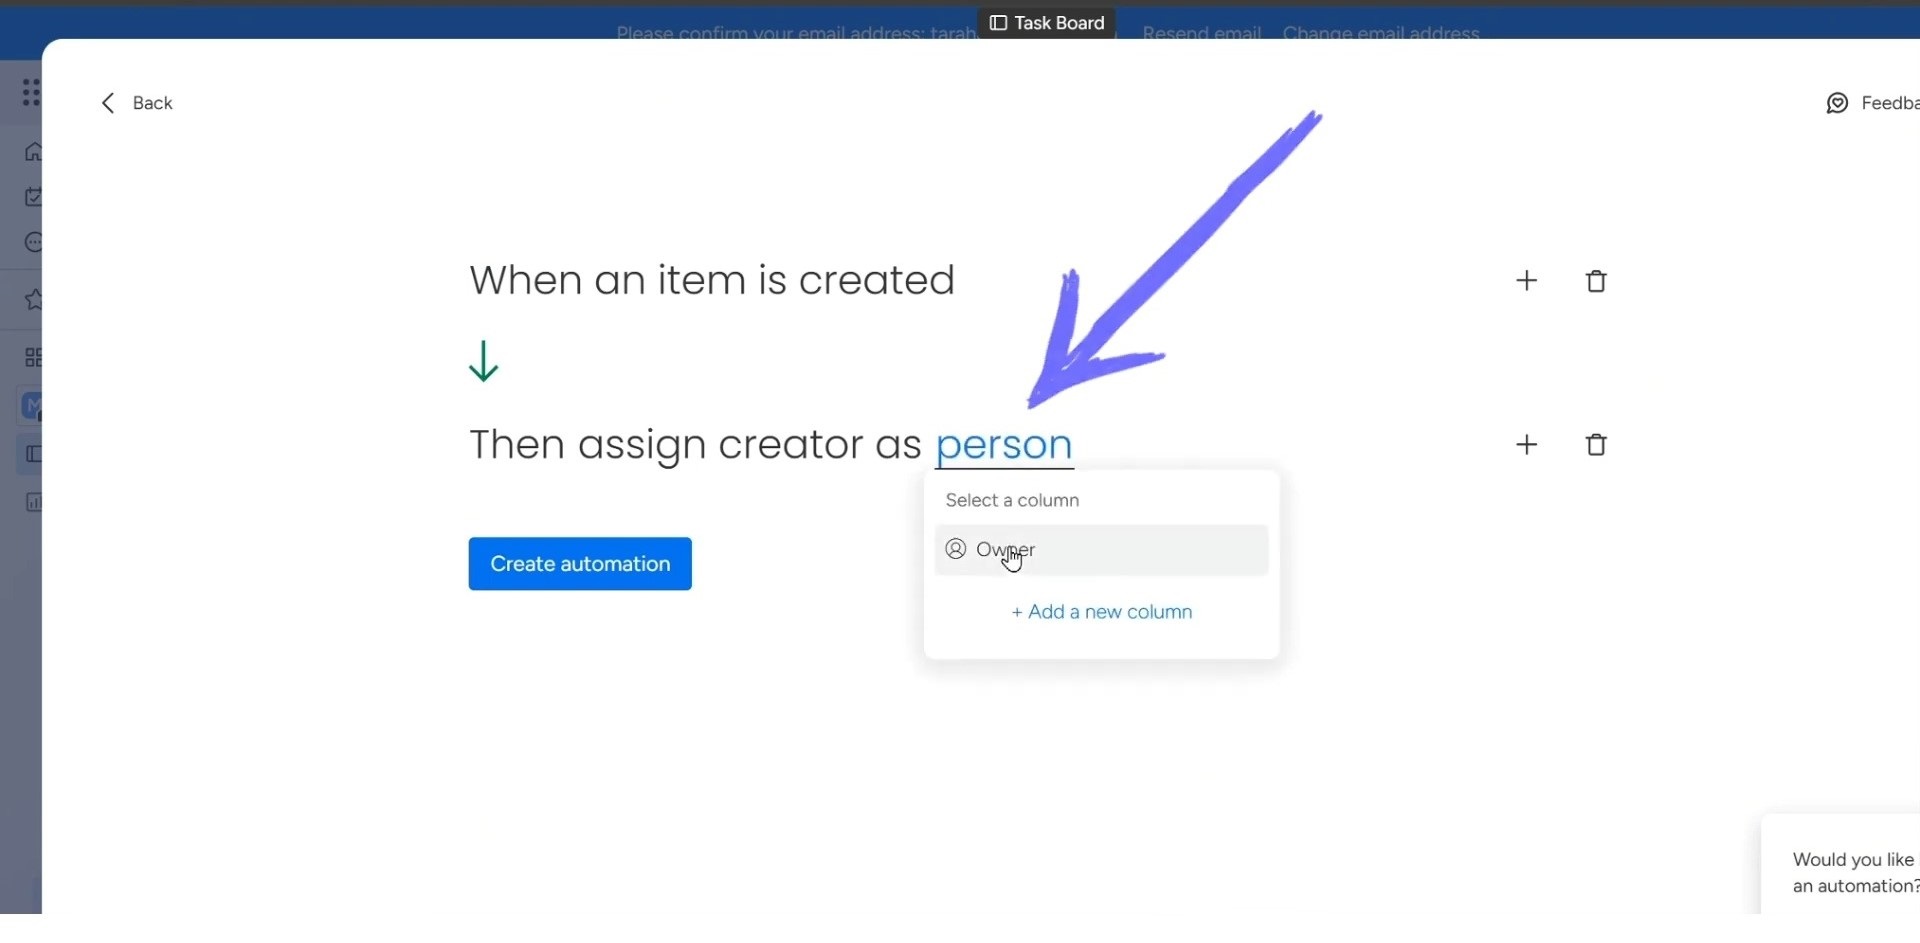
Automations are rules that you can set up to automate repetitive tasks. They save you time by doing things automatically, so you don’t have to. You can set one by going to the Automation Center.
For example, you can set up an automation to automatically assign a task when a new item is created on your board. This means you don’t have to manually assign every task.
Other automation examples include:
- Sending notifications when a task is nearing its due date.
- Moving tasks to a different group when their status changes.
These automations make managing projects a lot less stressful and help your team stay on track.
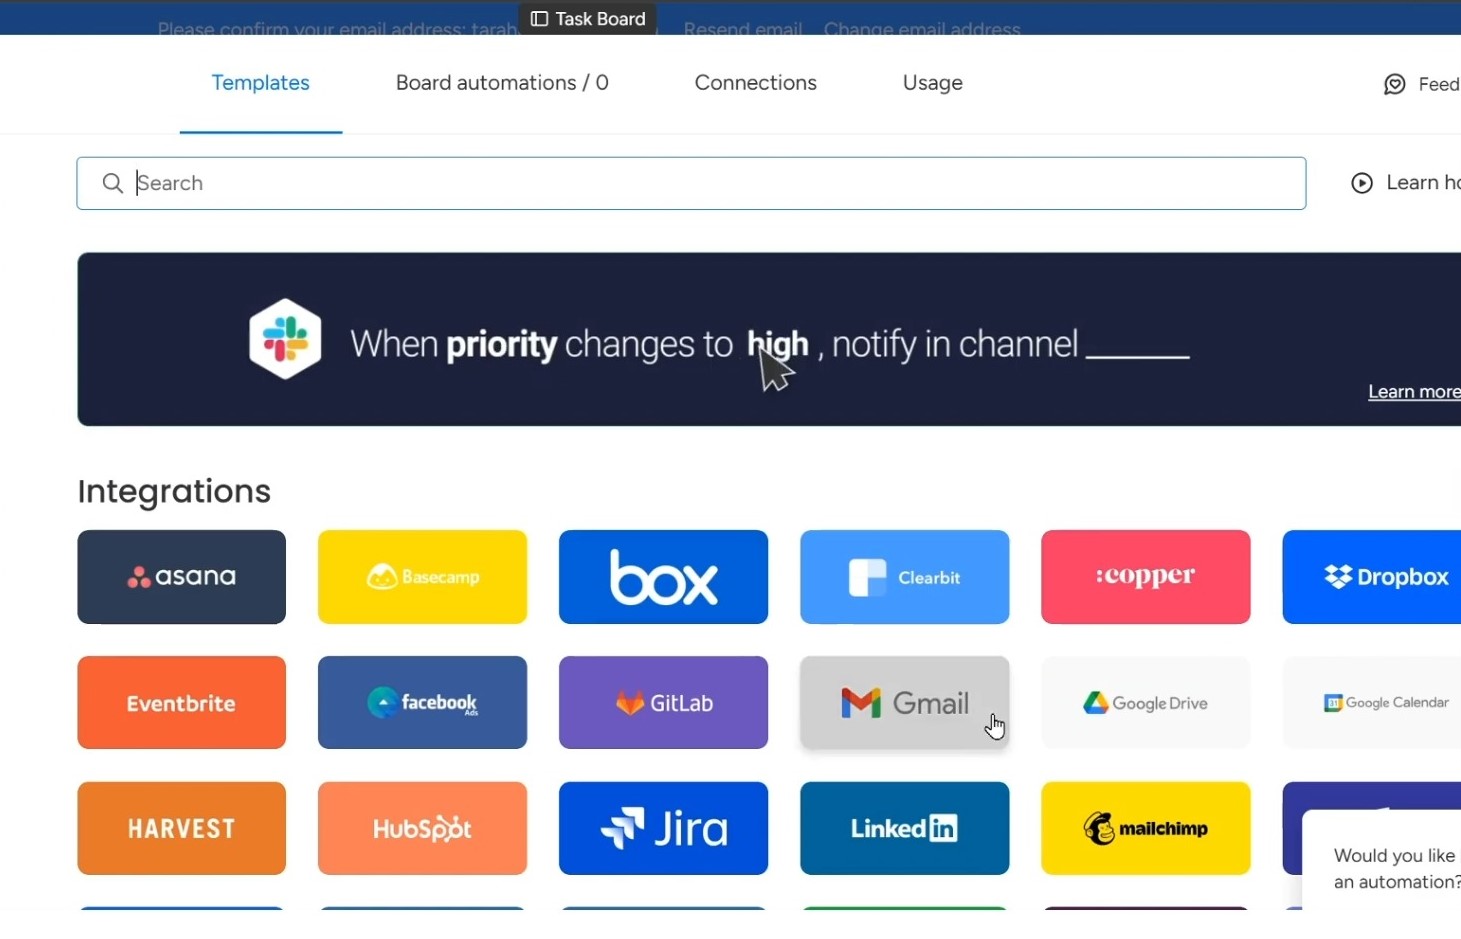
Integrations: Connect Your Favorite Tools
With the monday platform, you can integrate other tools you use every day, like Gmail, Google Drive, Dropbox, and MailChimp.
Integrations let you connect your workflow across different platforms. For instance, you can link monday.com to your Gmail account to send emails directly from a task. You can also link Google Drive to easily attach documents or collaborate on files without leaving the platform.
By using integrations, you streamline your work and keep everything in one place, making your team even more productive.
Simpleday can help you master monday.com. We’ll guide you through setting up, customizing boards, automating tasks, and integrating essential tools, all so you can work smarter, not harder. Contact us and transform the way your team works!