

If you’re new to monday.com, you’re in the right place. In 2025, this all-in-one work platform has become more popular than ever, for good reason. It’s easy to use and helps teams stay organized without getting overwhelmed.
This guide is for beginners who want to get started fast. You’ll learn how to set up your workspace, build your first board, and organize your tasks using groups, items, and columns.
And if you want to watch a tutorial, check this video:

Getting Started with monday.com
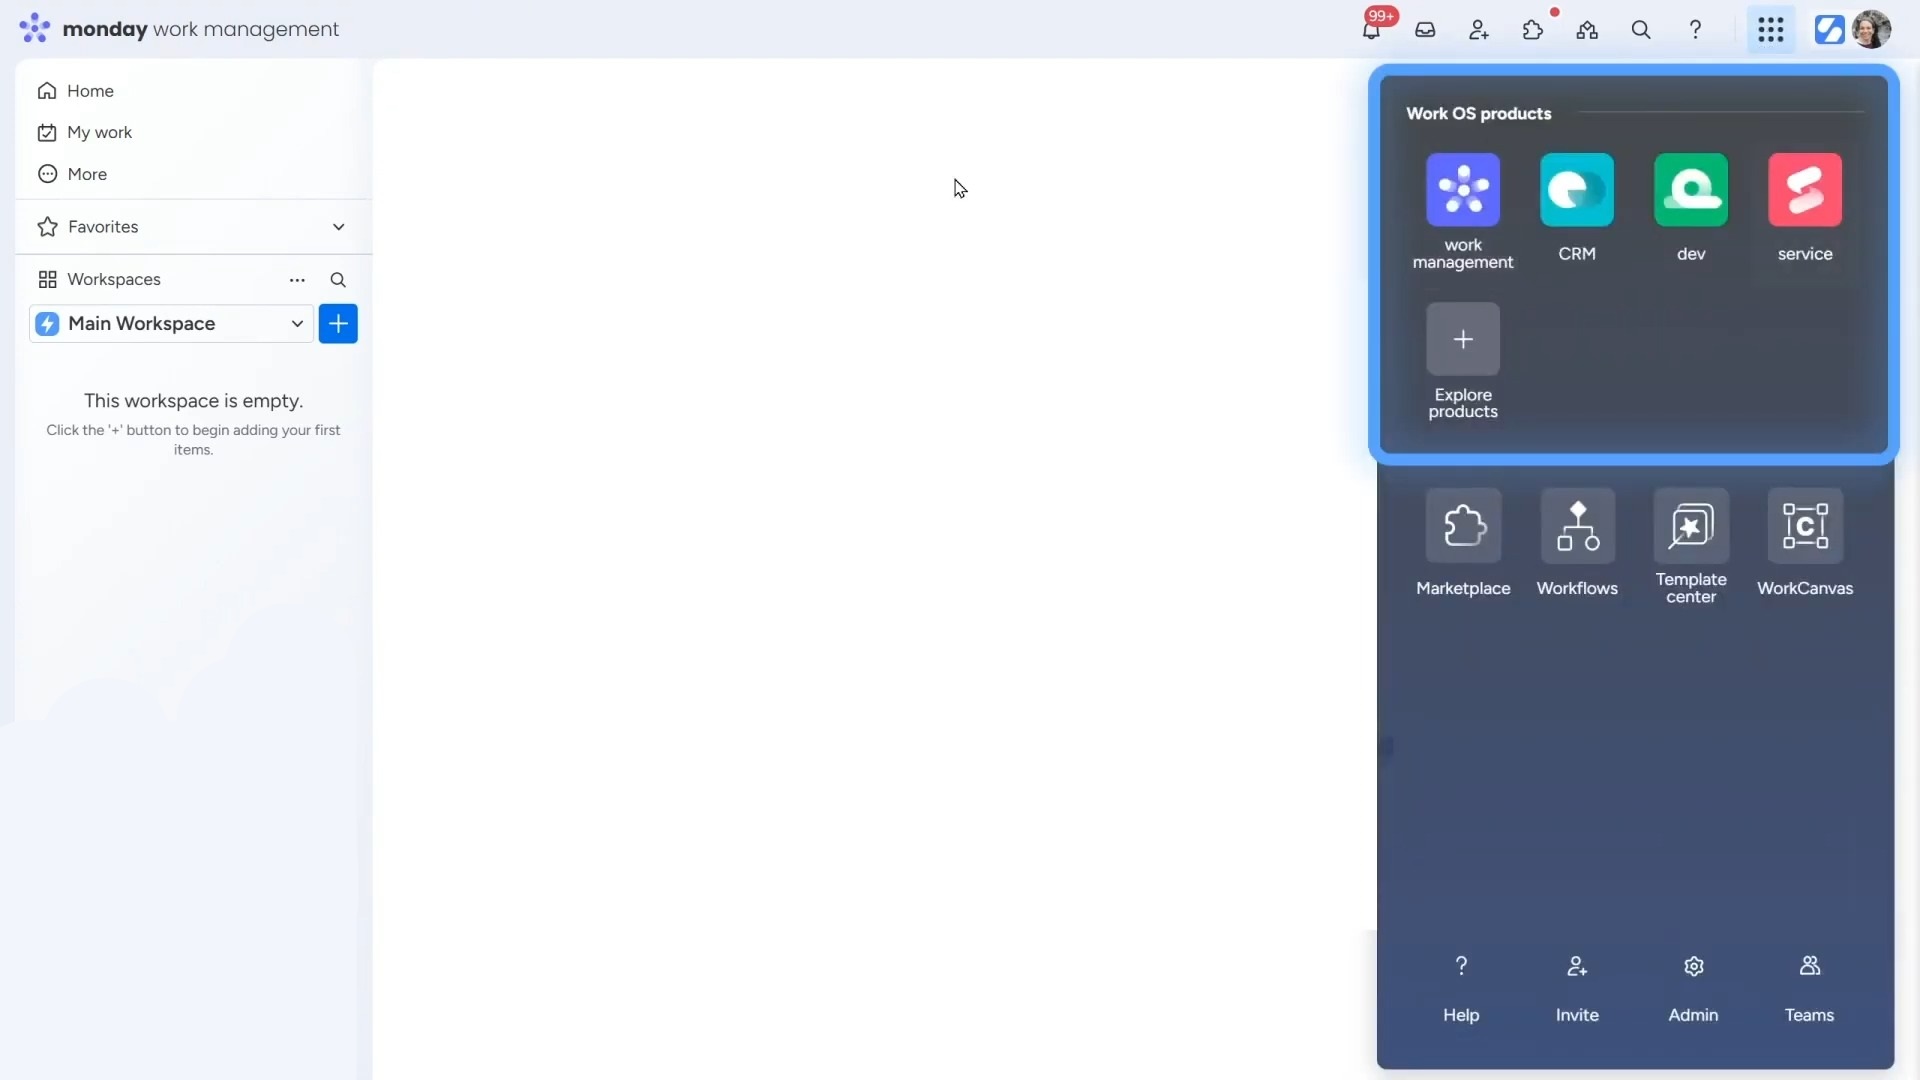
There are various products on monday.com that you can use for various purposes. You’ll find these products by clicking the little 9-dot icon in the top-right corner. This opens a menu where you can switch between products, such as Work Management, CRM, Dev, and more. Each one is built for a different kind of workflow, but they all work in a similar way.
And there are workspaces, which are like folders that hold everything you’re working on. You might have a workspace for a team, a client, or a big project. Inside each workspace, you’ll keep your boards, dashboards, and more.
Creating Your First Board
Boards are the main place where you create, view, and manage your work. To get started, click the big “+” button on the left side of your screen and choose “Board”. You’ll get three options:
- Main board – everyone in your account can see this.
- Private board – only you and the people you invite can see it.
- Shareable board – perfect if you’re working with people outside your company.
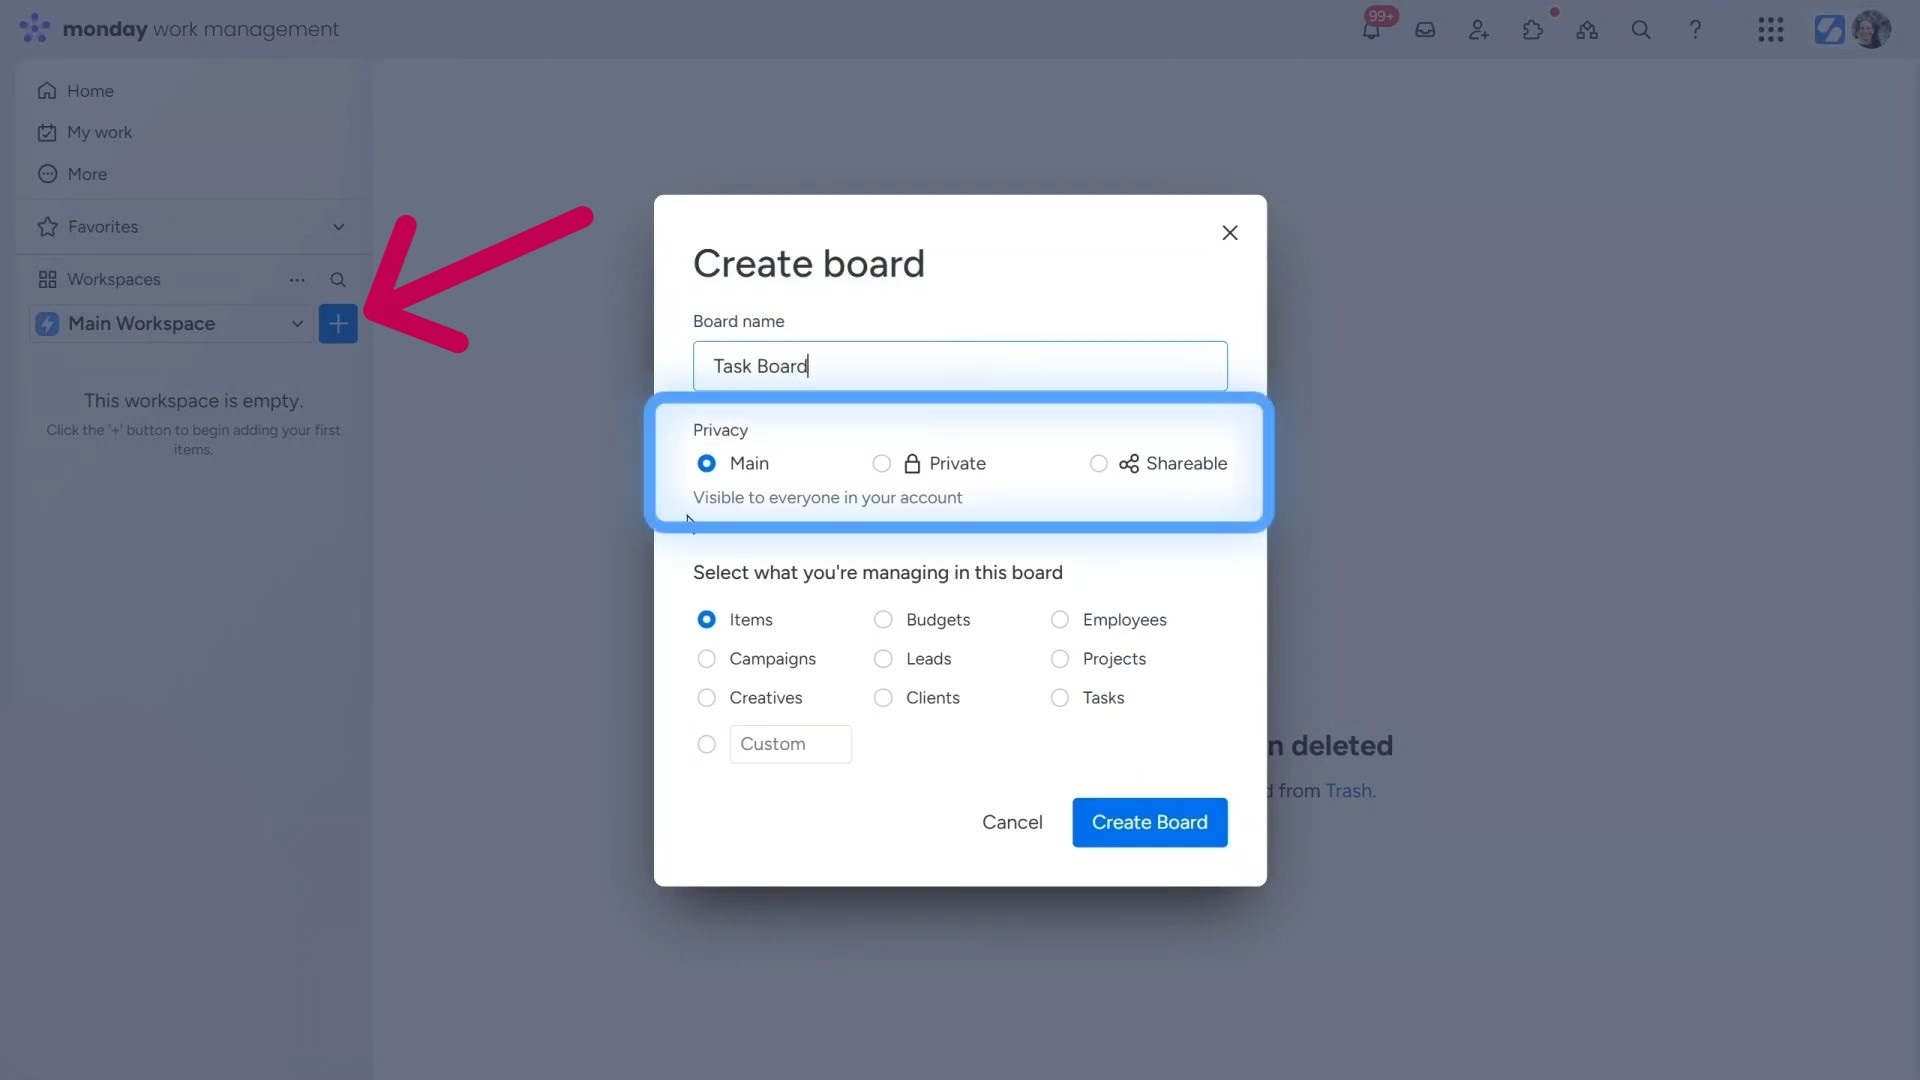
Pick one and name your board. There will also be the option to select the first column of your board. Choose one and hit the “Create Board” button to create the board.
Once your board is created, you’ll see it listed on the left-side panel. If you keep adding more boards, this list will become your table of contents over time.
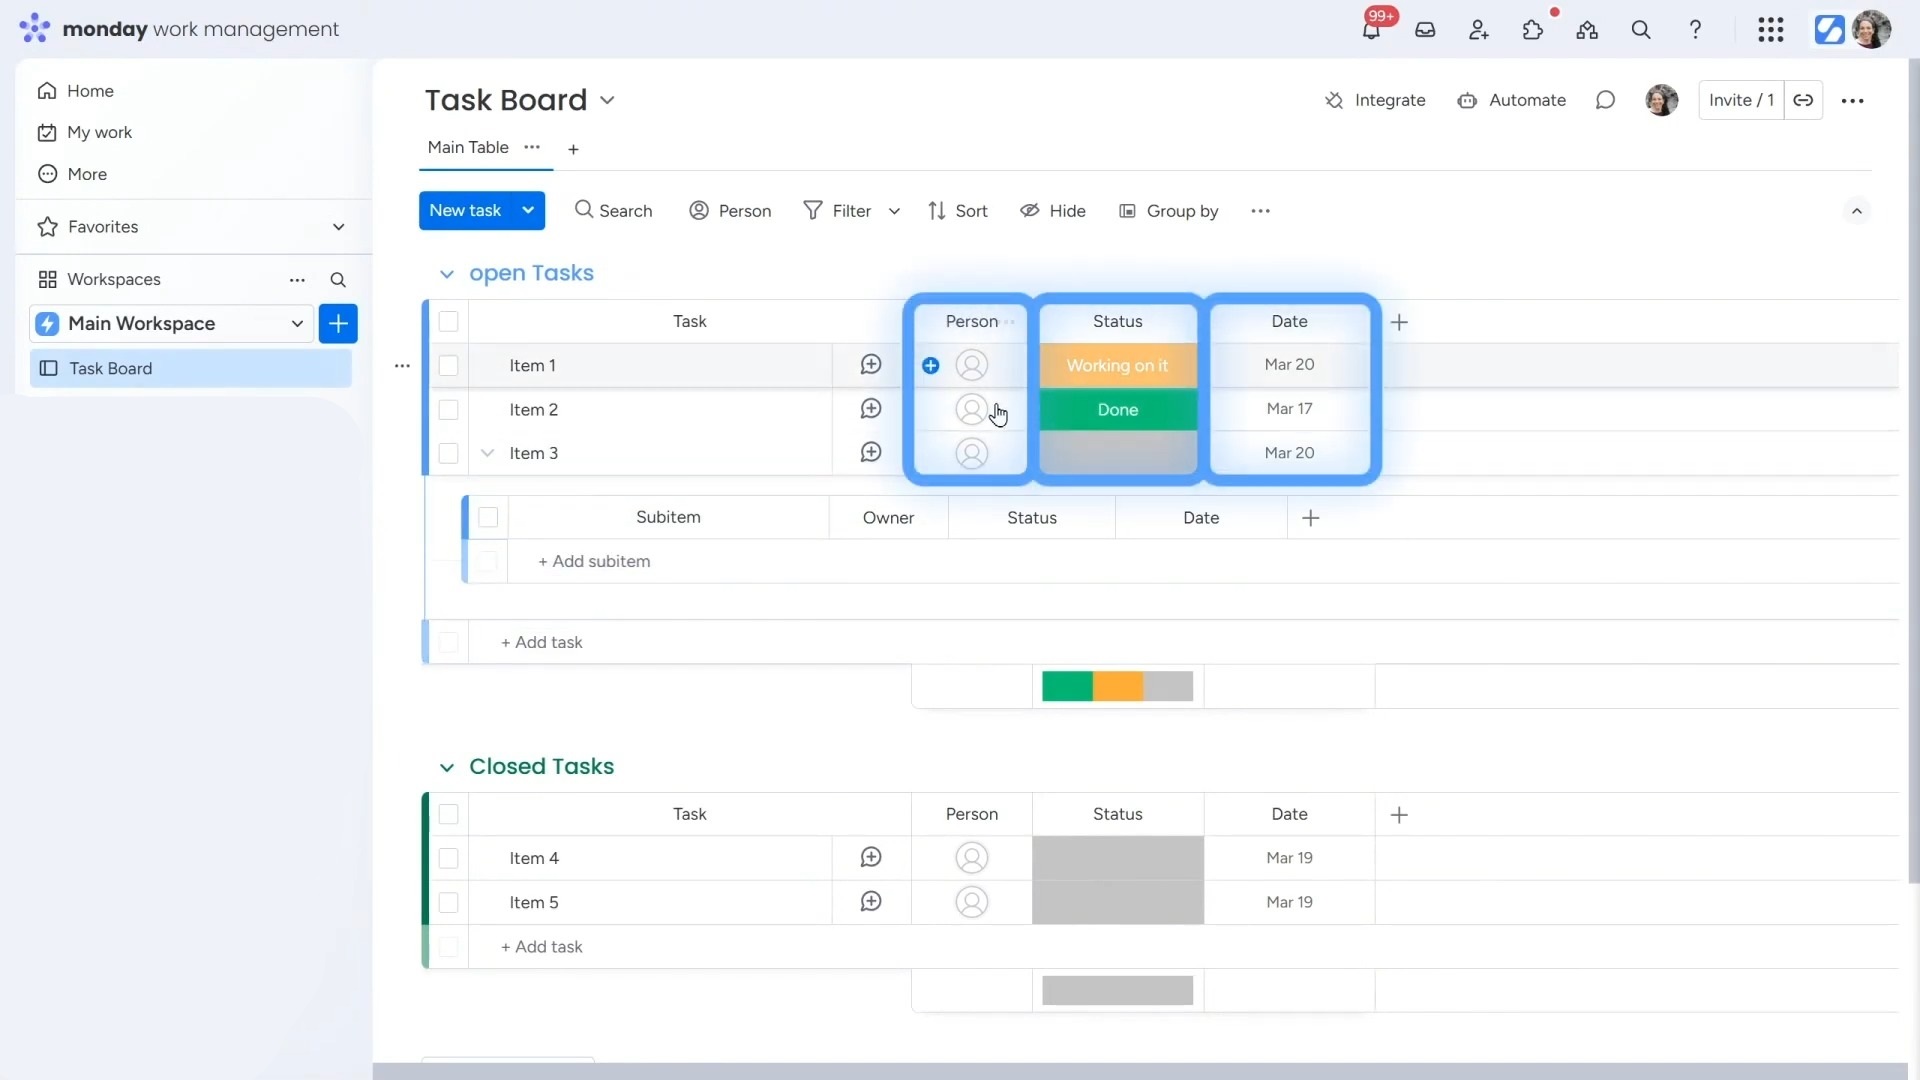
Inside your board, you’ll see various elements, such as groups, items, sub-items, etc. Let’s have a look into these features:
a. Groups
These are rows that help you organize tasks. For example, you might have one group called “Open Tasks” and another called “Completed Tasks.” You can rename groups and even color-code them to make things clearer.
b. Items and Sub-Items
There are items that are the individual tasks or entries inside a group. You might have one item for “Write blog post” and another for “Review design.”
You can also add sub-items, which are smaller tasks connected to a main one. For example, under “Write blog post,” you could add sub-items like “Outline,” “Draft,” and “Edit.”
The great thing is everything is customizable. You can change the names, move things around, and make the board fit your style.
c. Columns
Every item on your board has columns next to it. These columns help you track different pieces of information. For example:
- Person columns let you assign someone to the task.
- Status columns show if it’s “In Progress,” “Done,” or “In Revision.”
- Date columns help track due dates.
Click the “+” sign at the top of your board to add more columns. Then, choose “More columns” to open the Column Center. This is where you’ll find lots of options, such as star ratings, numbers, dropdowns, time tracking, and even a location column.
Smart use of columns can help you set up automations later. For instance, you can use an automation for sending a reminder when a date arrives or move a task to another group when it’s marked “Done.”
If you want to get an in-depth beginner’s guide to monday.com features, check out this tutorial.
Other Board Features
There are some more features in your board that help with communicating with your team and keeping everything organized.
a. Communicating with Your Team
One of the best features in monday.com is the conversation bubble, also called the Update section. Every item (or task) has one. Just click the little speech bubble icon next to the item to open it.
This is where you and your team can talk about the task. You can leave comments, share updates, or ask questions. It keeps all the info in one spot so nothing gets lost in emails or chats.
Want to make sure someone sees your message? Just mention them by typing @ followed by their name. For example:
“@Rosa, can you check this by Tuesday?”
Each update is saved with a timestamp, so you’ll always know who said what and when. It’s a great way to track progress and keep everyone in the loop.

b. Filtering, Sorting & Viewing Your Data
Once your board fills up with tasks, things can get crowded. That’s where filters and views can help you sort everything into order.
Click the filter icon at the top of your board to narrow things down. You can filter by status, person, date, or any column. For example, you can see only the tasks that are “In Progress” or only those assigned to you.
Need to organize your board quickly? Use the sort feature. You can sort by name, due date, or status, whatever helps you find what you need faster.
There’s also a cool feature called “Group by.” It lets you rearrange your board based on a column. So, instead of seeing tasks by group, you could group them by who’s working on them.
Even better, monday.com lets you switch views. At the top of the board, click “+ Add View.” You can choose:
- Calendar View – great for seeing tasks by date.
- Kanban View – shows tasks like cards you can drag and drop.
- Gantt View – useful for timelines and project planning.
- Chart View – helps turn your data into visuals.
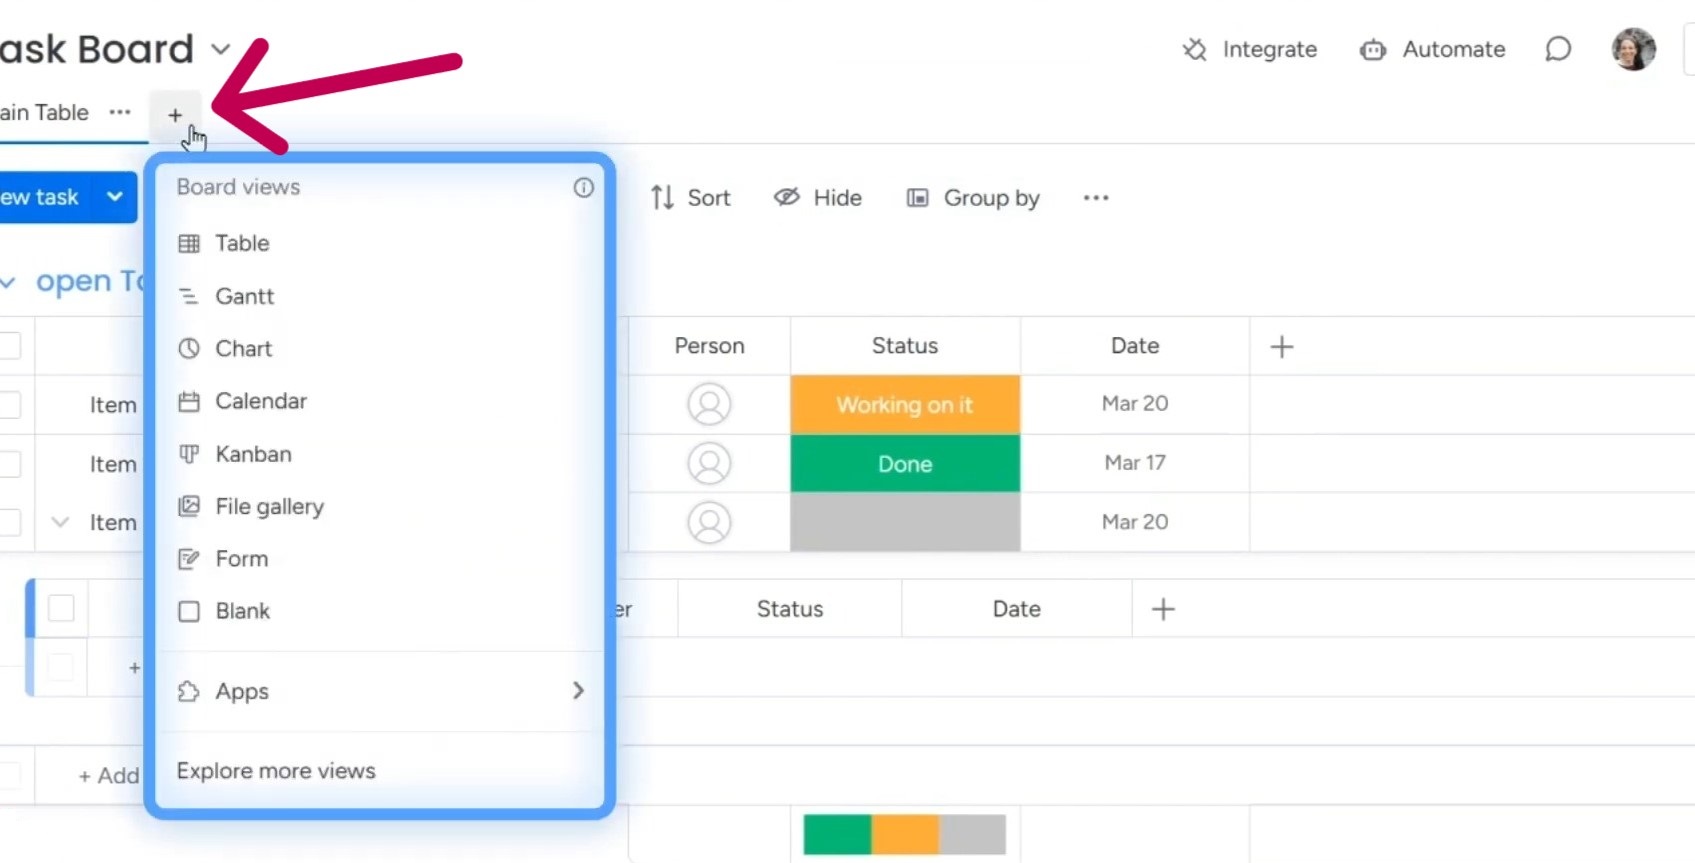
These views help you understand your work in different ways without changing your actual board.
c. Automations: Save Time with Smart Workflows
Automations are a real time-saver. You can set automated tasks like “If a task is marked Done, move it to the Completed group,” or, “When a new task is created, notify the team lead.”
To get started, click the Automations button at the top of your board. This opens the Automation Center. You’ll find lots of built-in recipes ready to go. You can also create your own by choosing a trigger (like status changes) and an action (like sending a message).
Using automations helps your team stay on track and spend less time doing repetitive stuff. Once you set them up, they run in the background, no reminders needed.
d. Connecting to the Dashboards
Dashboards help you see everything from a high-level view. While boards show individual tasks, dashboards pull data from one or more boards and turn it into helpful visuals.
To create a dashboard, click “+” from the left panel, then choose Dashboard. Give it a name and pick which boards you want to connect. You can link just one board or several, as you need.
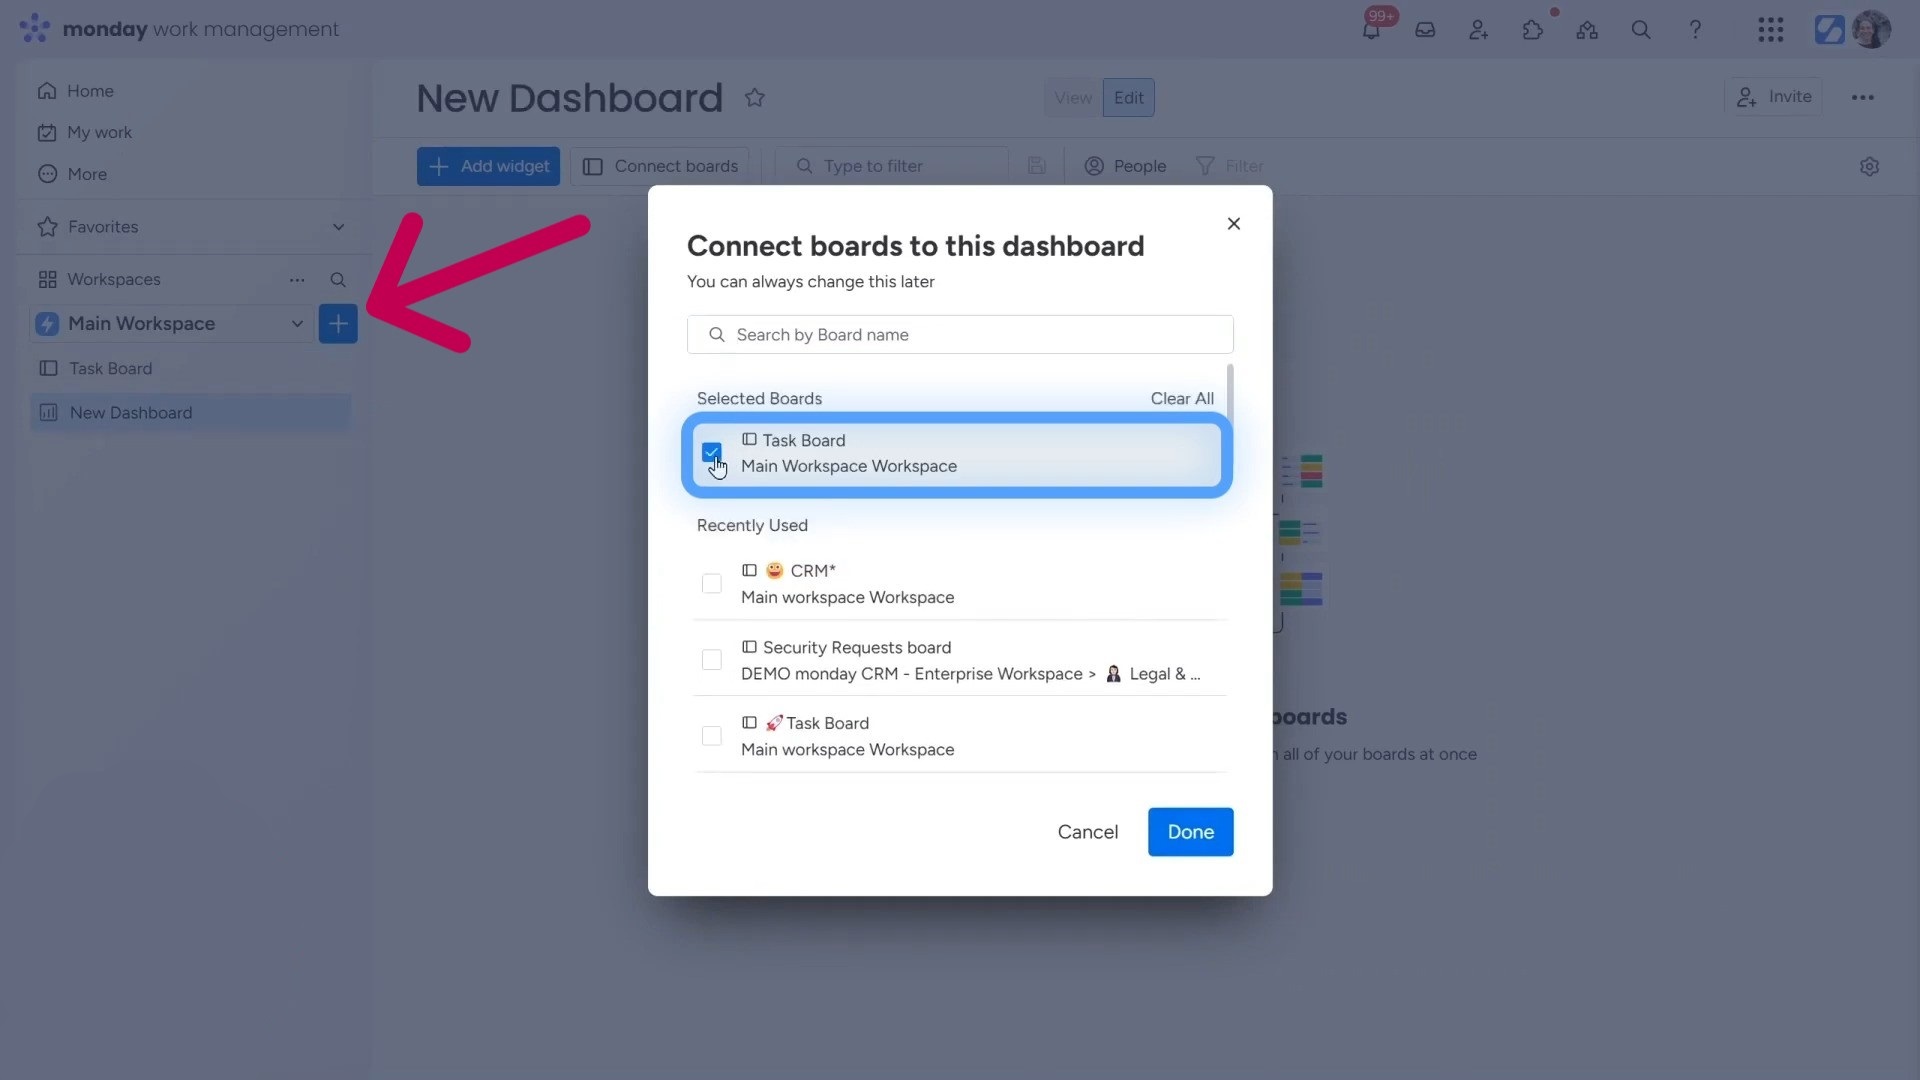
Once your dashboard is set up, start adding widgets. Widgets show your data in charts, numbers, calendars, or progress bars. For example, you might add a Battery widget to track how much of a project is done, or a Chart widget to see task status at a glance.
Dashboards are great for managers or teams that want to stay updated without clicking into every task.
e. Profile Settings, Admin Tools & Marketplace
In the top-right corner of your screen, you’ll see your profile picture. Click it to open your Profile Settings. Here, you can change your name, update your contact info, or adjust your notification settings.
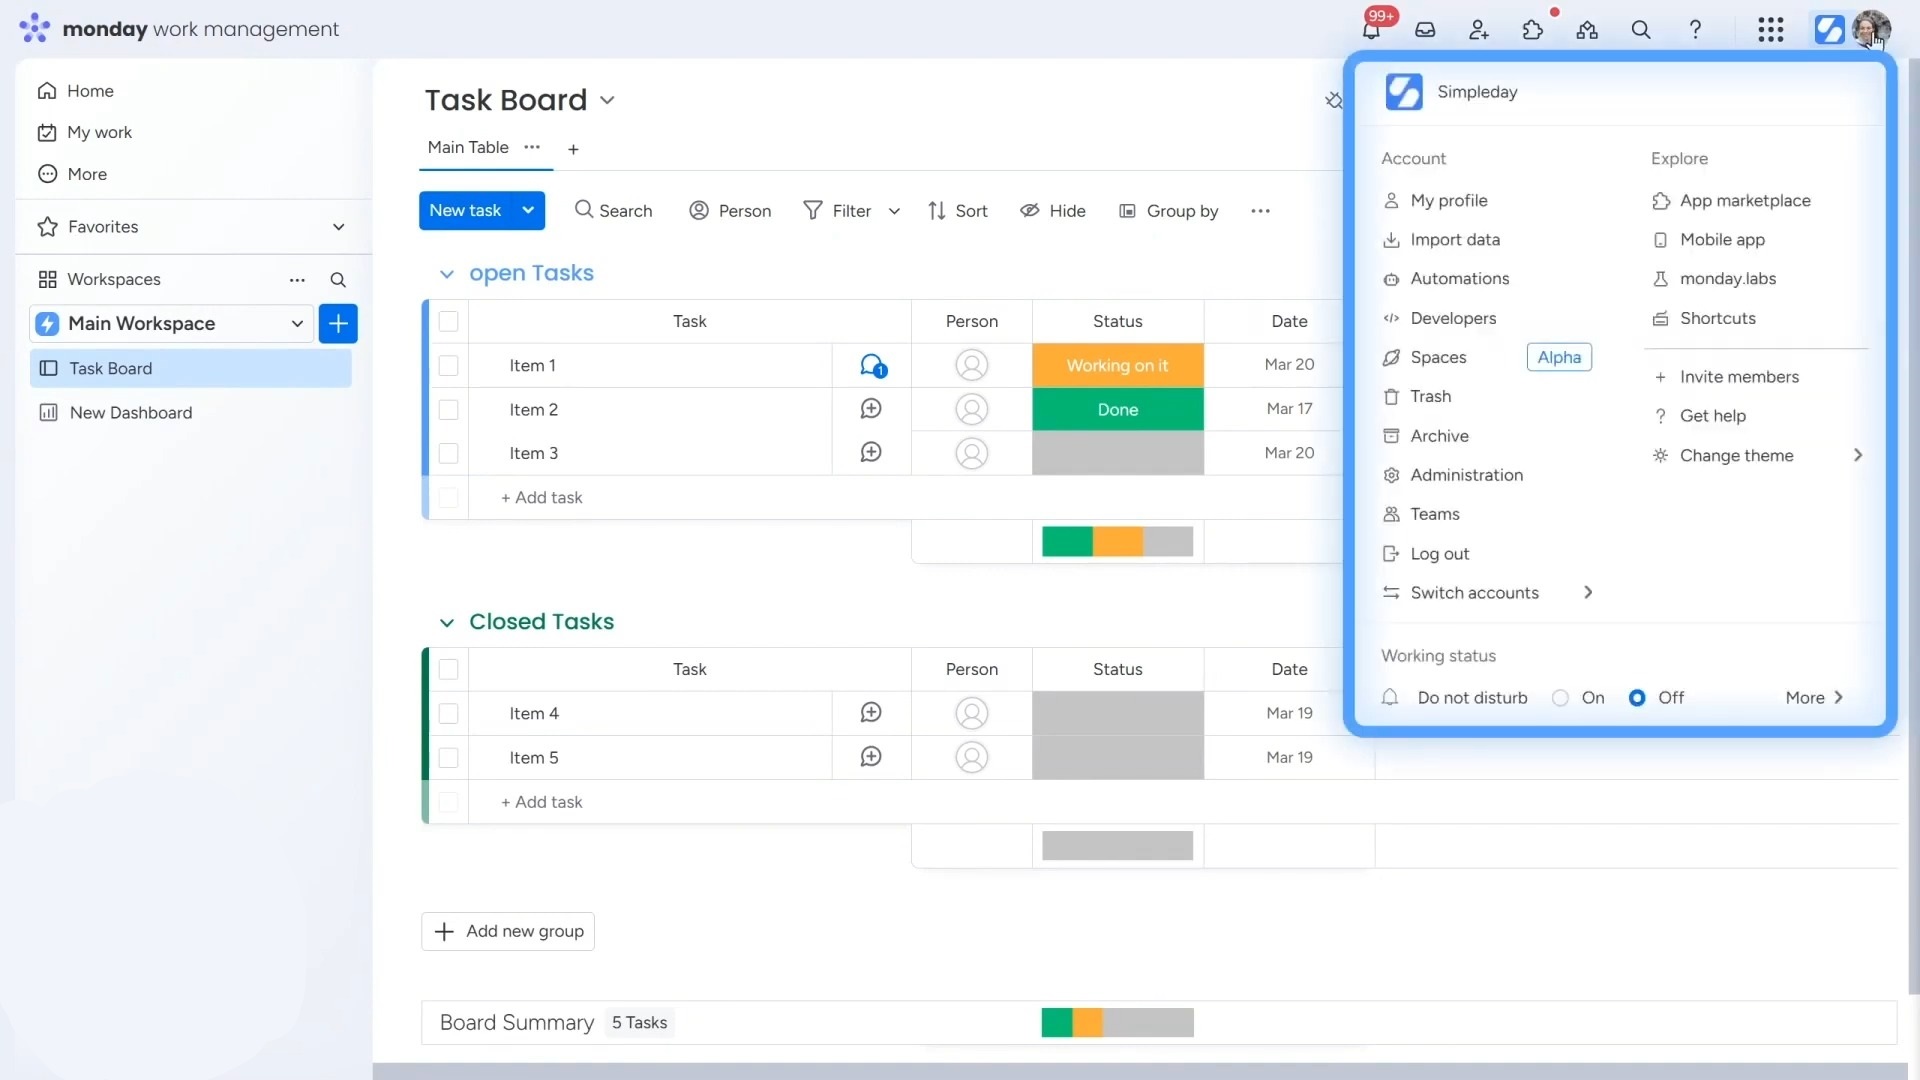
If you’re an admin, you’ll also see options for Admin Tools. These let you manage users, set up teams, adjust permissions, and more. You can also check the Activity Log to see what’s changed across the account.
To take things even further, visit the monday Marketplace. It’s full of apps and add-ons you can use to boost your workflow. Whether you need time tracking, document signing, or extra automation tools, you’ll probably find something useful there.
Ready to get the most out of monday.com without the guesswork? At Simpleday, we help teams set up, simplify, and scale their workflows using the platform, so you don’t waste time figuring it out alone. Book a free consultation with Simpleday today and let’s build a monday workspace that actually works for you.