Welcome to our guide on monday.com! If you’re ready to take your project management skills to the next level, you should read this blog post. We’ll walk you through building a clear structure with high-level and low-level boards.
You might wonder, what’s the difference? High-level boards give you the big picture. They show overall progress and goals. Low-level boards dive into details, helping you manage tasks and track specific activities. Understanding both is important to staying organized and efficient.
If you want to watch the whole process, check out this video below:
A Step-By-Step Guide to High-Level and Low-Level Boards
We’ll break everything down into 9 easy steps. Follow the guideline:
Step 1: Choose Your Naming Convention
The first step is deciding how you will name your boards. It’s important to make it clear which boards are high-level and which are low-level. For high-level boards, I normally use names like “Overview” or “Overall.” These names clearly describe the purpose of the board, making it easy for everyone to understand.
Step 2: Create Your High-Level Board
Once you choose names for your boards, it’s time to create your high-level board. Go ahead and name it “Overview.” This board will serve as the hub for your project’s low-level boards.
Step 3: Set Up Your Low-Level Board
Create a low-level board at this stage. You might want to name it something specific, like “Project Number One.”
- Pro Tip: If you plan to create multiple low-level boards, start with just one. Once you finish setting it up, duplicate it for the others. Don’t duplicate it before completing it 100%. Otherwise, if you decide to change something, like adding a column to a board, you have to do that manually for all the boards.
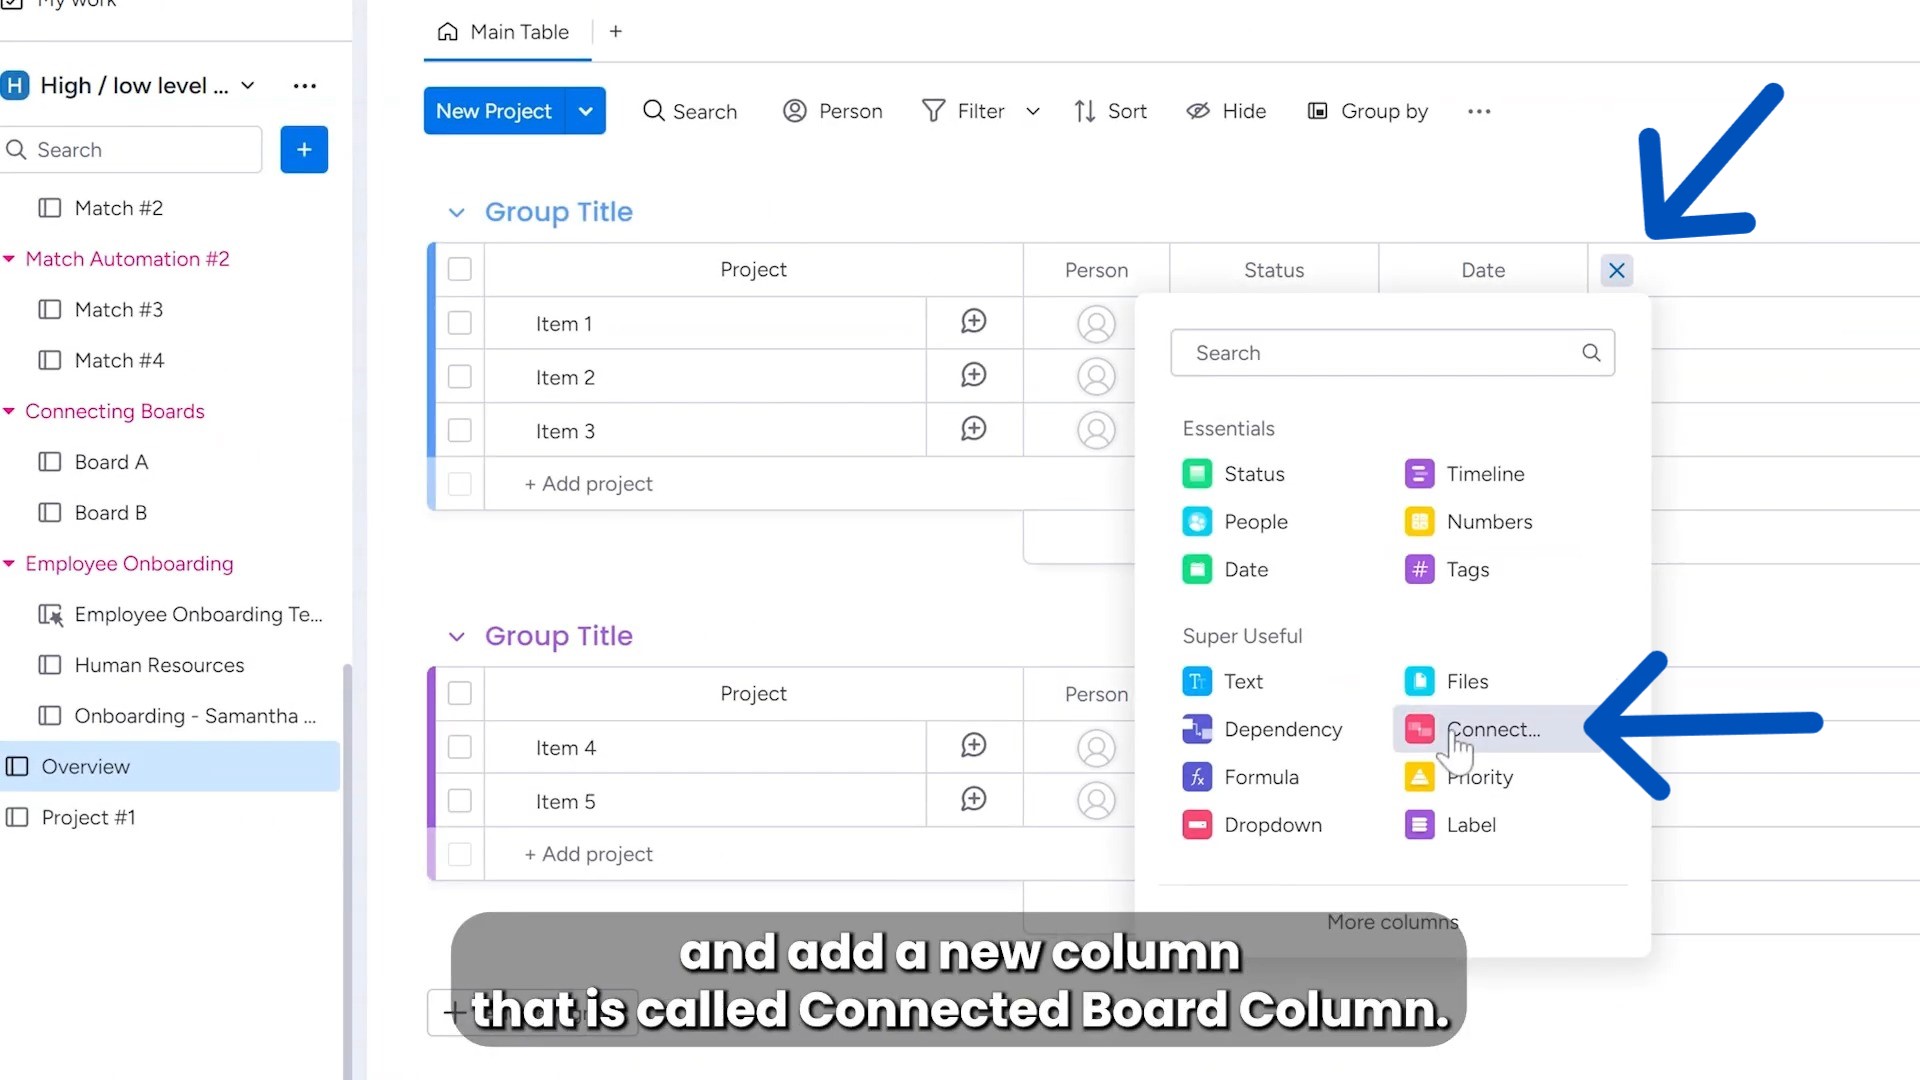
Step 4: Add a Connected Board Column
Now, go back to your high-level board. Add a new column called “Connected Board Column.”
Step 5: Enable Two-Way Sync
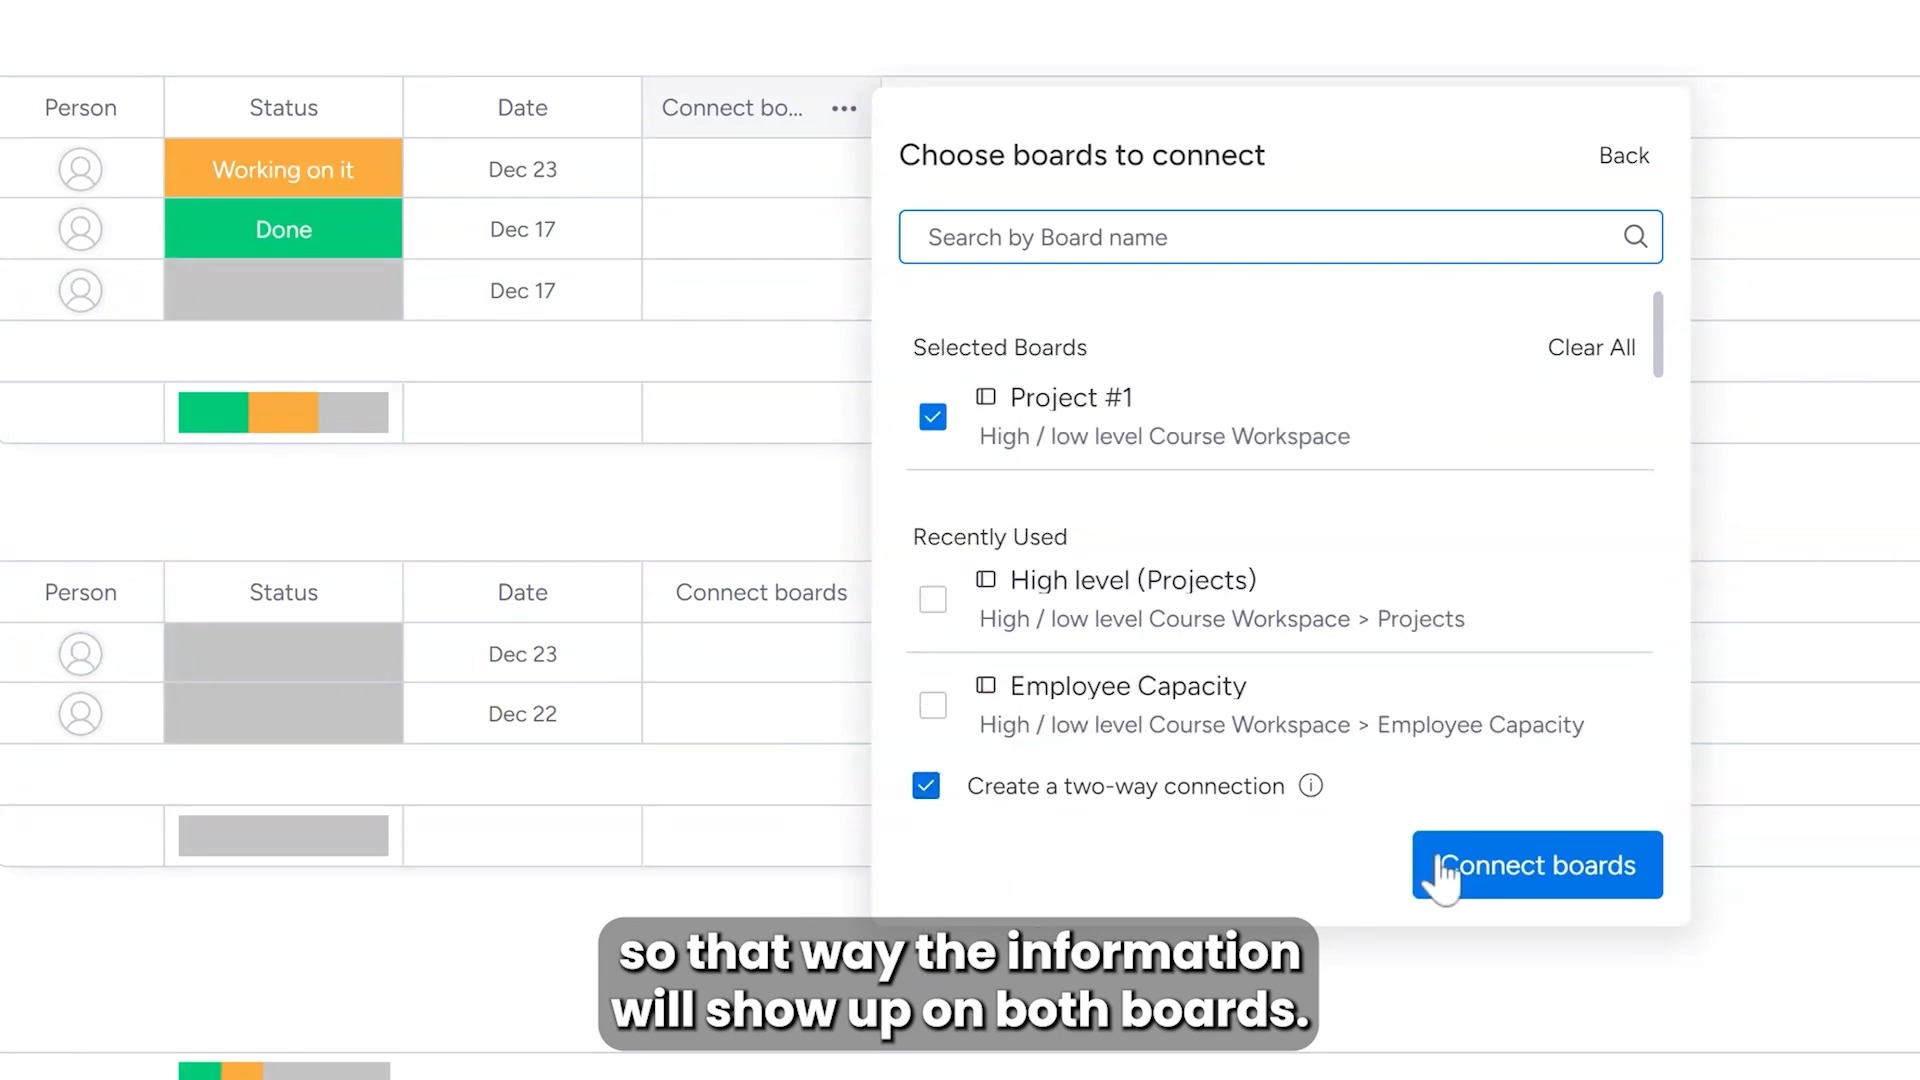
Make sure to click on the two-way sync option. This feature allows information to flow between both boards. It’s helpful to see updates on either side without the hassle of manual checks.
Step 6: Add a Mirror Column (Optional)
If it makes sense for your project, you can also add a mirror column. This column reflects information from your low-level board. You can always add it later if you prefer.
Step 7: Check Your Low-Level Board
When you look at your low-level board, you’ll see a new column that connects it to your high-level board. This visual link helps you keep everything aligned.
Step 8: Connect Your Items
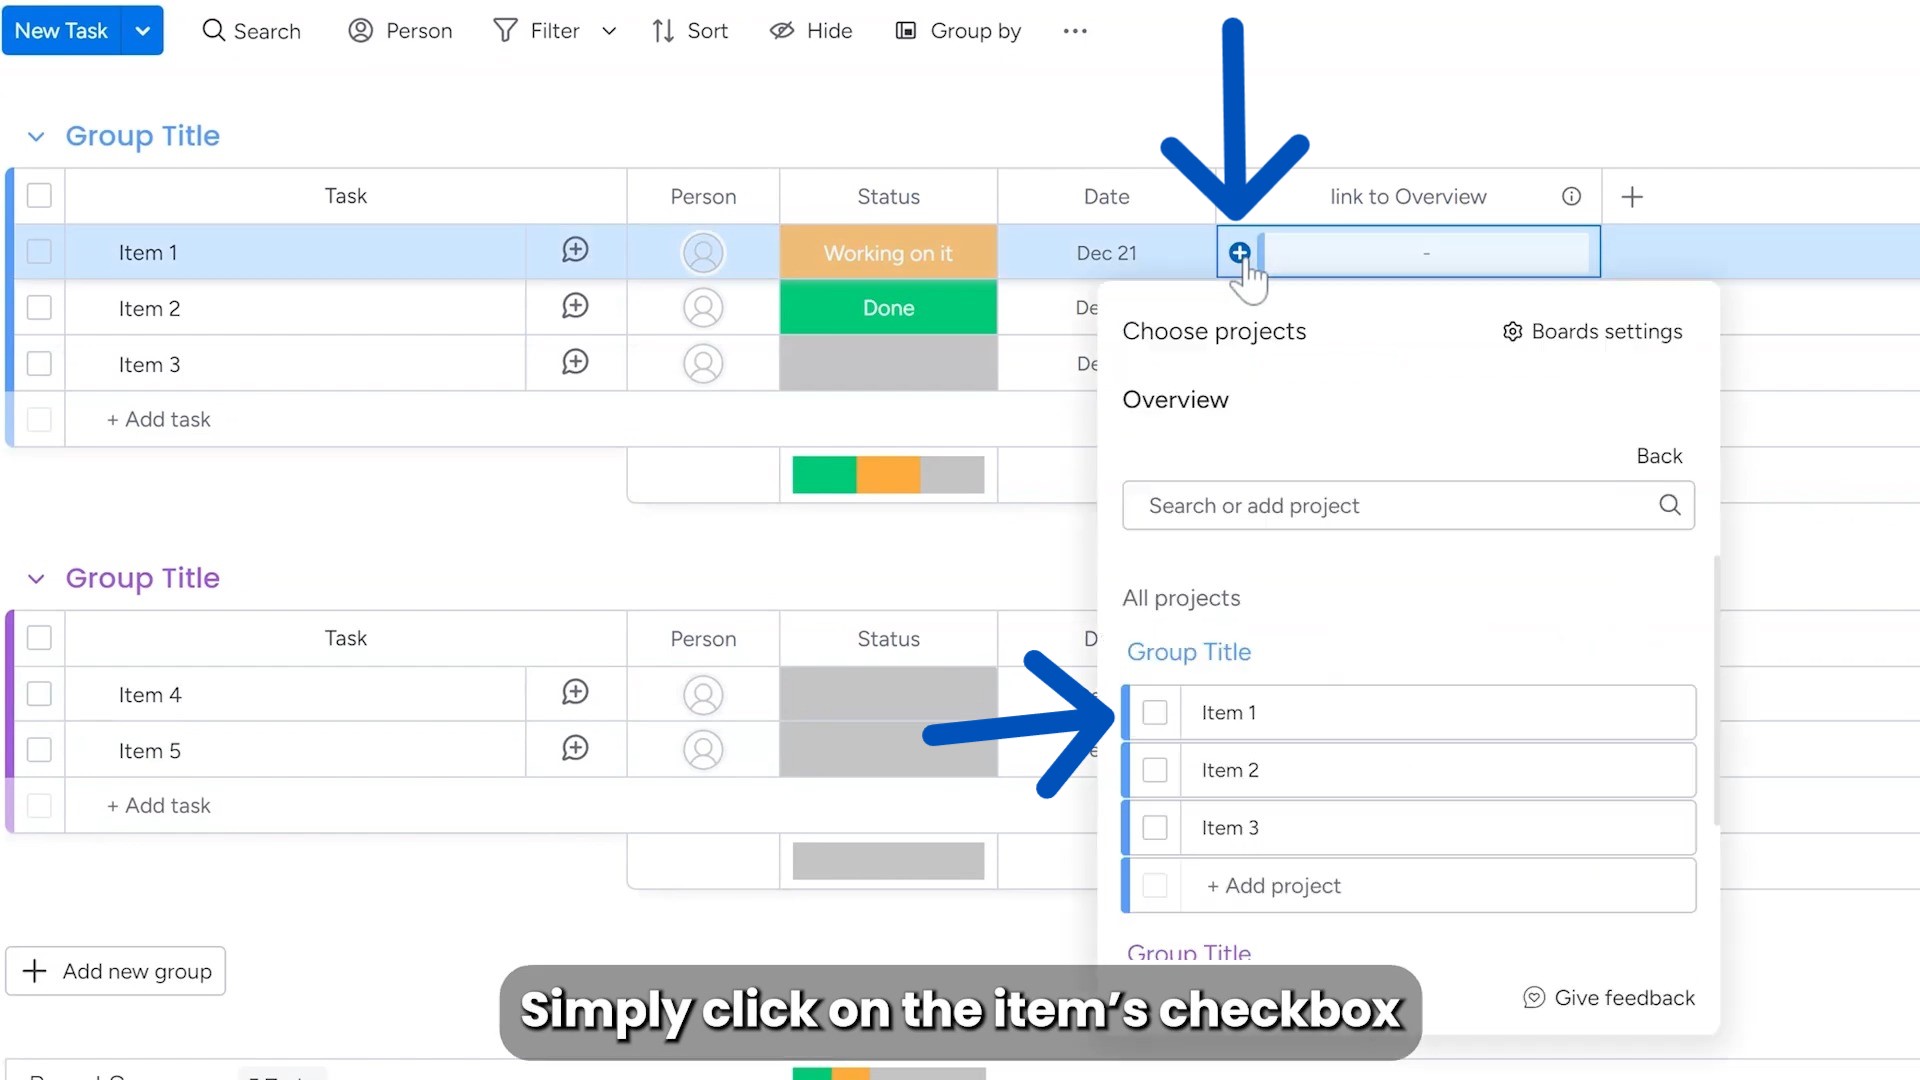
Now, you just need to choose which items to connect. Click the checkboxes for the items you want to link. This simple action ties both boards together seamlessly.
Step 9: Customize Your Mirror Column
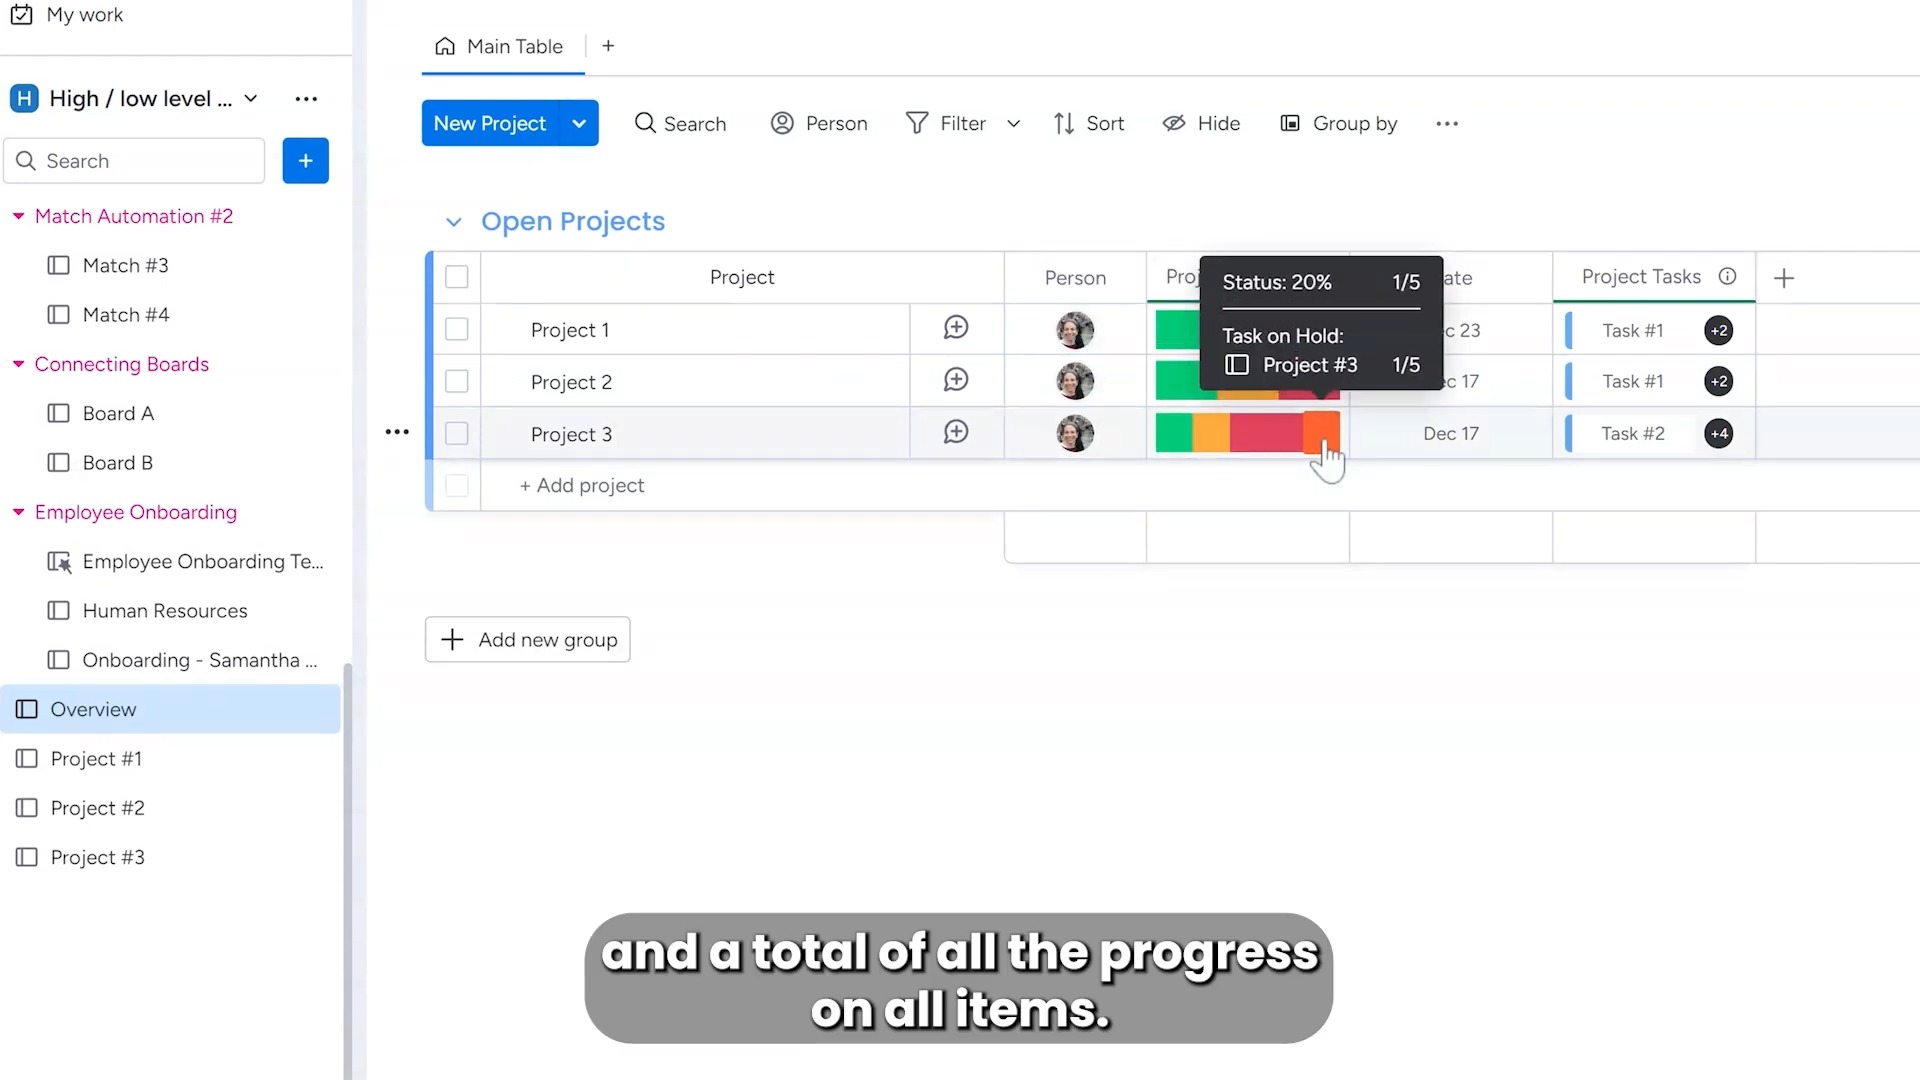
If you didn’t add a mirror column earlier, no worries! Go to the column settings, select “Customize Connect Boards,” and click “Add Mirror Column.” You can customize this column or any others to suit your needs. Your high-level board will now pull in data from the low-level boards, showing statuses and overall progress.
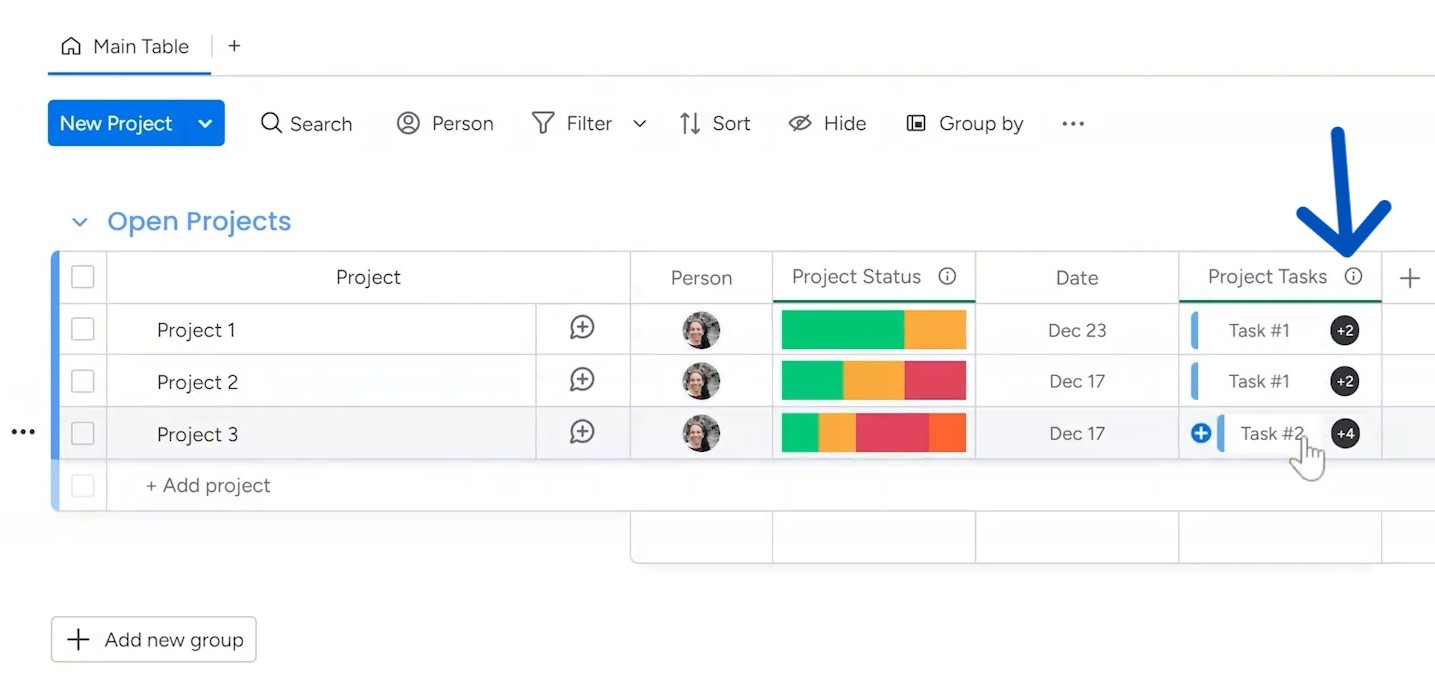
- Pro Tip: If you ever forget which board a column is connected to, just click the small “i” in each column. It will quickly show you the connections.
Setting up your high-level and low-level boards is straightforward if you follow these steps. Take your time, and soon you’ll have a well-organized project structure.
Ready to take your monday.com experience to the next level? With Simpleday’s expert guidance, you can seamlessly integrate high-level and low-level boards into your workflows. Enroll to my Udemy course for a better understanding of these boards and their functions.


