
If you’re new to monday.com and feel overwhelmed by all the buttons, columns, and options staring back at you, take a breath. In this blog post, I’ll walk you through everything you need to know to get started, step by step.
By the end, you’ll understand how the platform is structured, how to build your first board, set up automations, and use features that’ll actually save you time. Let’s make monday the best part of your week.
If you rather want to watch the tutorial, check the video below:

Before You Begin: Choose Your Plan and Product
When you first sign up for monday.com, you’ll make two important decisions, which are:
- Selecting your plan, and
- Choosing your product
Selecting Your Plan
There are several pricing tiers in monday, but if you’re serious about using it to manage your business, the Pro or Enterprise plan is where you should start.
The lower-tier plans simply don’t have the features, capacity, or automation capabilities that make monday worth the investment.
This tutorial focuses on features available in Pro and Enterprise plans.
Choosing Your Product
The monday platform isn’t just one tool, it’s a suite of products. You’ll get:
- Work Management – Manage tasks, projects, and workflows (this tutorial’s focus)
- CRM – Track leads, customers, and sales pipelines
- monday Service – Handle support tickets and service requests
- monday Dev – Manage sprints and development workflows
The good news? All these products connect seamlessly. You can start with Work Management and add others as your needs grow.
Understanding monday.com’s Structure
Before building anything, you need to understand how monday organizes information. Think of it as a hierarchy:
- Product → Workspace → Folders → Boards → Groups → Items → Sub-items
Let’s see how these structures work to create a seamless workflow:
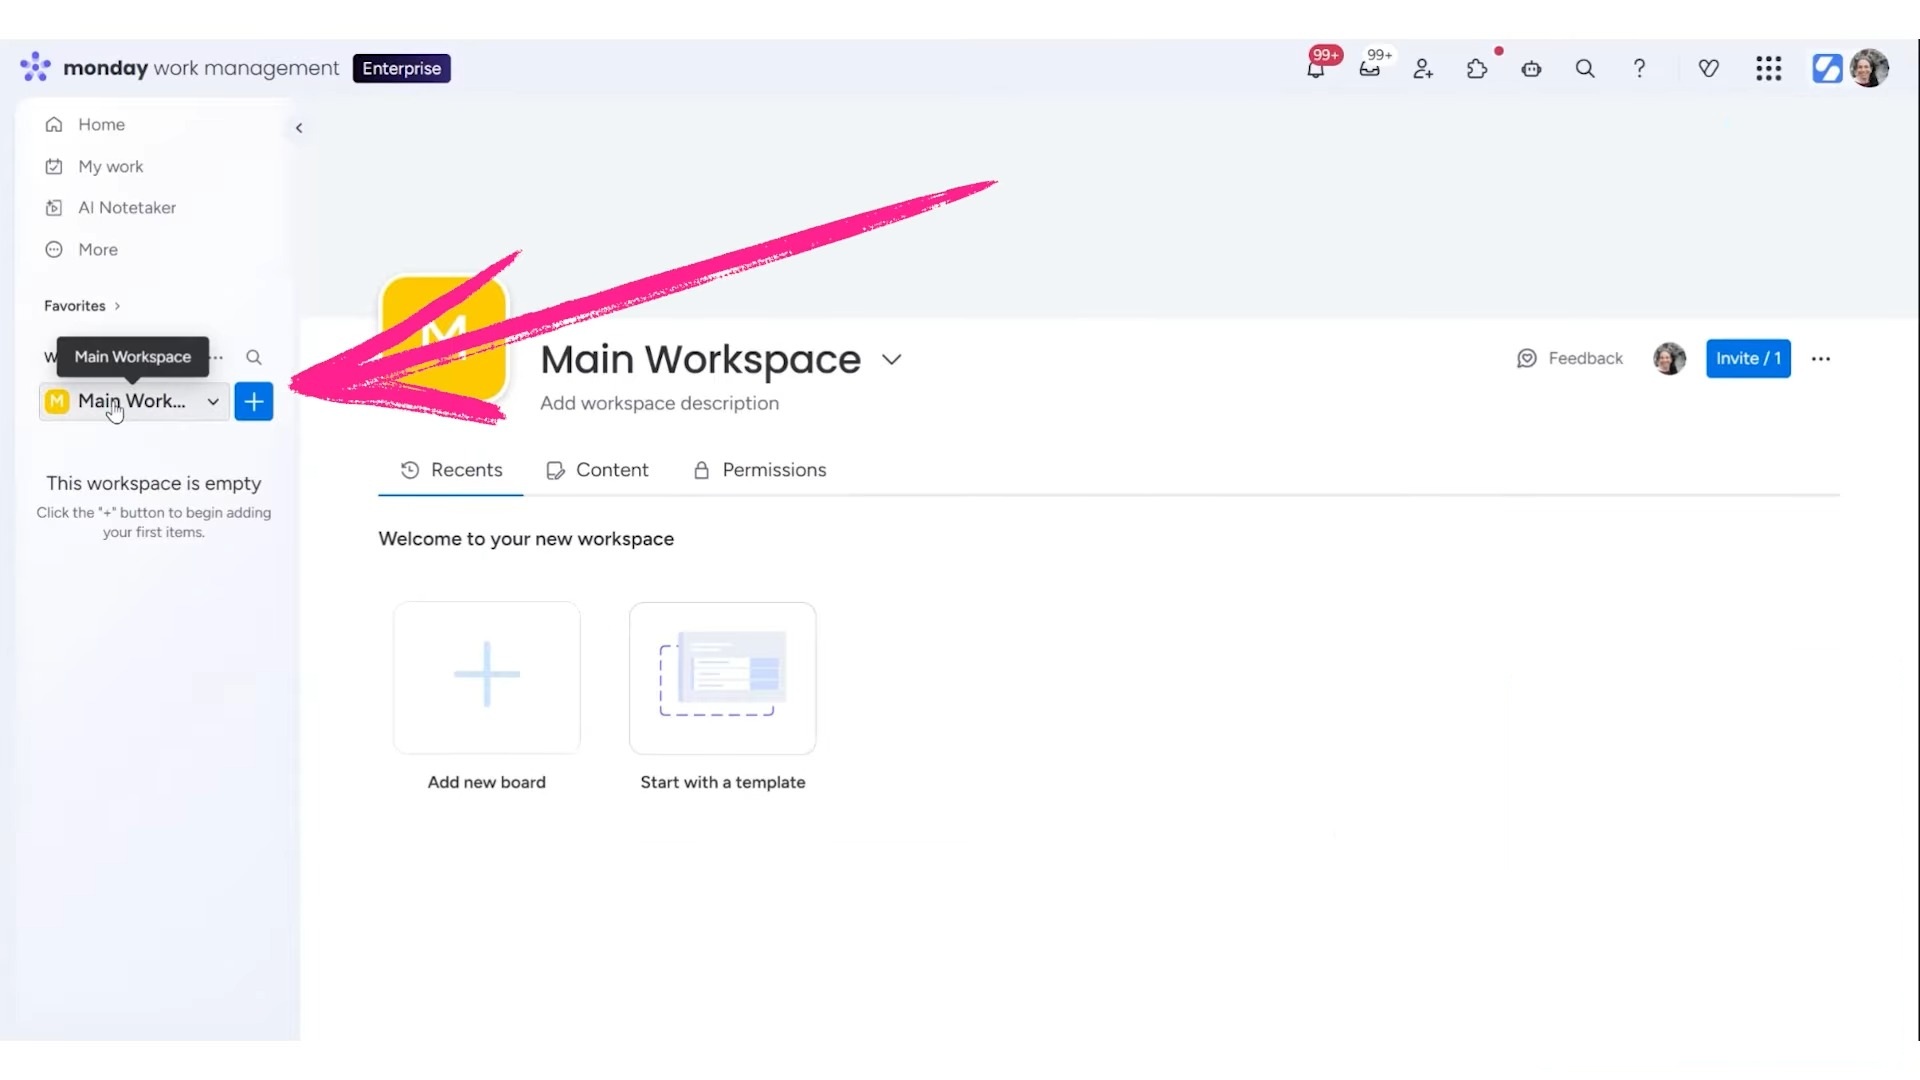
01. Workspaces
A workspace is your largest organizational folder within a product. It’s how you divide information at the highest level.
Common ways to use workspaces:
- Separate departments (such as Marketing, Finance, Operations)
- Organize by client or project type
- Archive completed work in a dedicated workspace
You can customize each workspace with a unique name, icon, and background image.
02. Boards
Boards are the foundation of monday.com, acting as the basic building blocks.
When creating a board, you can choose from three types:
- Main Board – Visible to everyone in your company with a seat
- Private Board – Only visible to people you specifically invite
- Shareable Board – Can be shared with external guests (clients, vendors, contractors)
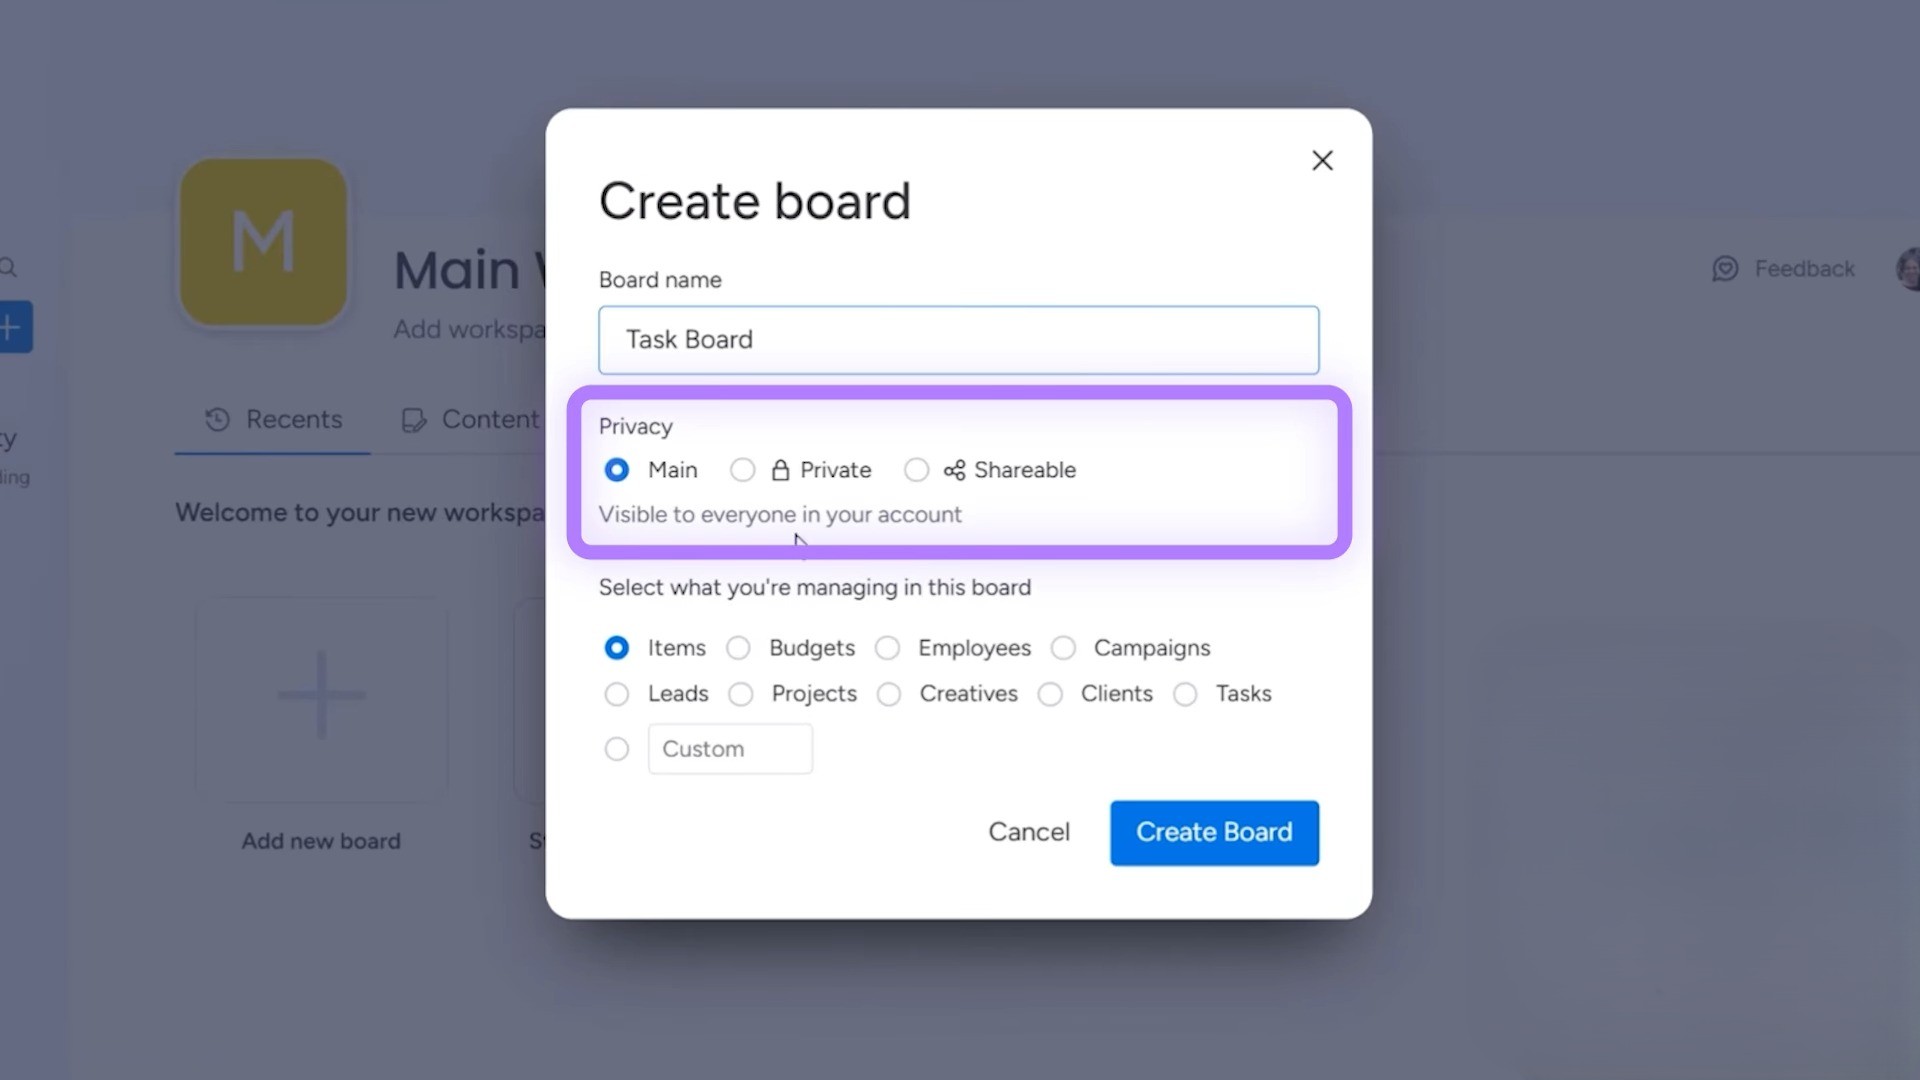
You can always change a board’s type later, so don’t stress about picking the “wrong” one.
03. Groups, Items, and Sub-items
Once inside a board, here’s how information breaks down:
Groups: They act like sections or categories within your board. For example, a task board might have groups called “Open Tasks” and “Completed Tasks.”
You can easily rename groups and change their colors. Using consistent colors (like green for “Completed” or blue for “Ongoing”) makes scanning boards much faster.
Items: These are individual line entries within a group, which are your actual tasks, projects, clients, or whatever you’re tracking.
Sub-items: You’ll find them underneath regular items when you need an extra layer of detail. Click the down arrow on any item to add sub-items.
How to Work with Columns
Columns define what information you track for each item. The first column is always the item name (like “Task”), and you can add as many additional columns as you need.
A. Essential Columns You’ll Use Constantly
i. Person Column
Assigns ownership to tasks. You can add multiple people or use separate person columns for different roles (like “Assigned To” and “Reviewer”).
ii. Status Column
One of the most powerful columns in monday.com. It uses color-coded labels to show progress at a glance.

Key things to know about status columns are:
- Maximum of 40 labels per column
- Colors are customizable
- Works beautifully with automations (e.g., “when status changes to Done, move item to Completed group”)
- AI can auto-assign labels based on conditions you set
You can use status columns beyond just progress tracking — think content types, priority levels, or department categories.
iii. Date Column
Critical for knowing what needs to happen and when. Click to select a date, or type naturally (like “January 5th”). You can also add specific times.
As a beginner, you should always use date columns. Without them, you’ll have no way to know what’s due each day.
B. More Columns Worth Knowing
Timeline – Similar to dates but shows a range (start and end dates)
Numbers – Track budgets, hours, quantities, or any numerical value
Dropdown – Like a status column but allows multiple selections
Tags – Flexible labels you can apply across items
Text – Free-form text fields
Formula – Calculate values based on other columns (AI can help write formulas)
Connect boards – Links information between different boards
To access all available columns, click the “+” button and select “More columns” to open the Column Center.
The Use of Filtering, Sorting, and Views
Once your board has data, you’ll want to slice and view it in different ways.
Quick Filters
Click the filter icon for fast filtering. Want to see only your tasks? Click your name. Only items with a certain status? One click.
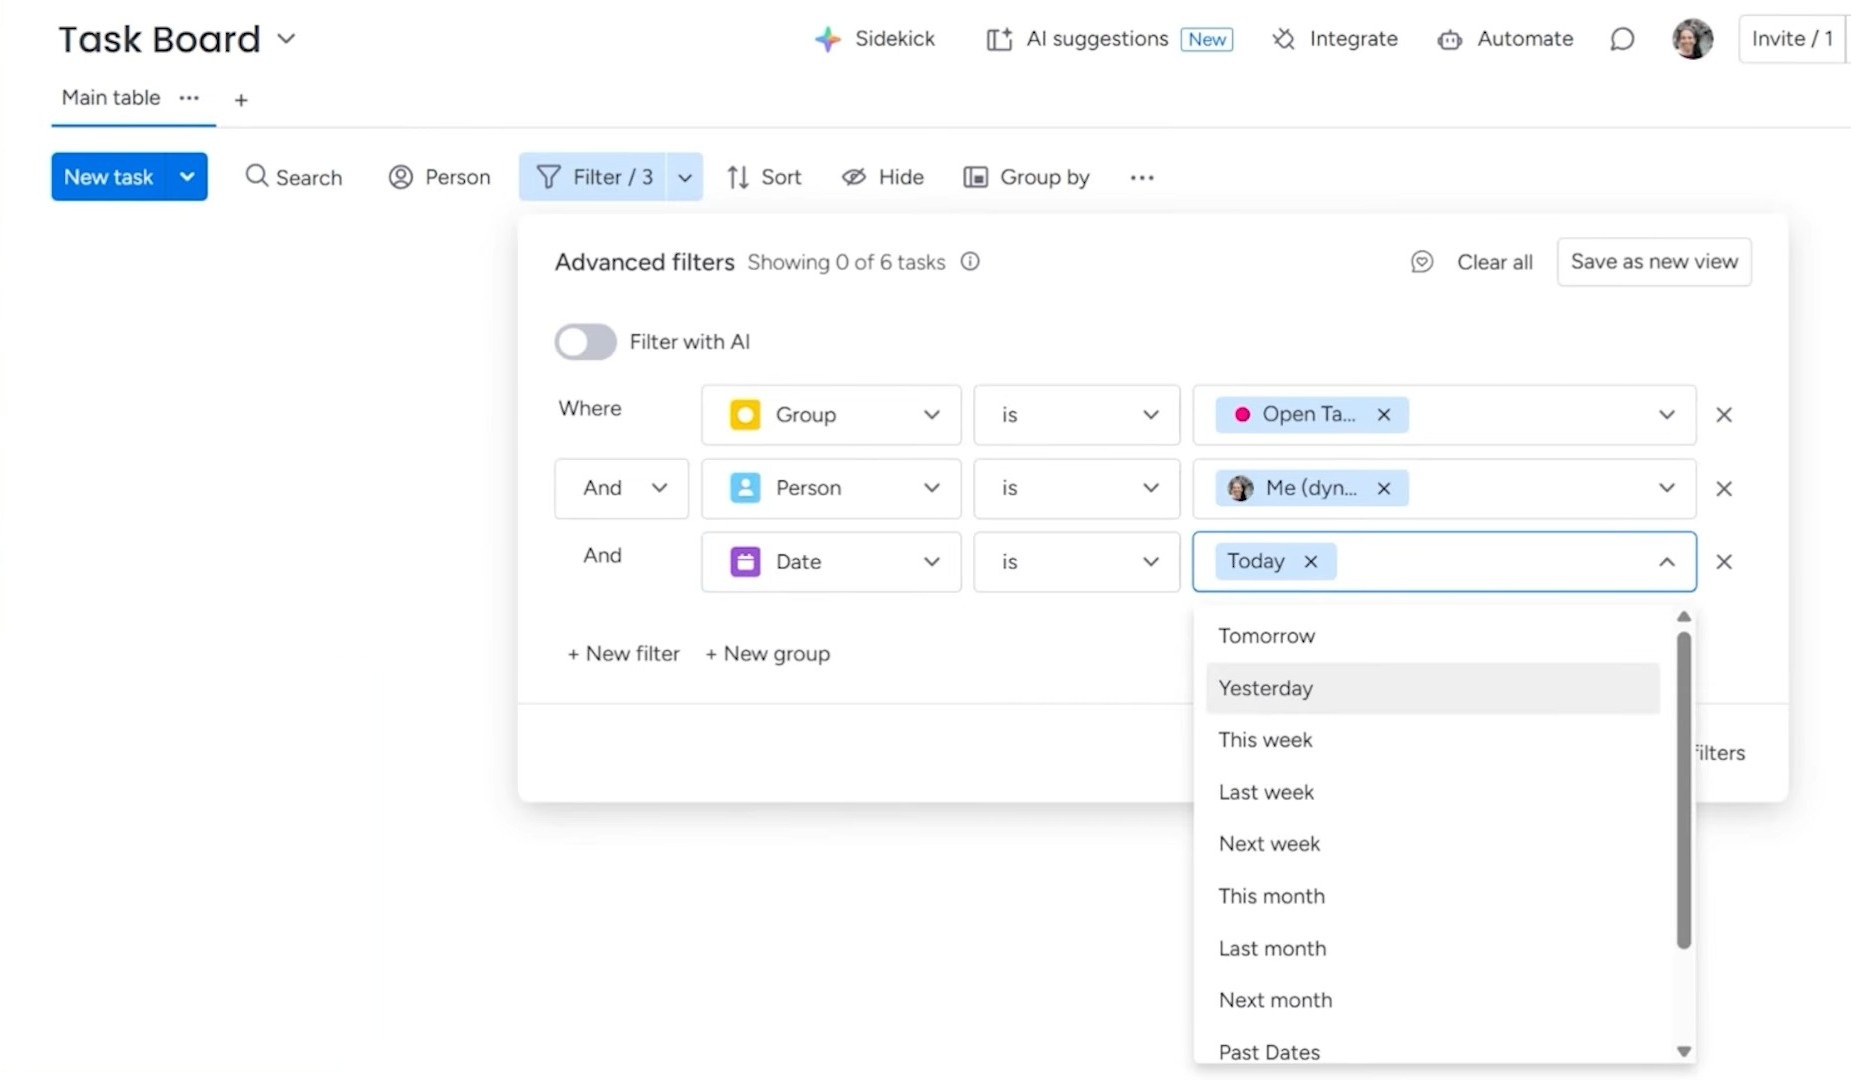
Advanced Filters
For more complex filtering, use the dropdown arrow next to the filter icon. Here you can combine multiple conditions:
- Show items where group is “Open Tasks” AND person is me AND date is today
The “me dynamic” option is especially useful. It shows each person their own tasks when they log in.
Saving Filters as Views
If you use the same filter regularly, save it as a view. Click “Save as new view” and it appears as a new tab at the top of your board.
You can change the name of this view as you like, such as:
- “My Daily View” (my tasks due today)
- “This Week” (all items due this week)
- “Blocked Items” (items with a specific status)
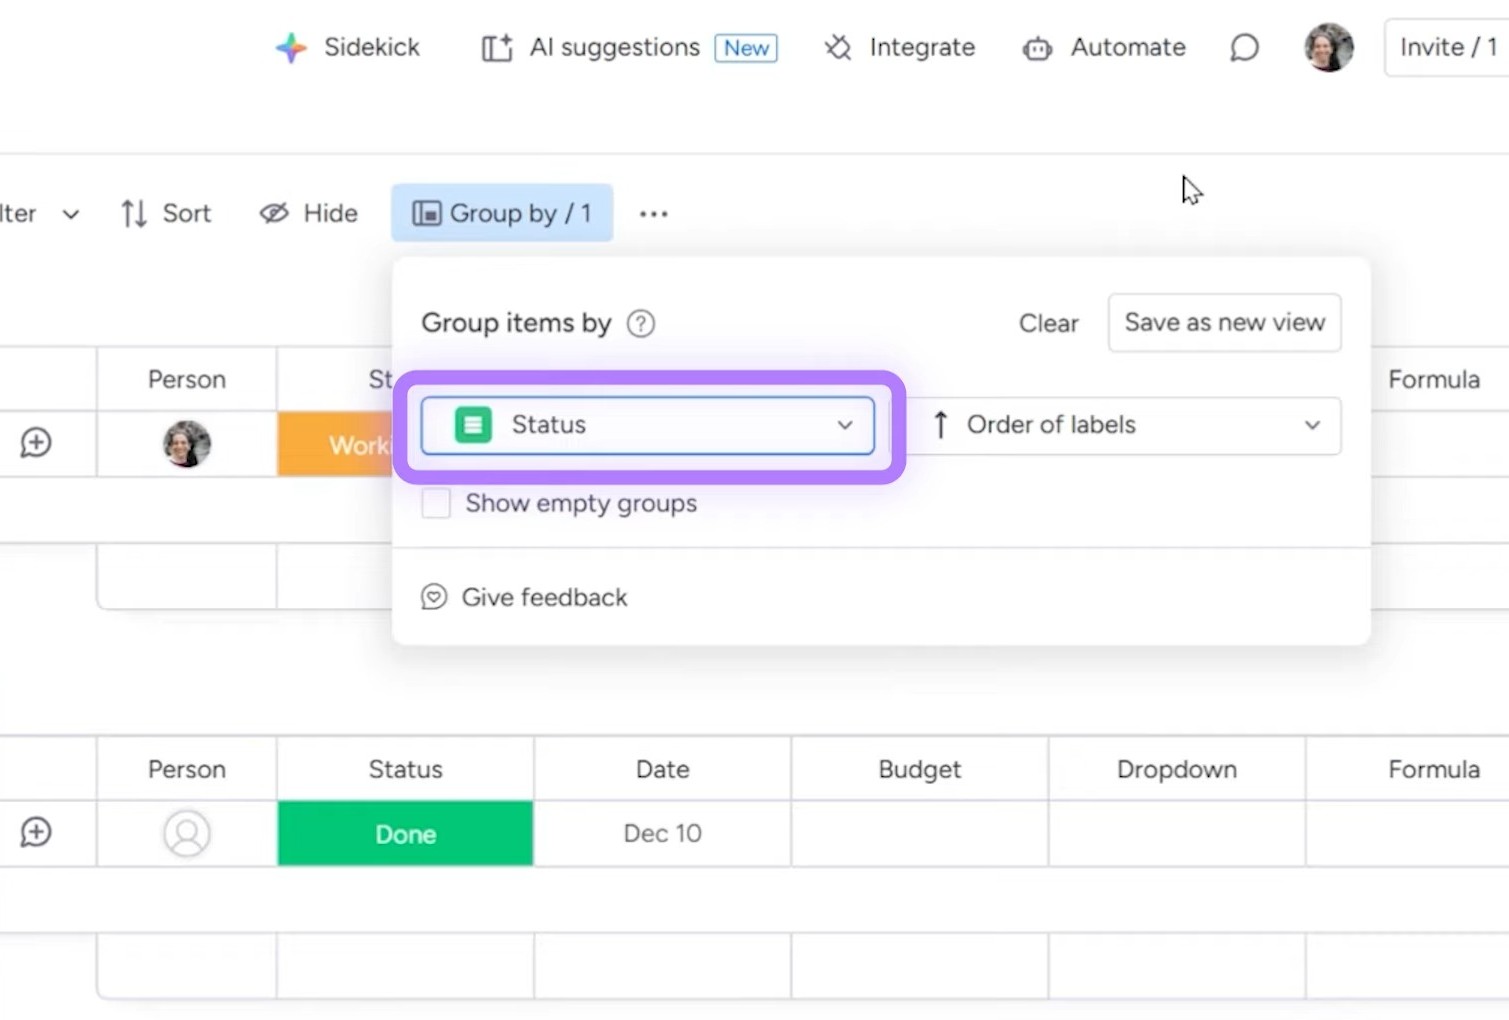
Grouping Your Data Differently
The “Group by” feature reorganizes your board’s groups based on any column. Instead of grouping by your custom groups (Open Tasks, Completed Tasks), you could group by status, person, or date.
This doesn’t change your data, but just how it’s displayed.
Other View Types
Beyond table views, monday.com offers:
- Chart views – Visualize data in pie charts, bar graphs, and more
- Calendar views – See items on a calendar based on dates
- Kanban views – Drag-and-drop cards between columns
- Dashboard views – Create widget-based dashboards directly on a board (click on the “Customizable view” from the option)
Automations: Let monday.com Do the Work
Automations eliminate repetitive manual work. They follow a simple formula:
- When [trigger happens] → Then [do this action]
Building Your First Automation
Click the “Automate” button at the top of your board.
You can use preset automations or build custom ones. Here’s how to create one from scratch:
- Click “Create from scratch”
- Select a trigger (e.g., “When status changes to something”)
- Select an action (e.g., “Move item to group”)
- Fill in the specifics (When status changes to “Done” → Move item to “Completed Tasks”)
Adding Conditions
Make automations smarter by adding conditions. For example:
“When status changes to Done, but only if person is me, then move item to Completed Tasks.”

Workflows: Advanced Automations
For more complex logic, check out Workflows. You can find this option by clicking the “+” button on the left panel of your task board.
Unlike standard automations (one trigger, one action), workflows support:
- If/then branching
- Multiple conditions
- Multi-step sequences
- Delays and wait periods
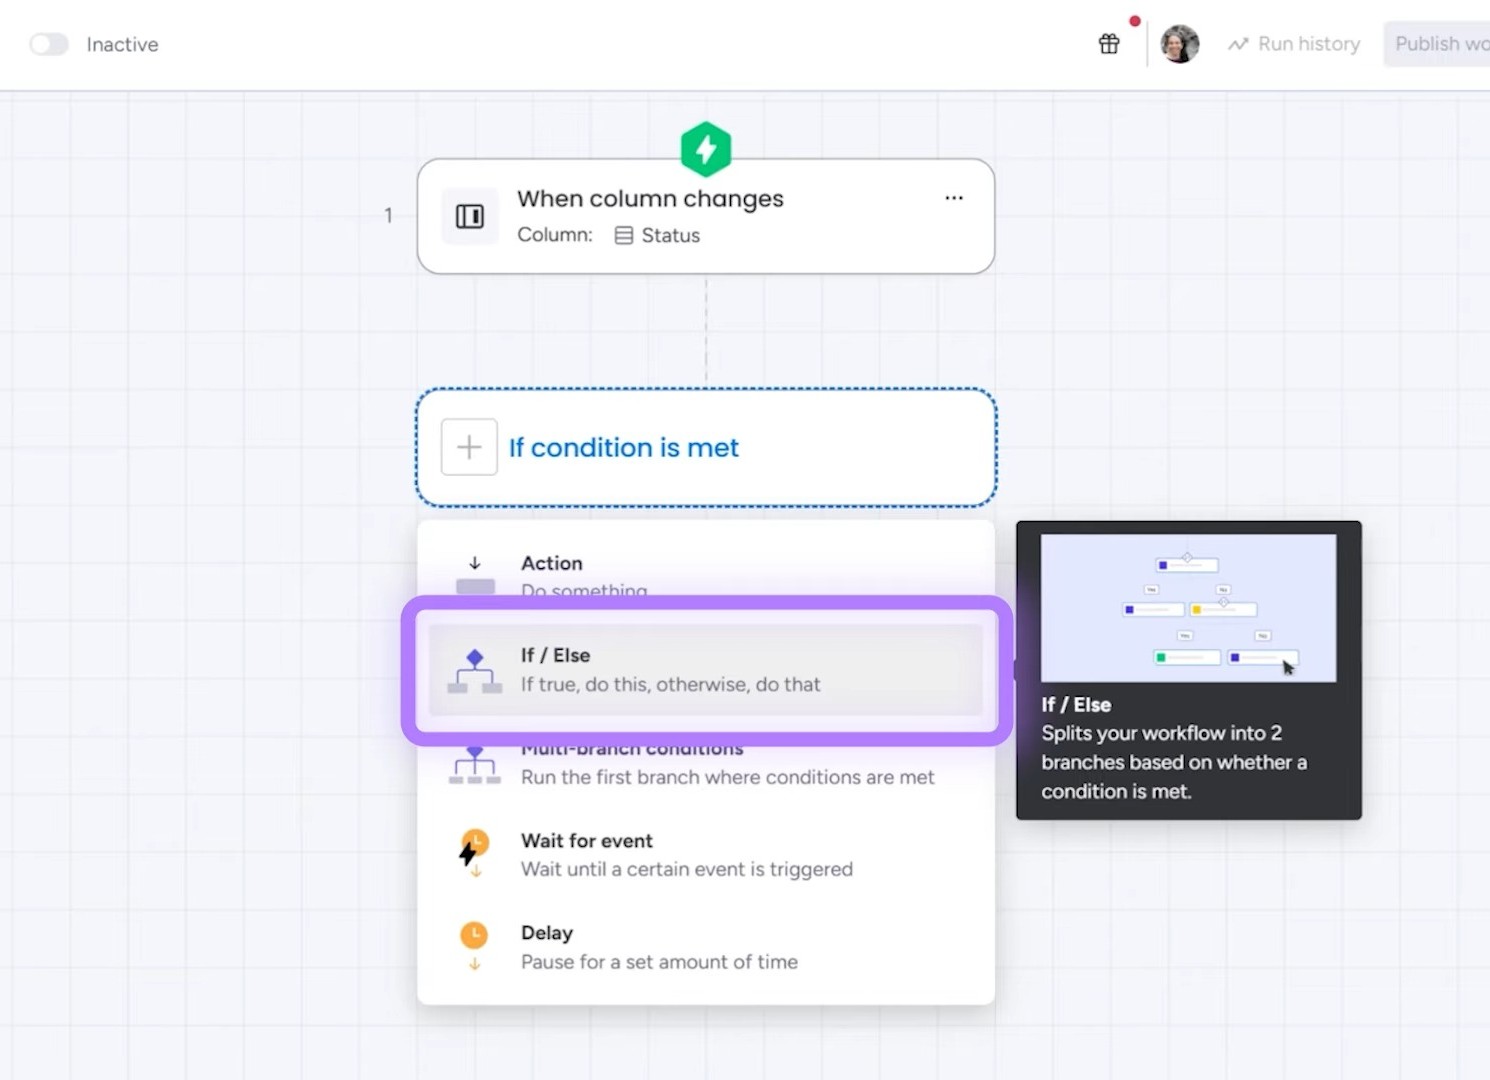
Once you’re comfortable with basic automations, workflows open up much more sophisticated possibilities.
Communication Within monday.com
Stop scattering conversations across email, Slack, and text. There is a built-in communication tied directly to items in monday.com.
Using Updates
Click the “+” button on any item to open its detail view. The Updates section lets you post messages, ask questions, and tag teammates.
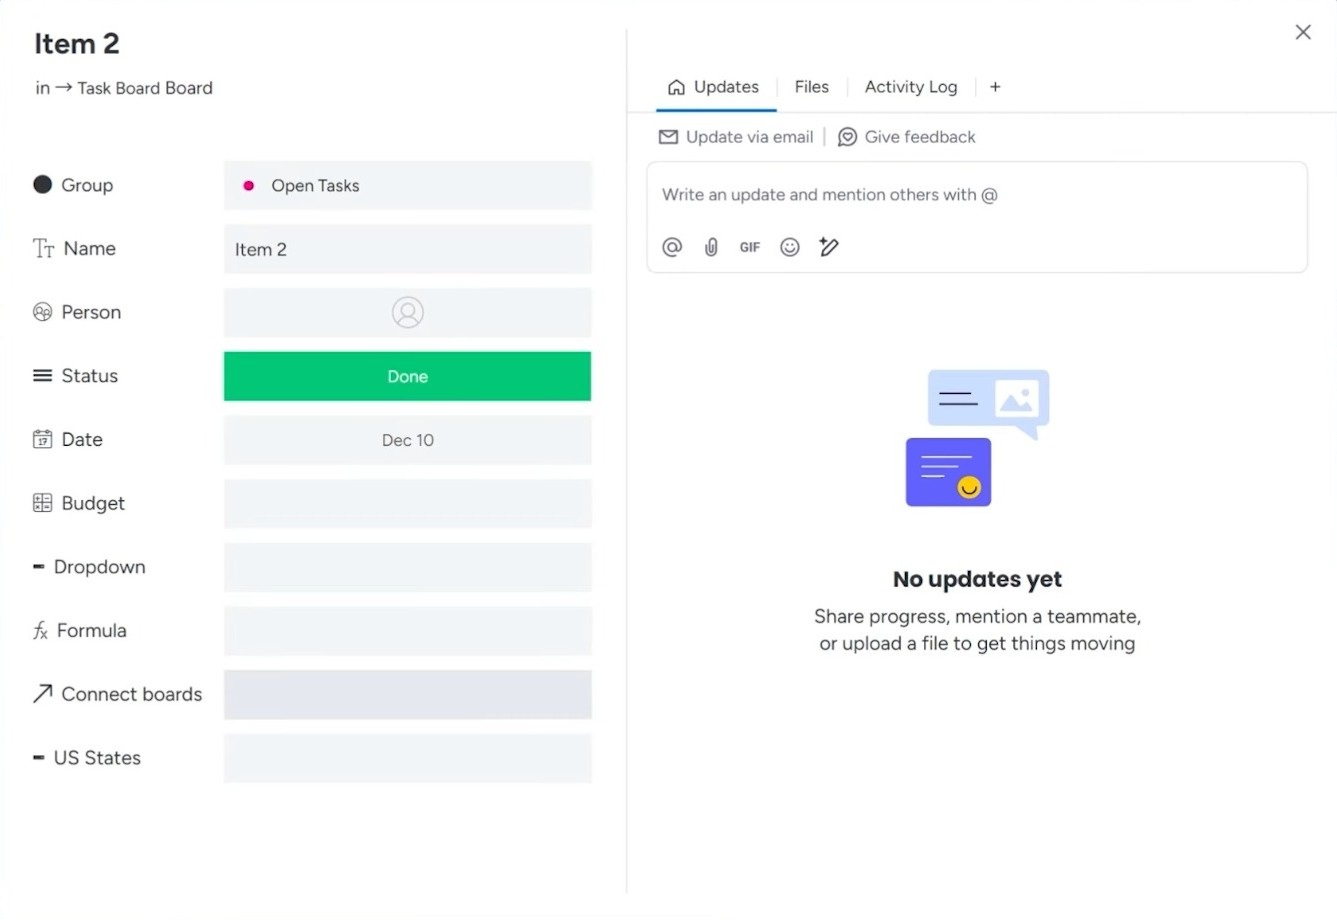
To tag someone, type @ followed by their name. They’ll receive a notification and can respond directly. Everything stays connected to the relevant task.
Options for tagging:
- Specific people
- Everyone on the board
- Everyone assigned to that item
Board-Level Discussions
For conversations about a board rather than a specific item, click the speech bubble icon at the top right. This opens a board-wide discussion thread.
Additional Features Worth Exploring
Click the “+” button on the left panel to find these options:
Monday Docs
You can create documents directly within monday.com. They function like Google Docs or Word documents, but they live alongside your boards and can embed live data from them.
Forms
Build forms that feed directly into your boards. Perfect for intake requests, client onboarding, or any scenario where others need to submit information.
Forms can be added as standalone items or as views on existing boards.
Dashboards
Dashboards aggregate data from one or multiple boards into visual widgets, like charts, numbers, progress bars, and more.
You can build dashboards manually or let AI help. Just describe what you want: “Show me a chart of my tasks and how many are in each status.”
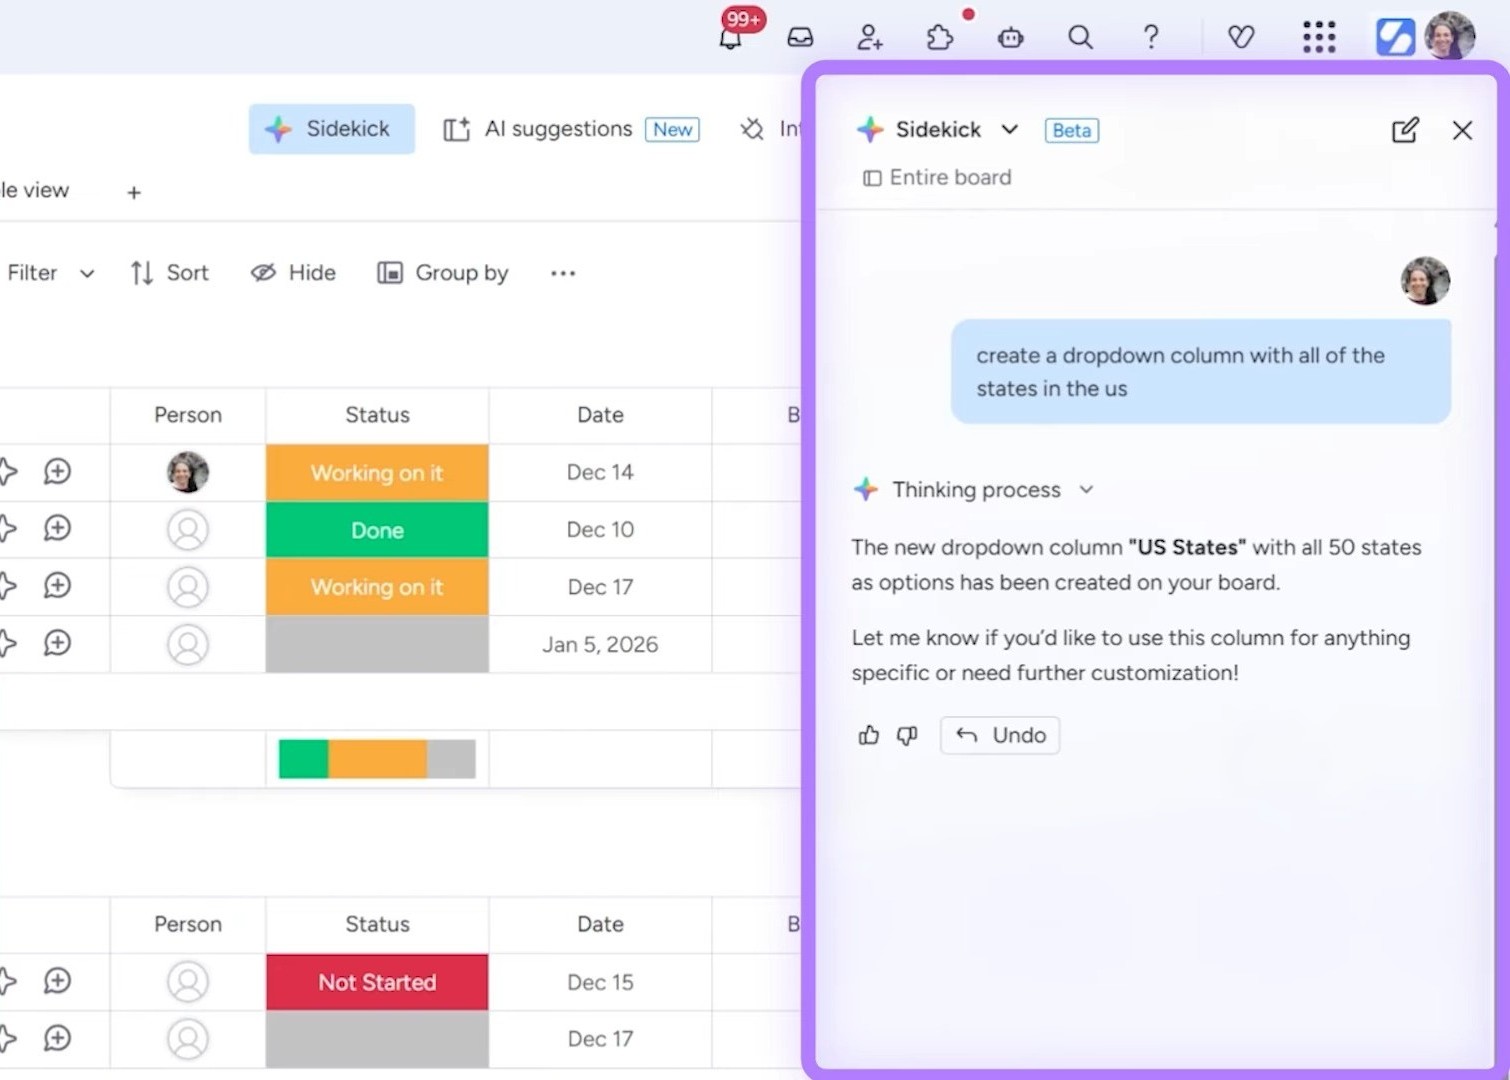
Sidekick AI
Sidekick is an AI assistant, available at both item and board levels. You can access it from the top bar of your task board. It can:
- Build columns for you (“Create a dropdown column with all US states”)
- Answer questions about your data (“How many tasks are due this week?”)
- Research information (“Find event venues in New York City”)
Portfolio Management (Enterprise Only)
If you’re on the Enterprise plan, Portfolio is a powerful feature for managing multiple projects in one view. Access this by clicking the “+” button on the left panel.
How It Works
A portfolio is essentially a collection of boards with executive-level dashboards on top. Each project gets its own board, and the portfolio aggregates key information.
When you create a portfolio (a high-level board), you can add individual project boards (low-level boards) to it. You’ll also have a resource planner (for capacity management) for each project board.
What You Can Track
The portfolio view shows:
- Project health (On Track, At Risk, Off Track)
- Percentage complete
- Planned vs. actual timelines
- Project managers
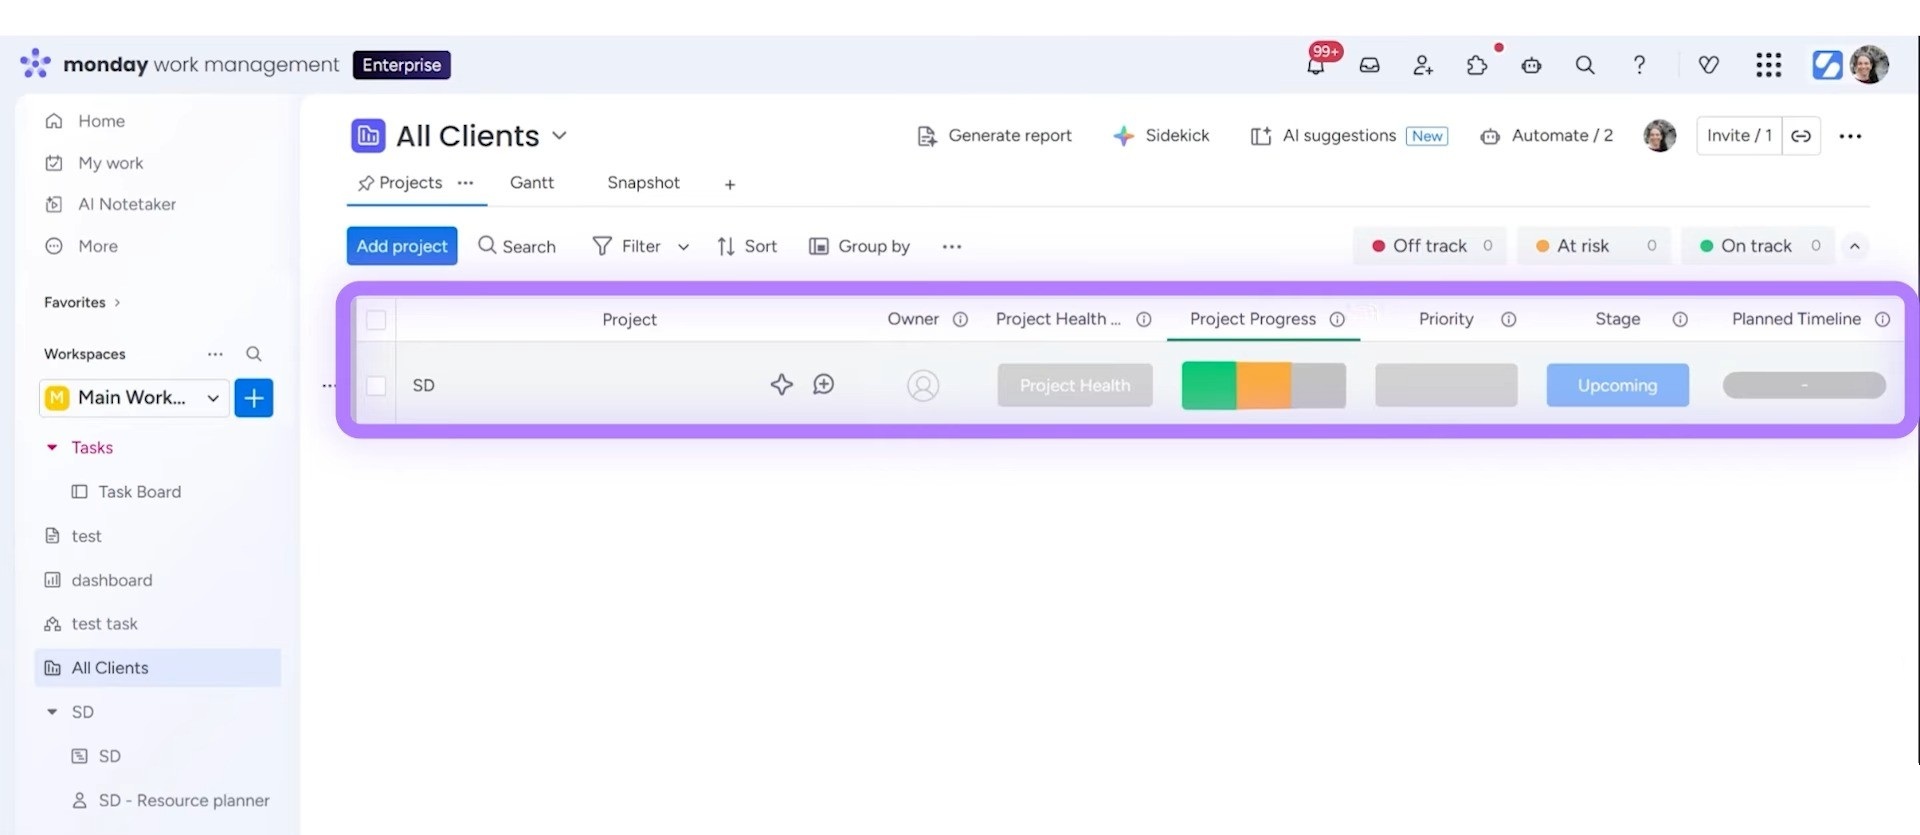
This is ideal for agencies managing client projects, companies overseeing multiple initiatives, or anyone needing a bird’s-eye view of work across the organization.
Quick Reference: Board Settings and Options
The three-dot menu on the top-right corner of any board gives you access to:
- Activity Log – Full history of every change on the board
- Notifications – Control what updates you receive
- Permissions – Set who can edit, view, or manage
- Export to Excel – Download your data
- Duplicate – Copy the board (with or without items)
- Templates – Save the board as a reusable template
- Archive/Delete – Remove the board when no longer needed
You can also invite team members directly from the board, setting their access level when you add them.
Wrapping up
There’s a lot of depth to monday, but you don’t need to master everything at once. Start with a simple board, add columns as you need them, and layer in automations once you see patterns in your work.
The platform keeps evolving with new features, and AI capabilities alone have expanded significantly. But the fundamentals covered here will carry you through the vast majority of what you need to do.
Ready to Implement monday.com the Right Way?
Learning monday.com is one thing, and building workflows that actually fit your business is another. At Simpleday, we help brands, businesses, and solopreneurs implement monday with custom setups tailored to how you work. Skip the trial and error, get expert help today.