One handy feature monday.com offers is time tracking. With this, you can easily record the time spent on individual tasks and projects within your workboards. No more guessing how long something actually took or scrambling to reconstruct your work log!
Time tracking helps boost productivity by giving you insight into how much effort different projects require. It also aids in billing clients and ensuring teams stay on track. Let’s look at how simple it is to add this useful feature.
How to Add the Time Tracking Feature
Adding the time tracking column to your monday.com board is a breeze. Just follow these quick steps:
-
- Open up the board you want to add time tracking to. It can be an existing board you use to manage projects, or a new one set up for this purpose.
-
- In the top menu, click the “Add Column” plus sign button. This opens up options for adding a new column to your board.
-
- Start typing “time tracking” in the search bar that pops up. Select the “Time Tracking” column type from the list.
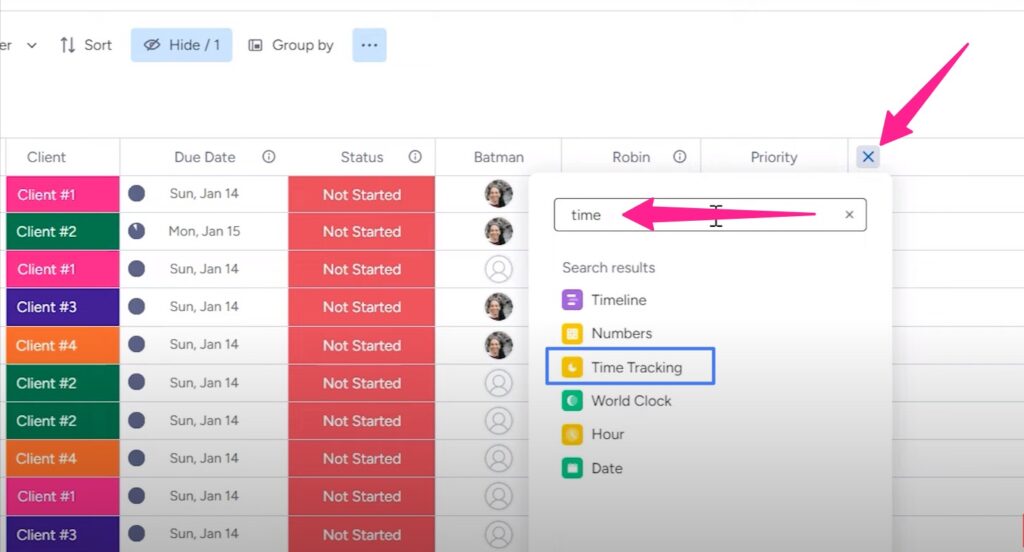
That’s it! The time tracking column will now show up on your board. It really is as simple as that.
For a visual walkthrough, watch this tutorial on YouTube to see the time tracking setup process in action.

Customizing the Time Tracking Column
After adding the time tracking column, you can customize it to perfectly fit your workflow needs. Here are some of the settings you can tweak:
a. View and edit time logs
Click on the time entry to see details of who tracked time, on what date, and the duration.
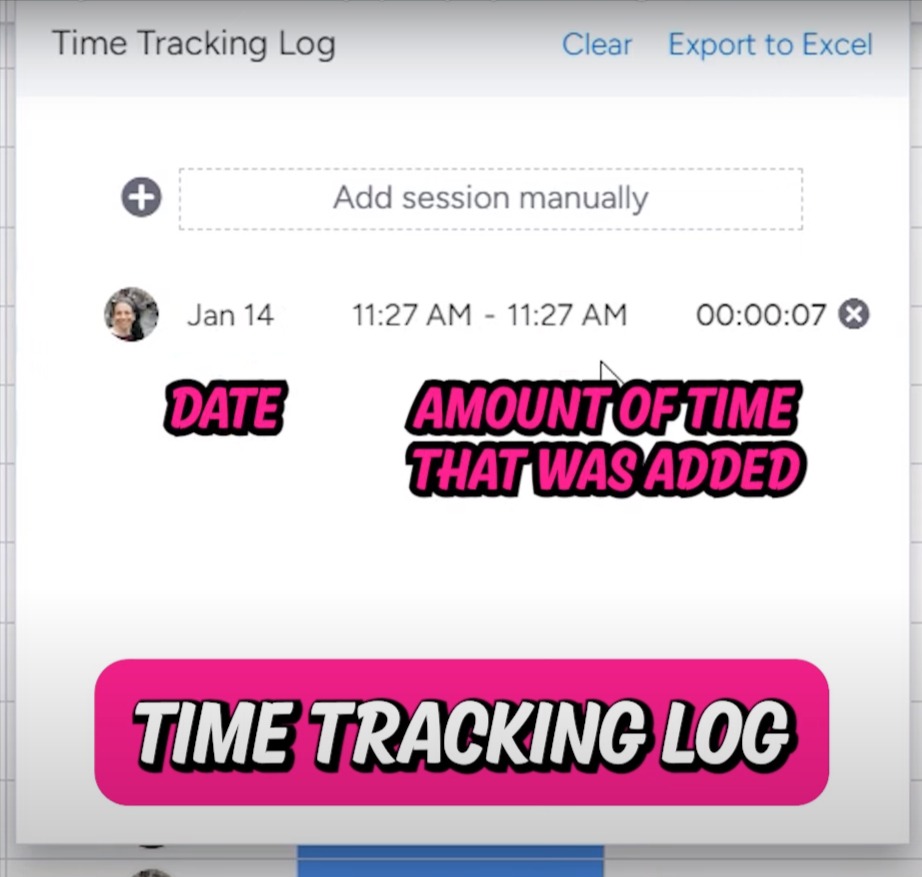
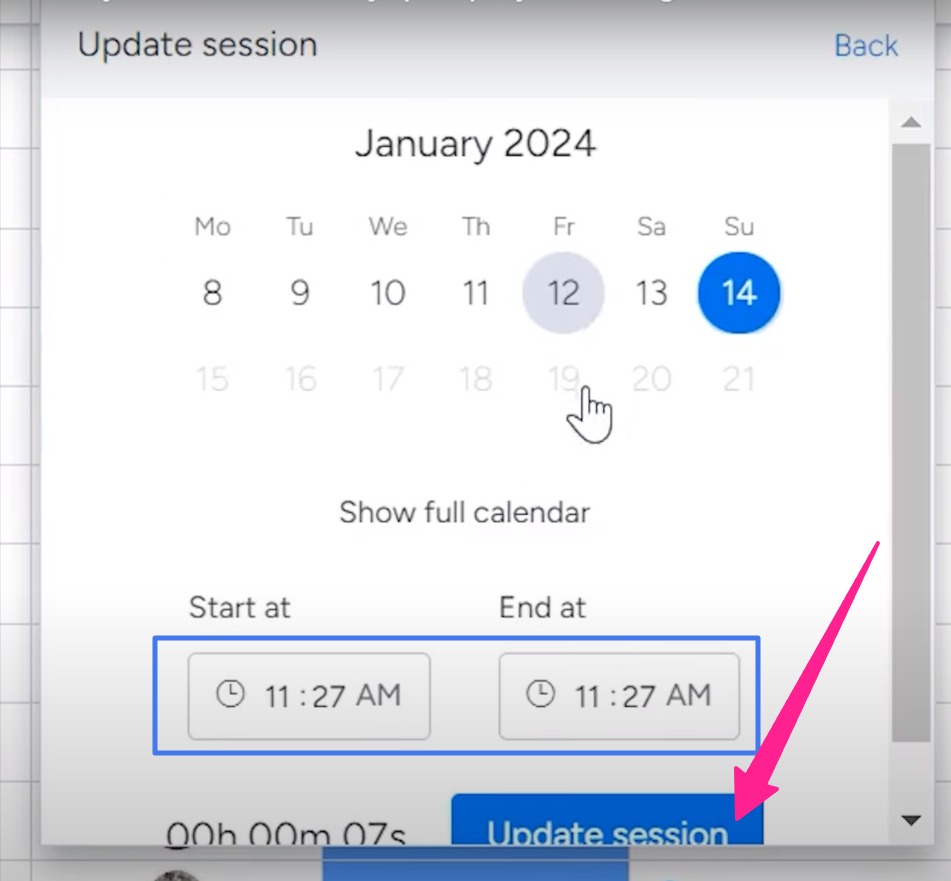
You can also edit the info by clicking on it. Say you meant to log 10 minutes but accidentally input 1 hour. Just change the time to reflect the actual work.
b. Clear time logs
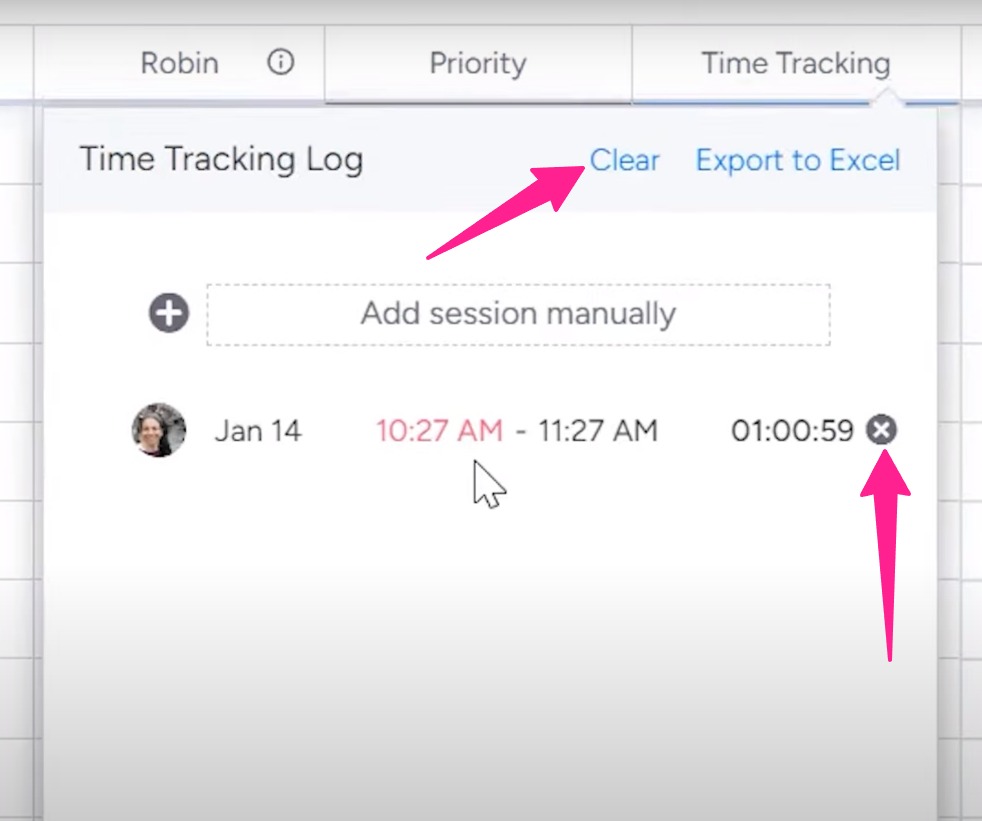
To erase a time entry, click the “X” icon or the “Clear” button. This removes it completely from your time tracking. Use this when you make a mistake or want to reset the clock.
c. Manually add time
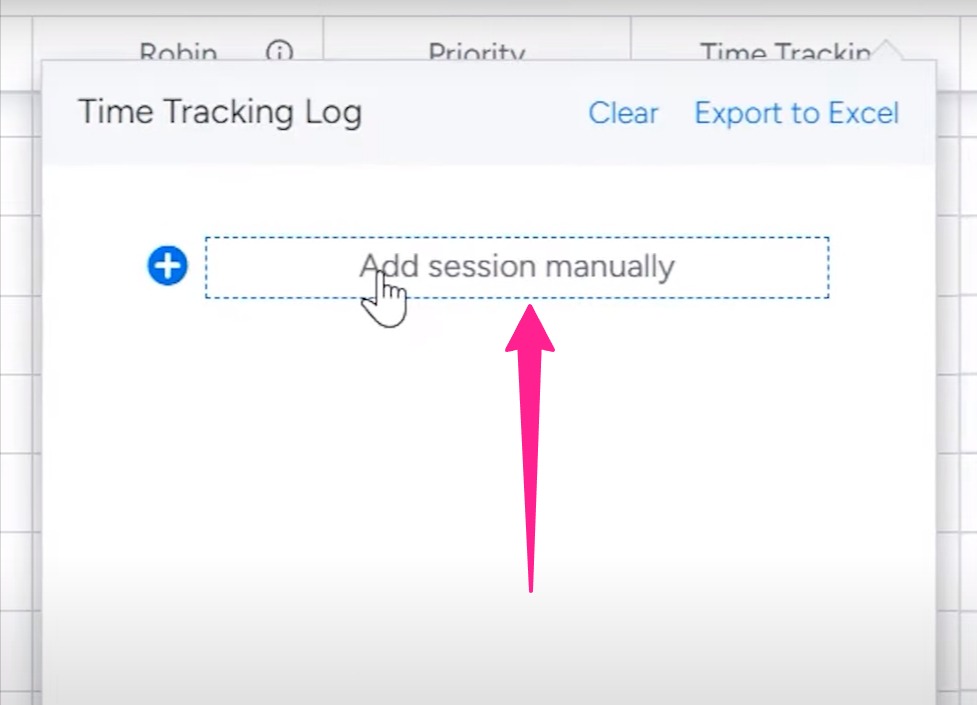
Don’t want to use the play/stop timer? You can manually input any time duration.
Just click “Add Session” and enter the details like date, person, and hours worked. Perfect for adding past time or if you forgot to start the tracker.
d. Change date
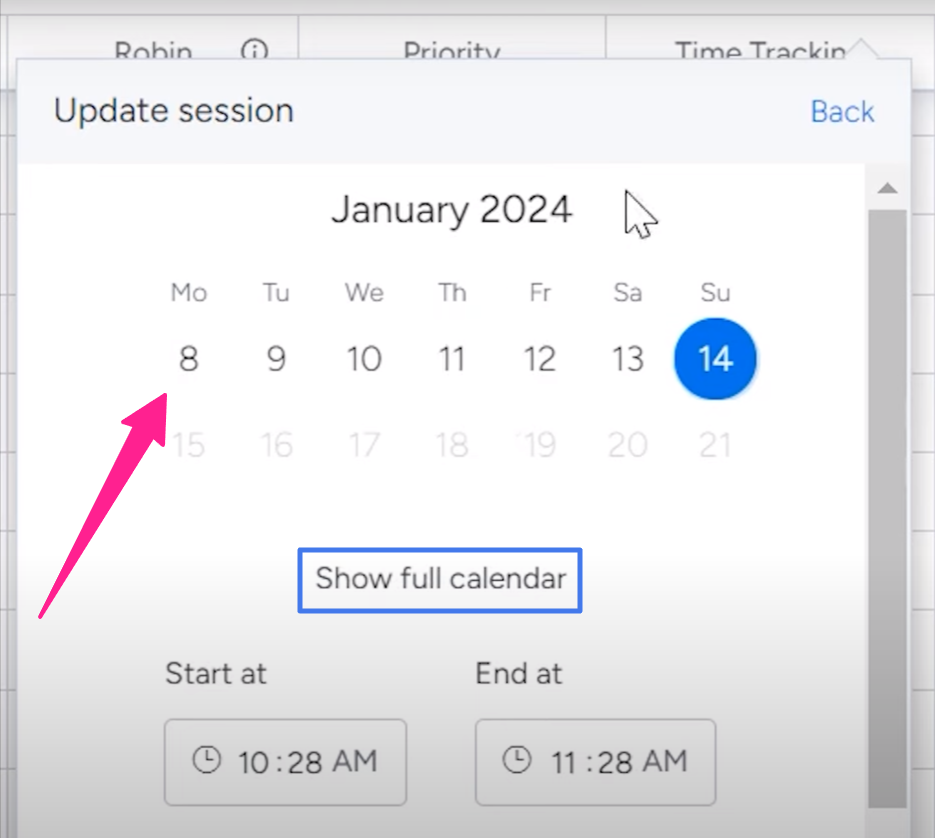
By default, time logs use the current date.
But you can edit the date by clicking on the calendar icon. This opens up a handy pop-up calendar so you can select any other date needed.
e. Show seconds
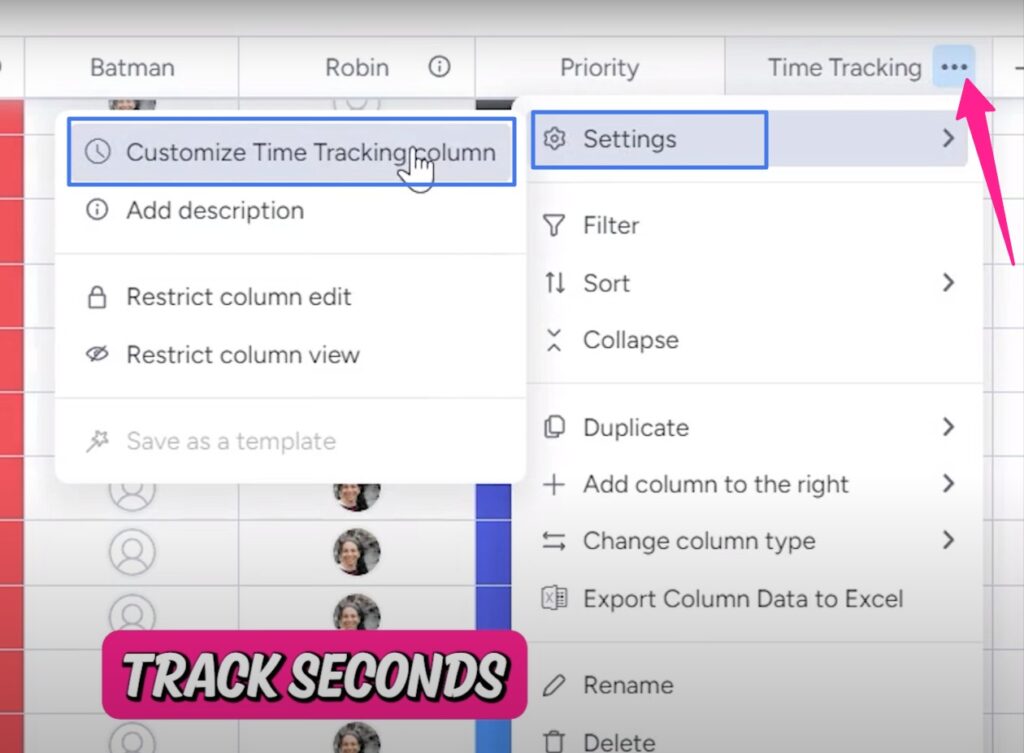
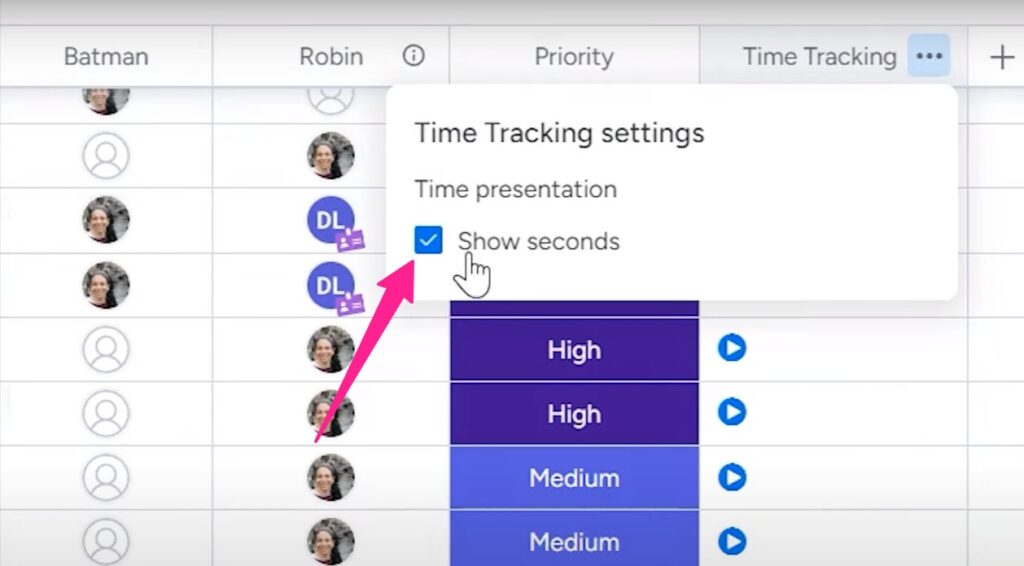
For more precise tracking, you can toggle the column to show seconds.
Go to Settings > Customize Time Tracking Column > check “Show Seconds.” Now you’ll see down to the second duration.
f. Export time logs
Need your time data in spreadsheet form? Easy! Click the “Export to Excel” button.
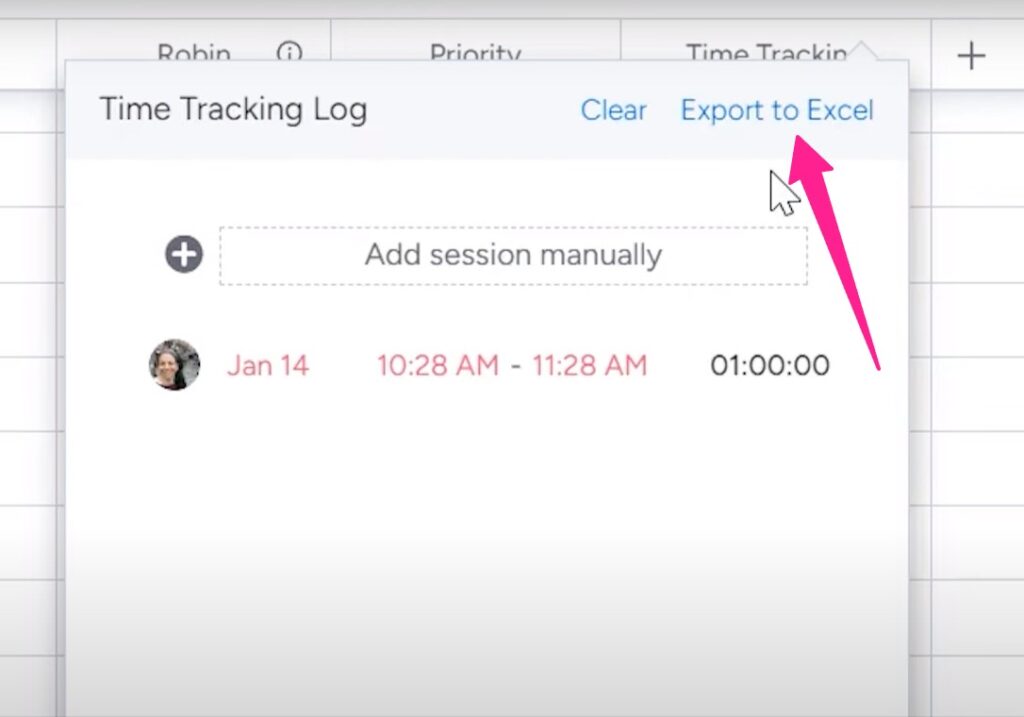
This will download an Excel file containing all your time tracking information. Great for sharing with clients, number crunching, or archiving logs.
g. Use in formulas
One powerful feature is using the time data in a formula. Simply add a formula column, and pull in the time tracking column to compare estimated vs actual time per task. Or calculate total time spent per project or client. The possibilities are endless.
For example, you could do:
Estimated Time – Tracked Time = Time Remaining
This would show if you’re over or under budget for each task. Formulas let you unlock the full potential of time tracking!
Get the most from monday.com with Simpleday. If you are excited about the platform, but feel overwhelmed implementing it yourself, our team of experts is here to help. Let us walk you through setup, training, rollout, and beyond. We know the platform inside and out, and can translate that knowledge to your specific use cases.


