
SOPs, or standard operating procedures, are super important for any business. They make sure everyone is on the same page and knows how to do their jobs. You can make SOPs for tasks like hiring, writing blog posts, and onboarding new clients.
Struggling to manage all those SOPs? Let me show you an easy way on monday.com to organize it all. You’ll have an SOP system set up in 5 to 10 minutes, depending on how organized you want it to be.
Building an SOP Management System
Setting up your SOP management system on monday.com is easy once you break it down into steps.
Create a Board
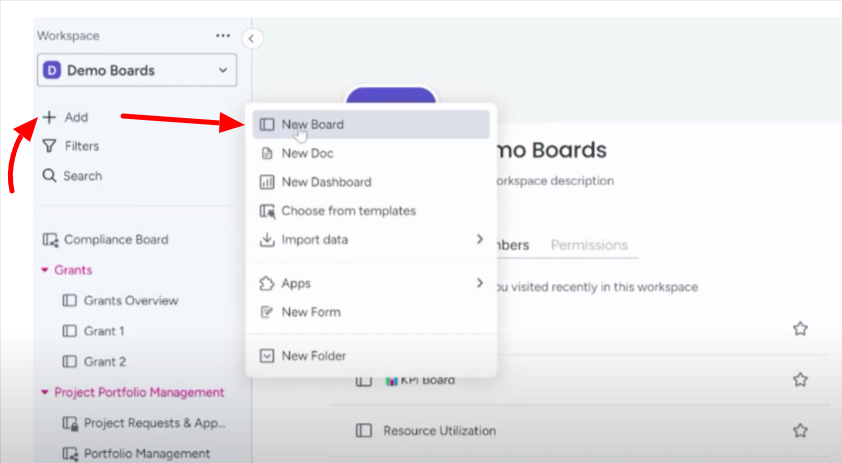
The first thing you’ll do is create a new board. Click the “Add” button and then choose “New Board.” Name your new board something like “SOPs.”
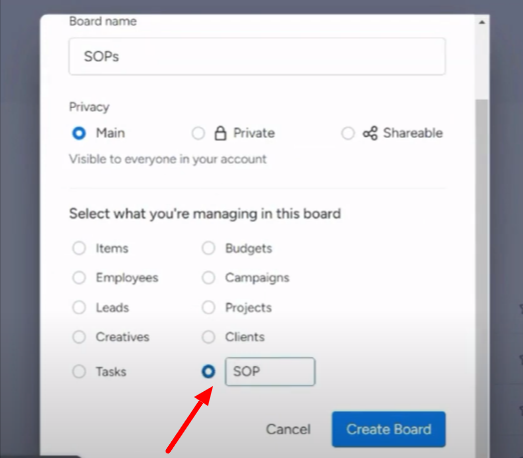
Select the “Custom” option under “Select what you’re managing in this board.” I like to change that name to “SOP,” so it’s easy to find. Then, click “Create Board” and you’ll have a new SOP board.
Now, you have a board to store all your SOPs. You have a couple options for how you organize them. You could sort by date written or updated. In most companies, sorting by department works great. That’s the method I’ll use in this example.
Add a “People” column to track the SOP creator and change its name to “Approver” to track who approves it. Change the “Date” column to “Final Doc Date” to keep track of the SOP’s last update.
Add a File Column
The next step is adding a column to attach your actual SOP documents.
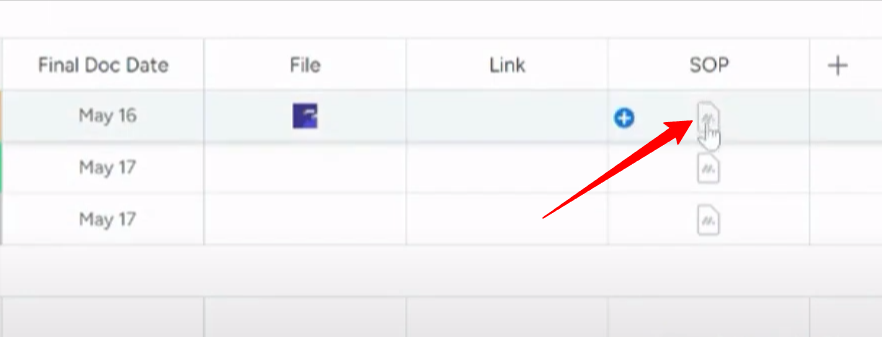
You have a few options: add a File column to attach word docs, a Link column for Dropbox or similar files, or—my favorite—create a monday doc column right in the app.
Creating a monday doc is super simple. Just click the document icon and you’ll see a new doc open up like a Google Doc or Notion page. Here you can simply type out your SOP. The monday doc is a real time saver because the SOPs are stored right in the platform. No more shuffling between apps!

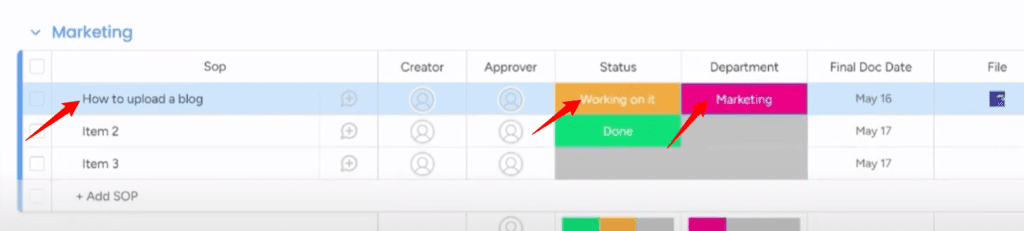
To organize your SOPs by department, first add a status column named “Department.” Then, create statuses under the department, say, “Marketing,” “HR,” and “Onboarding.”
Color coding the rows really helps things pop. You may assign blue for Marketing, green for HR, and orange for Onboarding guides. You can also create a group per department to keep track of the SOP’s per department.
Create a SOP
So, it’s time to create your first SOP. Simply add a new item to your board. Under that item, fill in the SOP name, the person who created it, and Initial status (maybe “In Progress” or “Not Started”).
To stay on top of your SOP library, consider adding a dashboard showing the number of SOPs per department or created by each person.
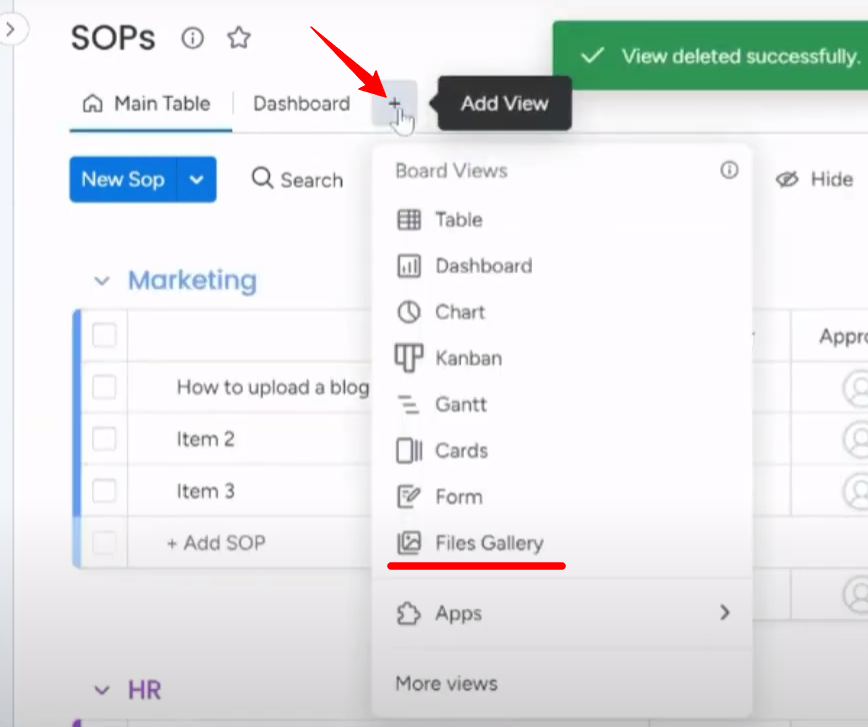
And for good measure, create a File Gallery where all your official SOP files will stay organized.
Here’s a pro tip: set up automations to streamline approvals and updating. For example, when an SOP moves to “Approver View” status, a notification will be sent to the assigned approver.
And when an SOP is marked “Done,” it’ll automatically stamp the “Final Date” cell with today’s date. Simple automations like that save tons of time.
A SOP management system like this really shines because it houses all your company’s procedures centrally and makes them accessible from anywhere.
Need help with monday.com onboarding? Take advantage of our 1-hour free consultation!