
Using monday.com? You’ll love this handy little trick called “match automation.” It automatically syncs up similar info between your different boards. It is super helpful for keeping things organized.
Let me break it down for you real quick.
Prerequisites for Automatic Matching
To set up automatic matching between boards, you need to do a few key things:
1. Ensure Matching Information
Step one for setting up automatic matching is making sure your boards actually have some common information to match up.
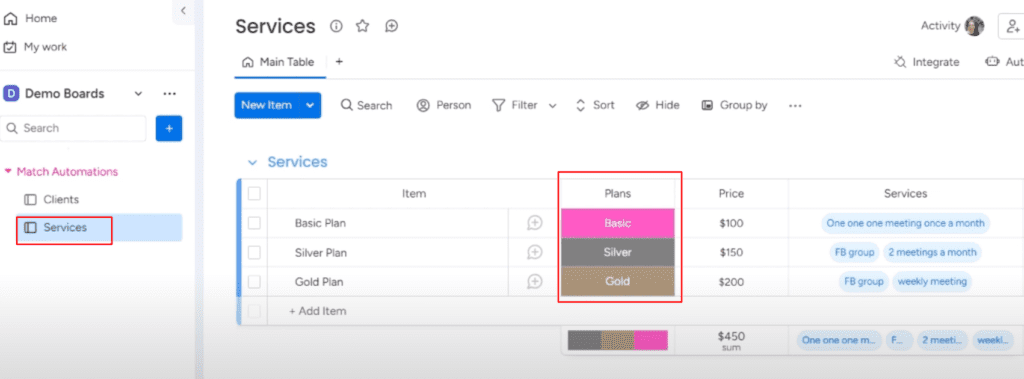
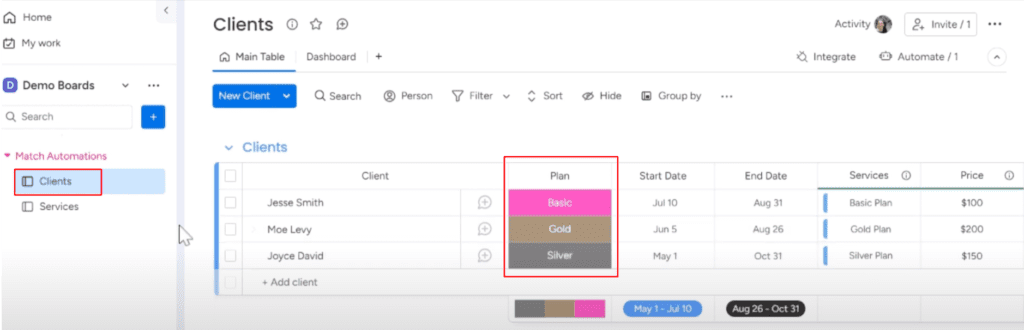
Let me give you an example to illustrate. Say, I’ve got a “Services” board with a column for “Plans”—Basic, Pro, Enterprise, and whatnot. And I want it to automatically match up with my “Clients” board. For that to work, my Clients board also needs to have a column listing out those same plan types.
The column names don’t need to be exactly the same—”Plans” on one and “Subscriptions” on the other is fine. The key is having identical information inside the column. As long as the data itself matches up between boards, monday.com can sync up those items automatically.
It works for all kinds of columns, be it text, numbers, or statuses.
2. Create Connected Boards Column
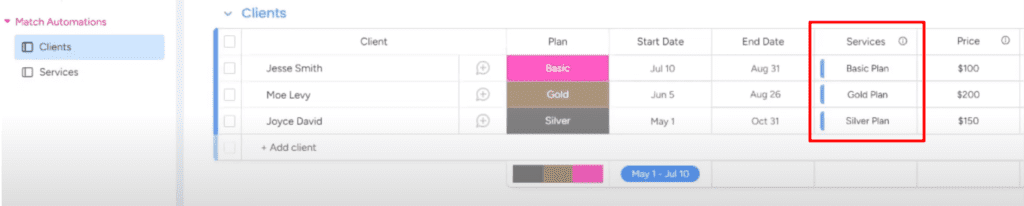
Now that you’ve got some matching fields set up between your boards, it’s time for step two: adding a “Connected Boards” column in one of them. It’s where all the matched information from the other board will get pulled into, allowing you to see the connections.
How to Set up the Match Automation
Here are the steps to set up automatic matching between two boards:
1. Create the Match Automation
It’s time to actually set up the automation that will sync everything up.
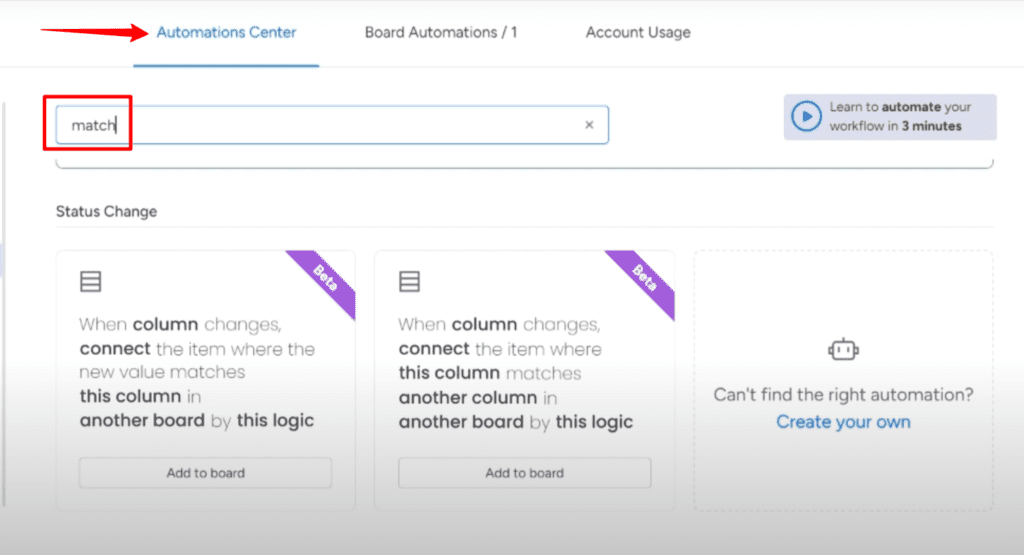
Head over to the Automation Center and search for the word “match.” You’ll see a few options pop up for different automation recipes. Pick whichever one makes sense for what you’re trying to do.
For example, you could choose “when an item is created” if you want new items that are added to your board to automatically be matched. Or, go with “when an item’s status changes” if that’s what you need.
In the automation setup, you’ll need to fill in the following:
- The board you want to connect
- The matching column in that board
- The Connected Boards column you created


Finally, test it out! Add a new item to one of the boards and watch the data appear in the Connected Boards column. Whenever an item is changed in the matching column in the source board, it will automatically match and connect to the item in the destination board.
Remember that to have an automation, you must have:
- Matching data fields in both boards
- A Connected Boards column with a 2 way connection
- The match automation set up
2. Using the Information
Once you’ve got match automation up and running, the possibilities for using it are endless. Here are just a few ways I’ve been able to put it to use:
- Syncing client info from my CRM board into project management. Now, client details auto-populate for each new project.
- Pulling product pricing from inventory into orders. No more cross checking prices, they sync automatically.
- Matching project status between my team’s board and the client-facing board.
The main benefits are huge time savings on manual data entry, plus having 100% synced information across all my boards.
I won’t lie; setting up match automation can have a learning curve. But once you get the hang of it, the automation is so powerful. Let me know if you need any help getting it configured for your boards. I’m happy to provide tips or free sessions.