
If you’re looking for a tool to get organized with your social media and content marketing, I’d recommend checking out monday.com. It’s been super helpful for me to plan and manage all my content strategies in one place, and I know that it can do the same for you.
Let me walk you through how I set up a board there to track everything.
Setting up the Board
The first thing to do is to create a board on monday.com. I recommend dividing the board into different groups to help you organize your tasks.
Having different groups let me categorize and filter tasks. I can view my weekly social media plans, brainstorm new topics, and archive old posts. Some possible groups could be:
- This Month (Planning current month’s activities)
- Next Month (Planning or scheduling next month’s content calendar)
- Ideas (Saving ideas before creating full posts)
- Completed (For completed tasks)

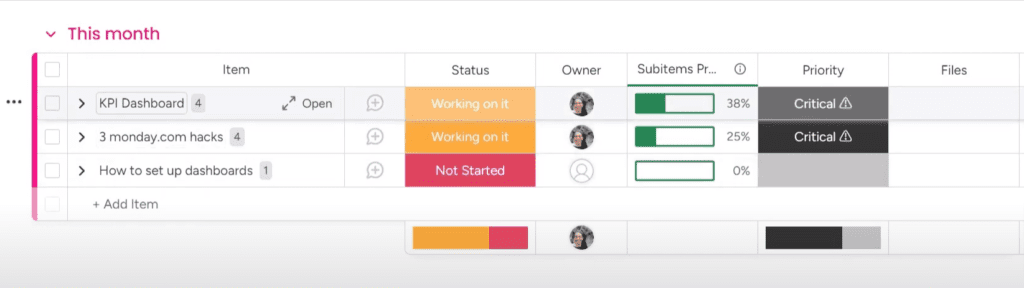
Adding Social Media Activities
Within the “This Month” section, add columns to track all the key details for each social media task. The ones you can include are:
- Status (This helps me see at a glance where each post is at. I use statuses like “To Do,” “In Progress,” and “Completed.”)
- Owner (Our team will assign tasks to each other so we know who’s handling what.)
- Priority (I’ll mark high priority tasks so we don’t let those slip through the cracks!)
- Progress bar (Lets me see how close we are to finishing a task.)
- Attachments (I can add images, draft text, or anything else needed for the post.)
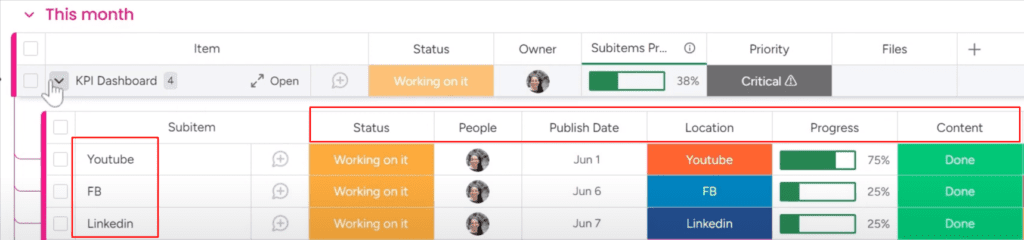
Creating Sub-Items
When I’m repurposing one piece of content for multiple platforms in different posts, I’ll create sub-tasks to track details for each one separately.
For example, if I have a new video going on YouTube, and then want to post about that video on Facebook, and LinkedIn, I’ll make sub-tasks like:
- Status (Tracking the progress of your tasks on each platform.)
- Published Date (Seeing when the content was published on each platform.)
- Location (Displaying where your content was published, like Facebook or YouTube.)
- Progress (Showing the progress of the tasks on each platform.)
It helps me see at a glance the unique status, publishing date, and platform for each sub-task.
The platform also makes it easy to set up automations, so I don’t have to manually move everything once it’s done. I have one set up that automatically marks tasks “Complete” and moves them to my “Completed” group once I mark them at 100% progress. Such a timesaver!
Using the Calendar View
The calendar is so handy for mapping out the publishing schedule. To set it up, click the plus button and search for “calendar” to add it to the board.
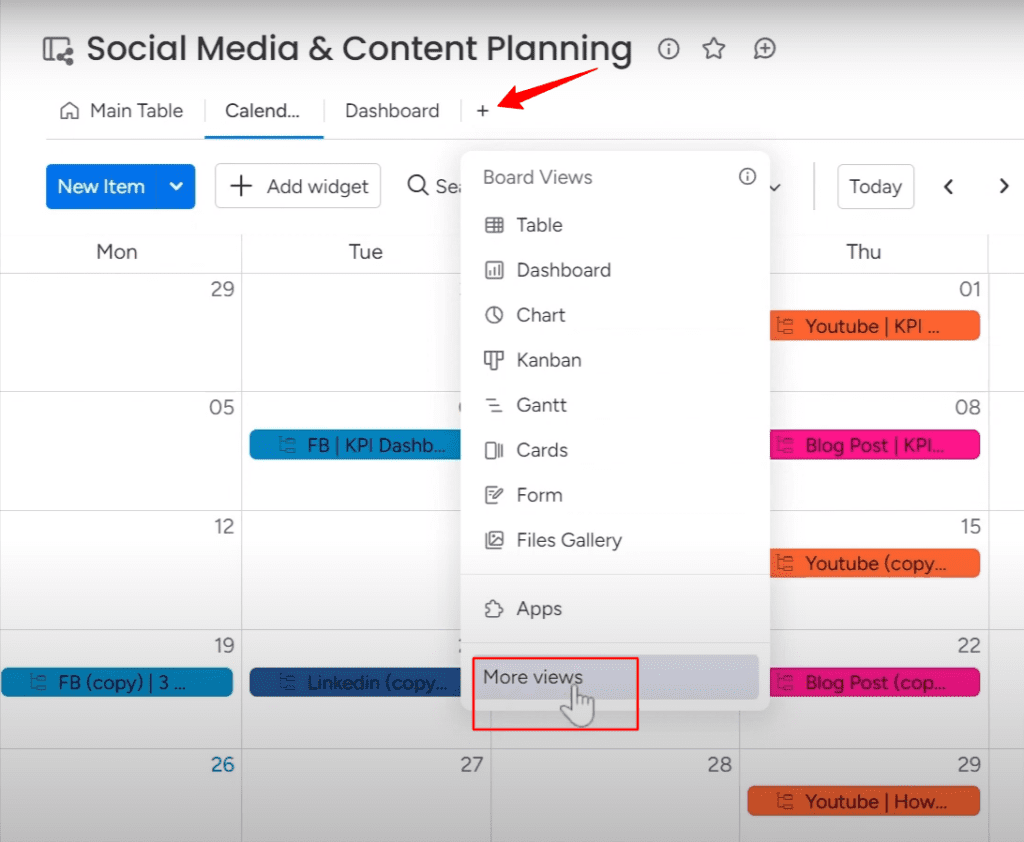
From the settings, pull in the “Publish Date” column in the calendar. It’ll populate the calendar with all the scheduled posts.
Here’s a little trick I like to use, I color code the calendar entries based on which social platform the content will go on. So, YouTube videos show up as orange, Facebook posts are blue, etc.
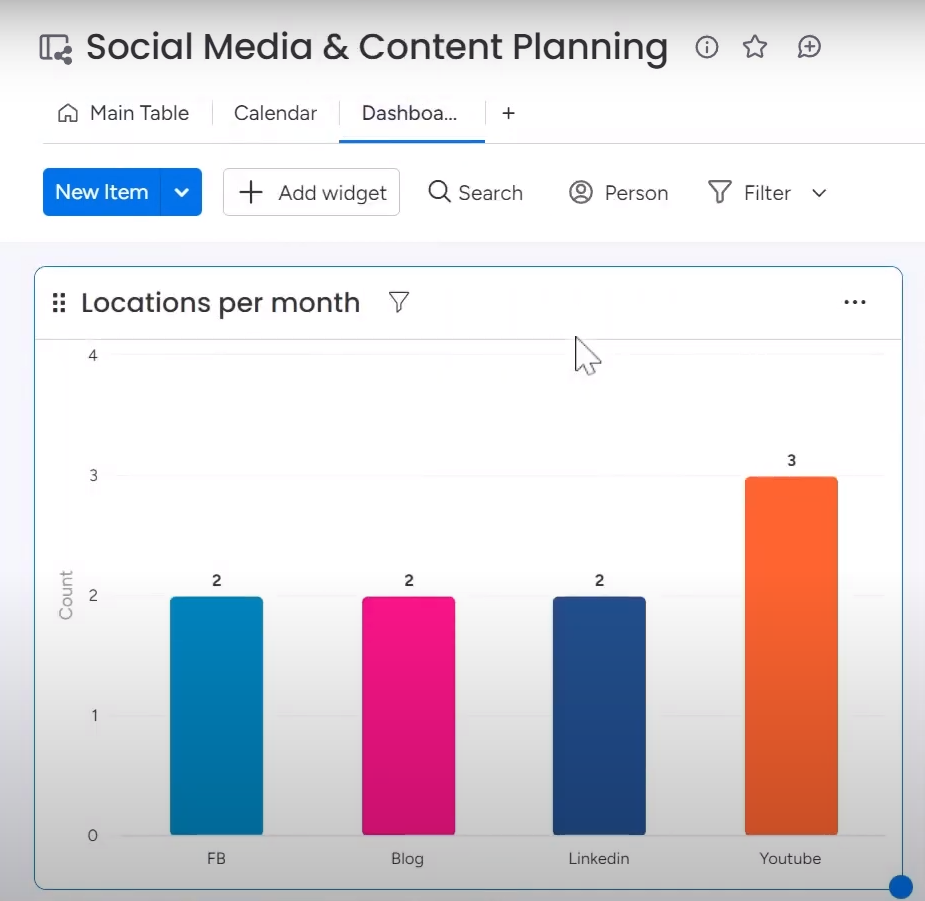
Creating a Dashboard View
Another view I find super helpful is the dashboard. Here, you can add different widgets to monitor key stats at a glance, like:
- Number of posts completed this month
- Status of upcoming content
- Breakdown of posts per social platform
It allows keeping tabs on how the social media strategy is progressing.
You can also set up alerts tied to due dates. So, if you have a post needing approval 2 days before it’s scheduled to go live, you’ll get a notification reminder.
Let me know if you want any tips on setting up your dashboard. I’m happy to share how I have mine configured to best track my social media activities.