
Keeping track of projects, tasks, and time can get messy, especially when working with a fast-moving team. That’s why having the right setup in monday.com is so important. It’ll help you keep track of all tasks and finish them within the deadline.
In this blog post, I’ll follow a real example from a cyber security company that I helped with the setup. Their team needed something easy to use but still effective in tracking every project.
However, this setup will work for any team. Whether you’re in tech, marketing, or even a school club, you can tweak it to fit your needs.
I’ve covered the entire process in a video tutorial. If you’d rather watch it in action, check it out below!

Why the Setup Works for a Company
Tracking projects, tasks, and time is essential for teams that deal with multiple clients and deadlines. For a cyber security company, this is even more important.
Their work involves both large-scale projects and smaller, one-time tasks, all while managing employees who are outsourced to client offices.
Here’s how monday.com helps them stay organized:
a. Managing Client Projects
This company runs different projects for its clients, like penetration testing or ongoing security assessments. Some projects follow a clear step-by-step process, while others are continuous. This setup allows them to:
- Create a dedicated board for each project
- Break it down into smaller tasks
- Assign responsibilities to the right team members
b. Tracking Outsourced Employee Work
Many employees work directly with clients for part of the week. For example, a chief information security officer (CISO) officer might spend one or two days at a client’s office.
Since the company still manages these employees, they need a way to track their time and tasks. The features in monday makes this easy by:
- Assigning employees to specific projects
- Logging their work hours
- Keeping a record of all completed tasks
c. Monitoring Time for Billing and Efficiency
At the end of each month, the office manager gathers work-hour data to calculate client billing. But without proper tracking, this can become a headache. But with this setup, they can:
- Compare planned vs. actual time spent on projects
- Generate reports on employee hours
- Use time data for accurate client billing
This helps them understand project costs, prevent overwork, and make informed business decisions.
How to Track Projects, Tasks, and Time in monday.com
For this setup, we’ll be using the 7pace Time Tracking app. This tool makes it easy to log and manage work hours directly in monday.com.
If you haven’t installed it yet, don’t worry, check this video that walks you through the installation process. Since it’s already set up here, we’ll jump straight into how to use it. If you need help getting started, be sure to check out that tutorial first!
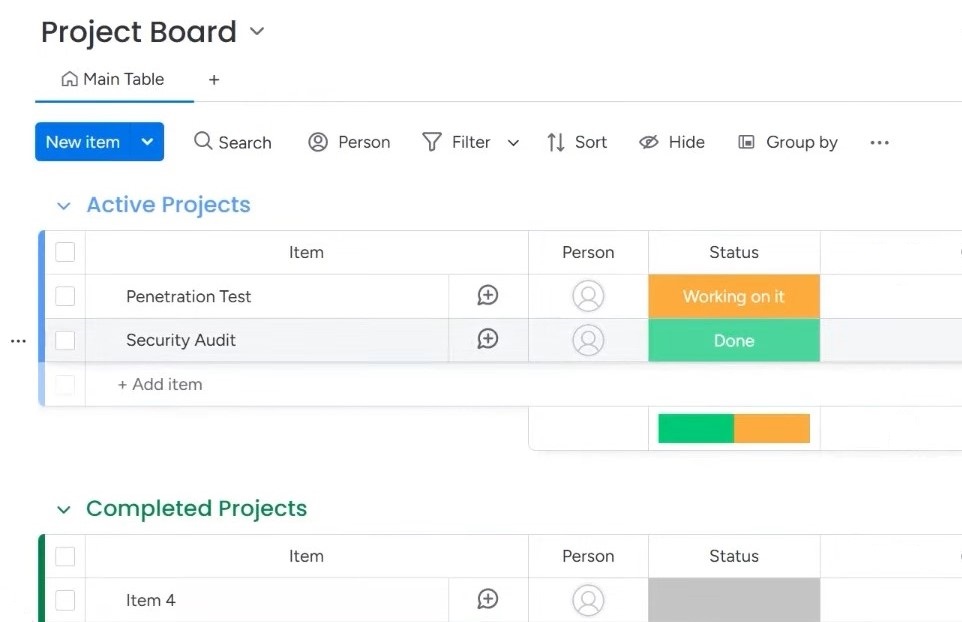
1. Setting Up a Project Board in monday.com
Setting up a project board is quite simple. First, create a new board to start tracking your projects. The board will act as a central place for all your project-related information.
You can name it something like “Project Board” or “Client Projects” to match your team’s needs.
Once your board is set up, it’s important to organize the tasks in a way that makes sense. You can change the task group names, such as “Active Projects” and “Completed,” to help your team quickly see what’s currently being worked on and what’s already done.
Next, you’ll need to add some important columns to your board. These columns will help you track essential information for each project.
i. General Columns
These are the columns that come with every group of tasks.
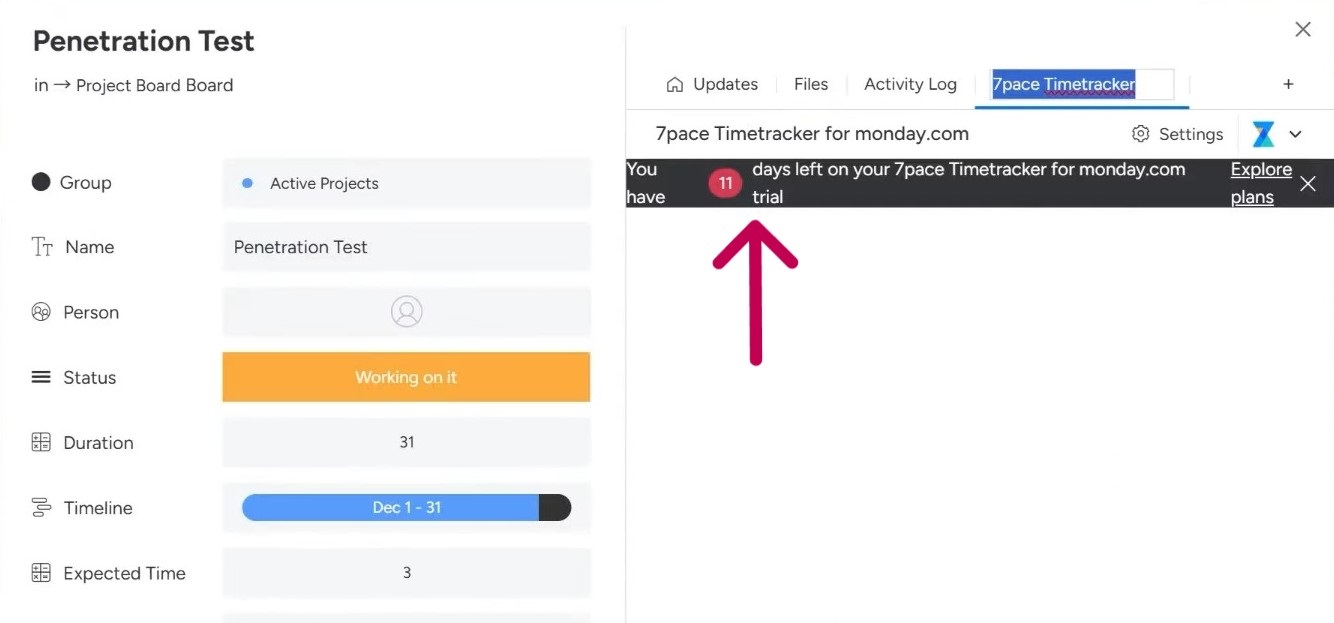
Tasks: The item column on the board is for tasks. I’ll rename the tasks accordingly. For example, the client wanted Penetration Tests and Security Audit, so these will be two separate tasks in that column.
Person: This column lets you assign a person or team to each task or project, so everyone knows who is responsible for what.
Status: Use this column to track the progress of a project or task. You can set statuses like “Not Started,” “In Progress,” or “Completed.”
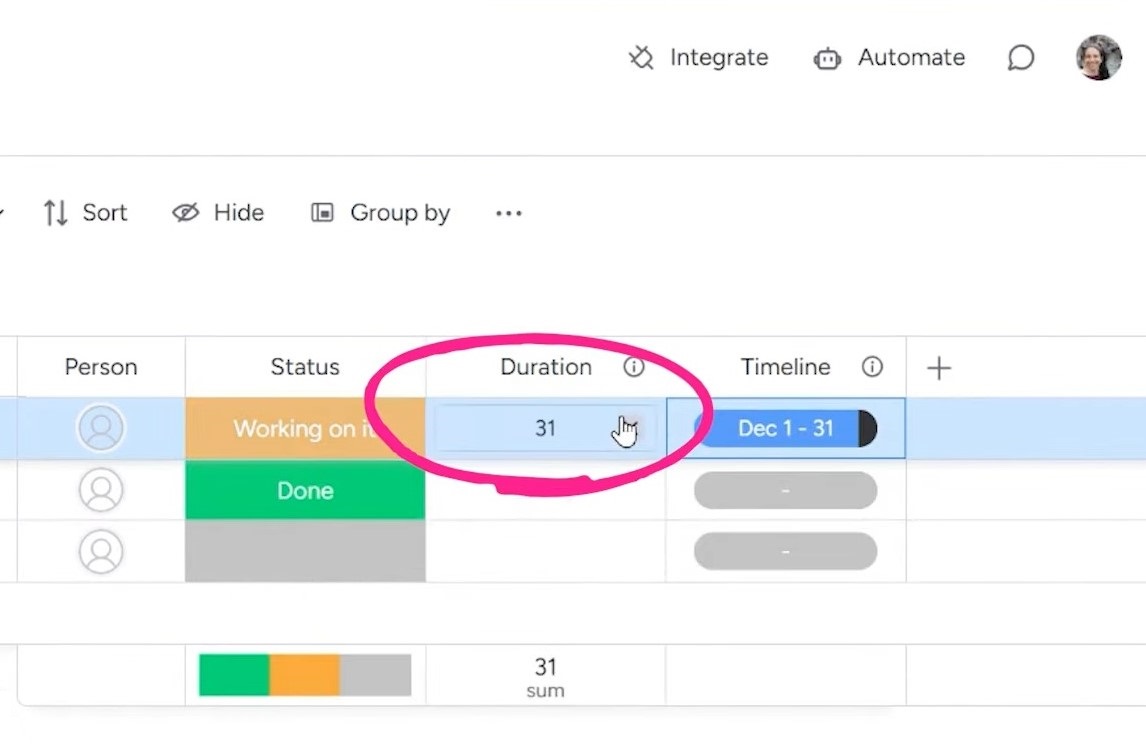
There is also a date column, but I’ll delete that since the cybersecurity company wanted a timeline column instead.
ii. Other Columns
I’ll add this column to meet the specific needs of this project. You can
Timeline Column: Instead of a standard date column, I’ll use a Timeline Column, which gives a clear visual of each project’s duration.
It’s a combination of “TImeline+Numeric” columns, so it’ll show the start and end dates of a task along with the duration of that timeline.
Time-Tracking Columns: Next, I’ll add two numbers columns. One will be the Expected Time column (to calculate how much time was planned for a project) and another will be the Actual Time column (for recording the real time spent on the project).
To make comparisons easy, we’ll add a Formula Column later to calculate the difference between expected and actual time.
Sub-Items: Some projects require multiple steps. Instead of cluttering the main board, I’ll use Subitems to break them down.
Subitems are perfect for listing smaller tasks within a project. For example, under a Penetration Test, you could have tasks like:
- Run vulnerability scan
- Analyze test results
- Write security report
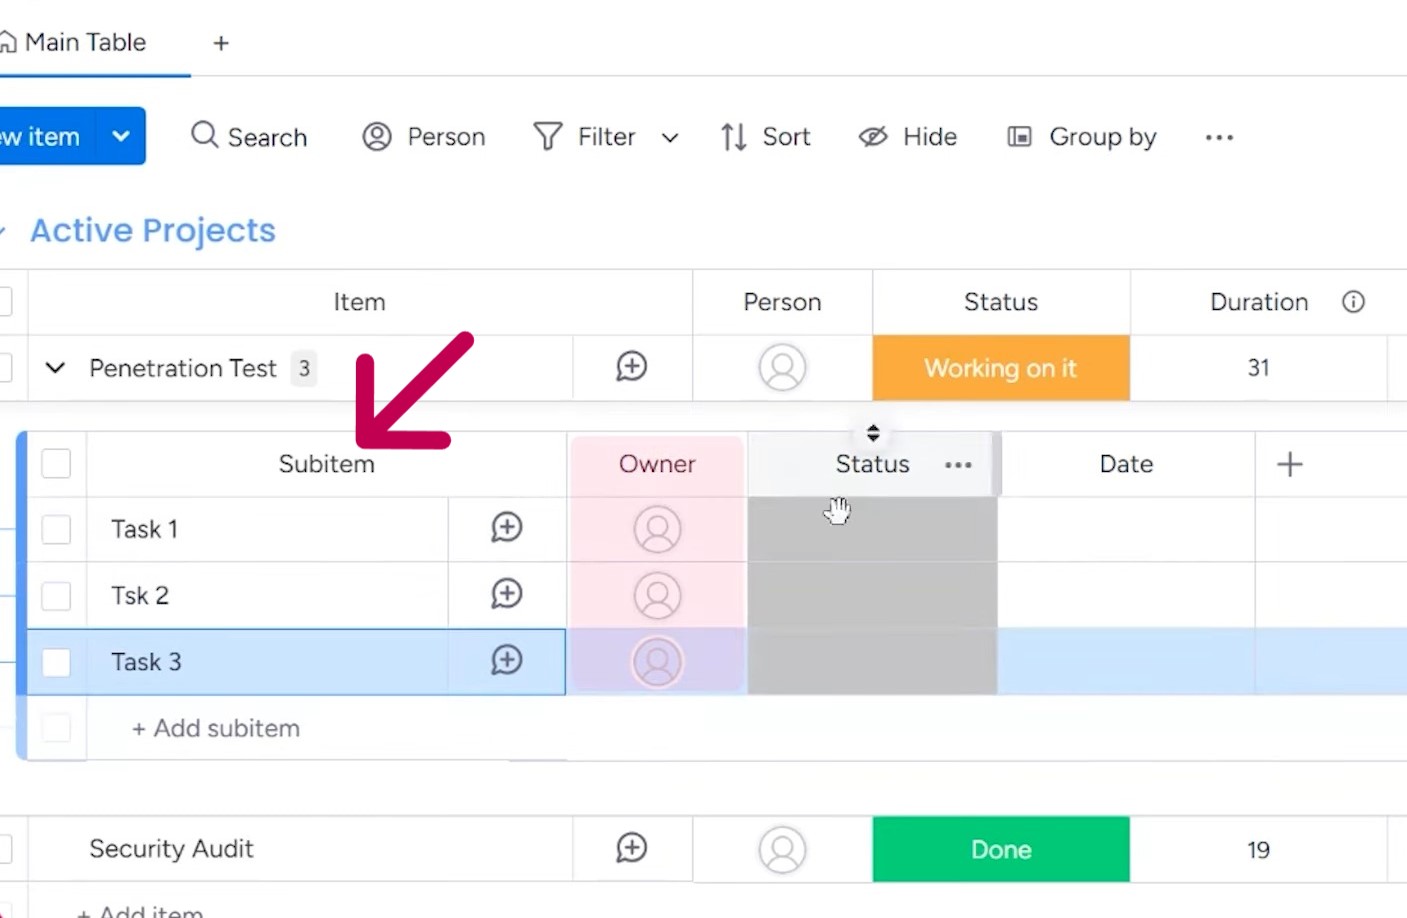
Each subitem can have its own Owner, Status, and Time Tracking columns, making it easy to see progress at a task level.
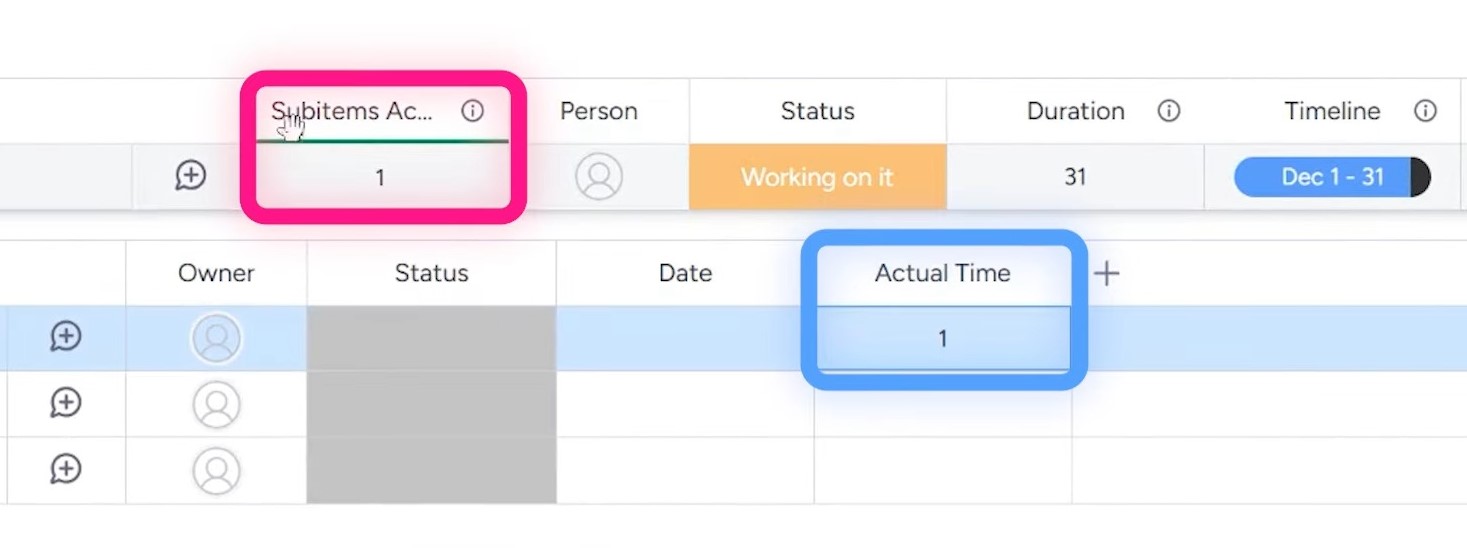
iii. Automating Time Summaries
To keep track of time accurately, we’ll roll up the total time spent on subitems into the main project item. Here’s how:
- Click on the three dots in the Actual Time column.
- Select Show Summary on Parent Item.
This automatically adds up all subitem time entries, displaying a total at the project level.
iv. Setting Formula to the Formula Column
Formulas in monday.com help automate calculations, saving time and reducing errors.
In this case, we want to track how much time is left on a project by comparing Expected Time with Actual Time.
Since Actual Time is tracked at both the project and task levels, we need to sum these values and subtract them from the Expected Time. Here’s how:
- Click on the three dots in the Formula Column.
- Select Settings to open the Formula Builder.
- Use the AI-powered Formula Builder if you’re unsure how to write the formula.
- Write a prompt about the kind of formula you want, and it will give you the desired formula
- Click “Insert” and then “Set formula” to apply the formula.
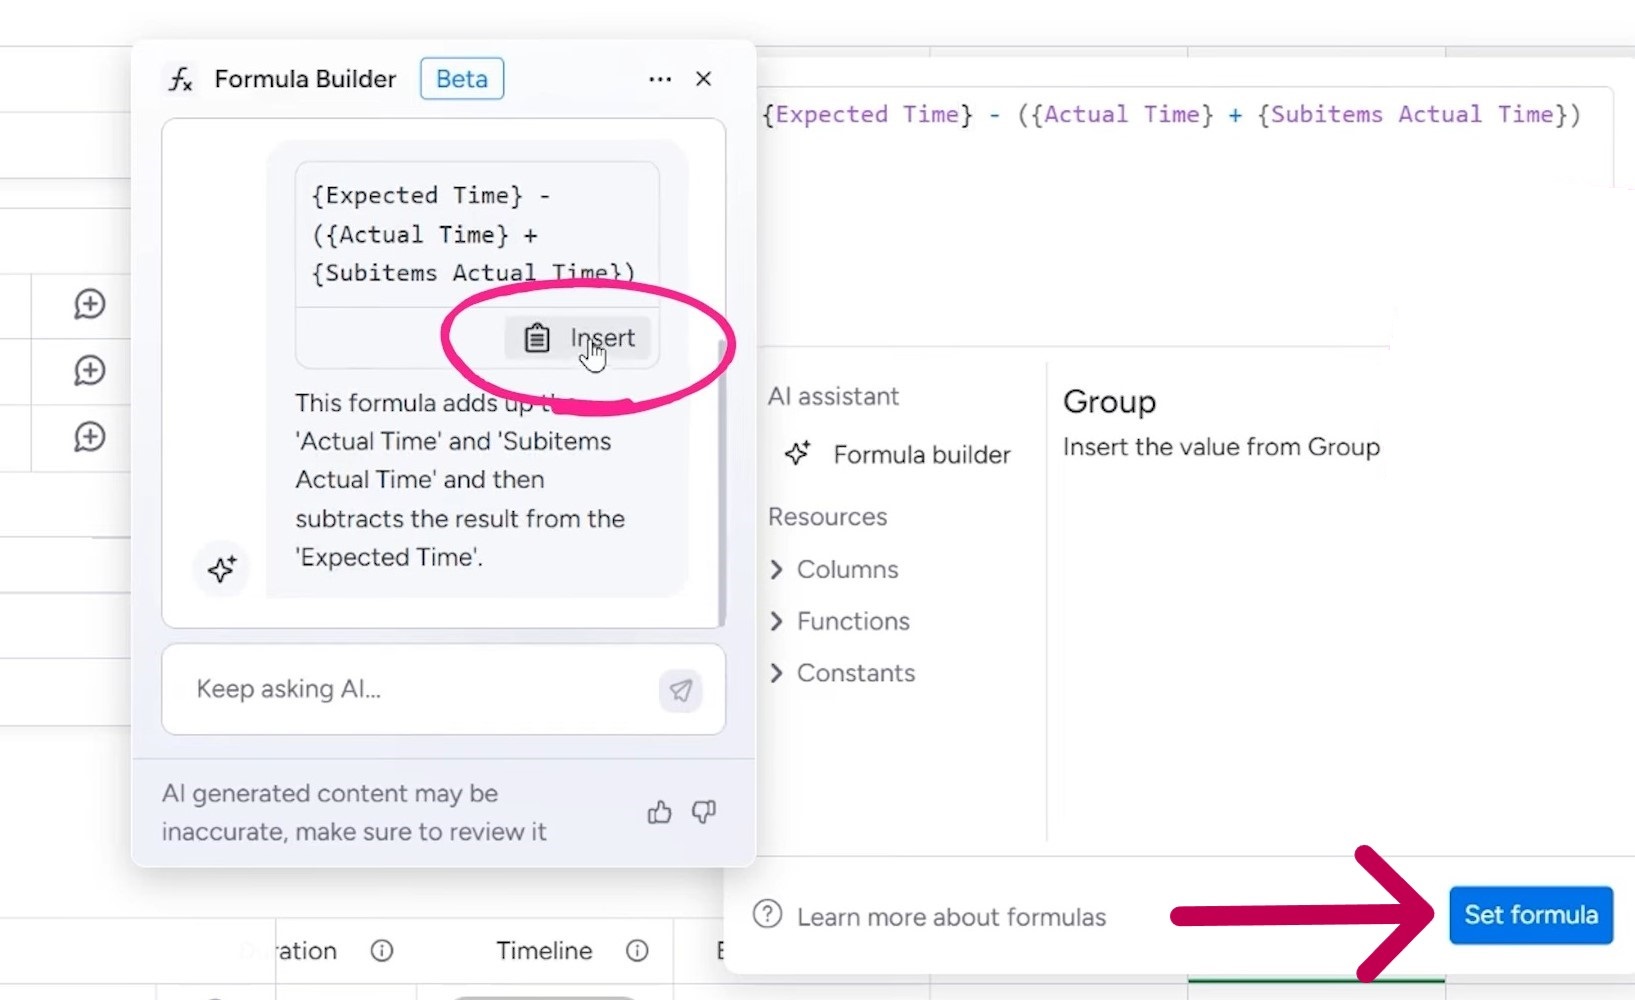
You can also test the formula to make sure it works. Enter these sample values:
- Expected Time: 3 hours
- Actual Time: 1 hour
- Subitem Actual Time: 1 hour
The result should show 1 hour left to the column where the formula is applied. This formula ensures teams can quickly see if they’re on track or running over time.
2. Adding 7pace Timetracker and Automations
For time tracking, you have to add the 7pace Timetracker app from monday Marketplace. After that, you need to add it to the specific task.
To do this, go to your board and click the plus (+) button beside a task. When the task opens, click on the (+) button on the top right corner. Search for 7pace, and when it appears, add it to the item level first.
You can repeat the same process to add the app to the sub-item level, so you can track time at both levels.
You can make time tracking even easier with automations. You’ll notice two columns for actual time, but since we’re tracking time in 7pace, we need an automation that transfers the tracked time into those columns.
- Click Automate and search for 7pace in the automation options.
- Choose the automation: “When total time tracked on an item changes, update the actual time column.”
- Select the actual time column and apply the automation.
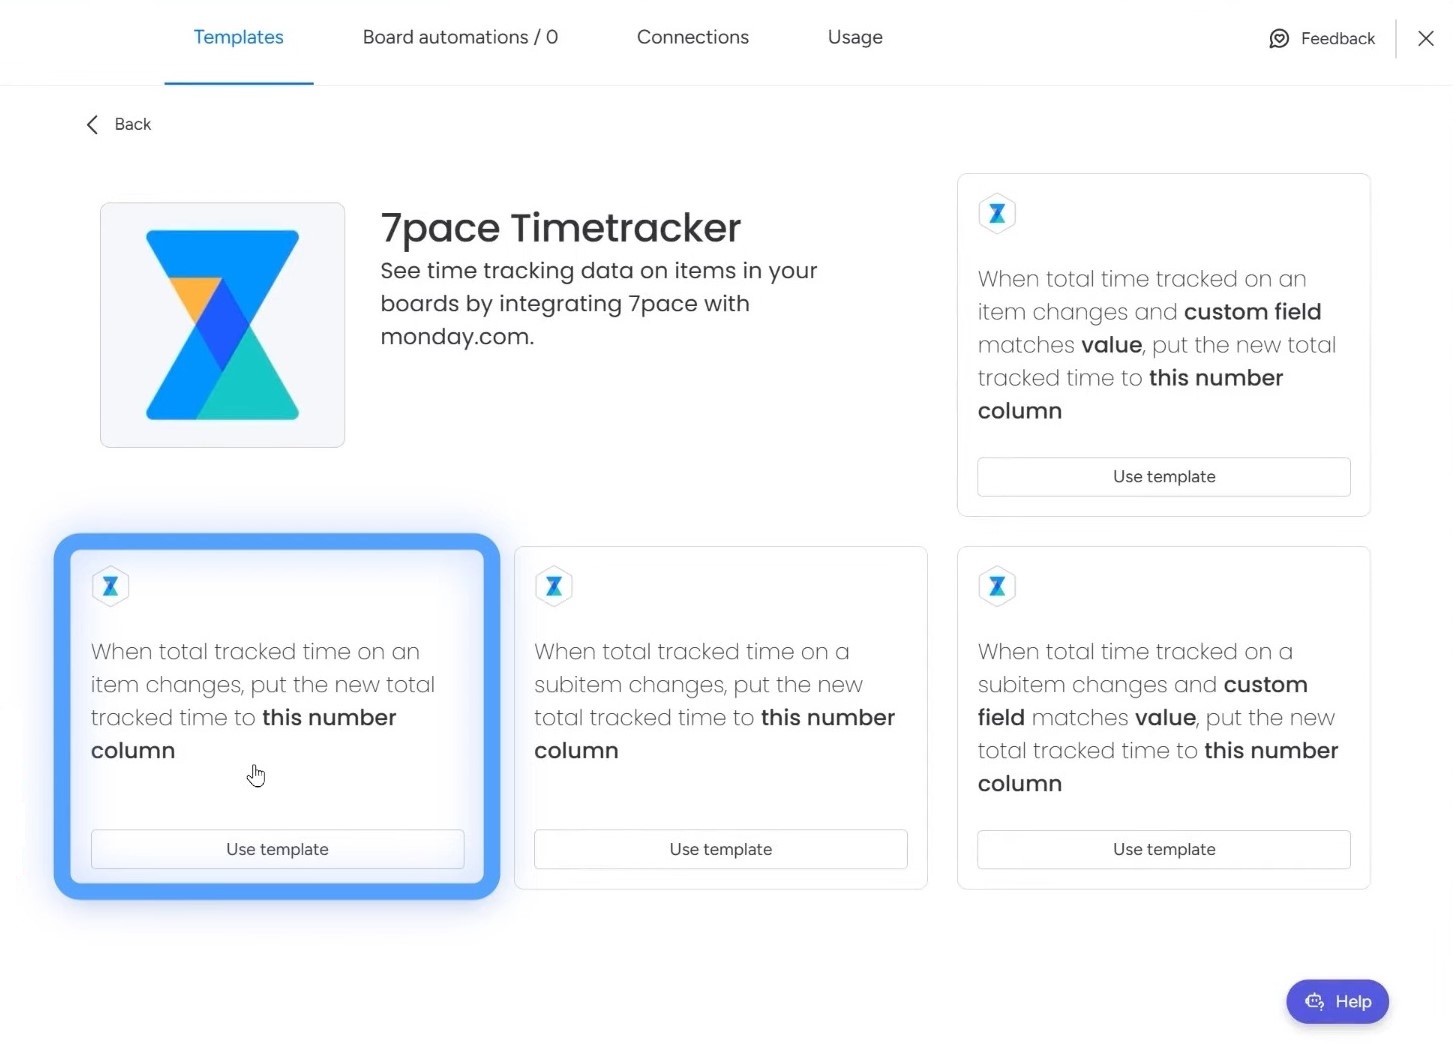
Since we also track time at the sub-item level, we need to repeat these steps for sub-items. Once set up, 7pace will automatically update both actual time columns whenever time is logged.
By adding this automation, you can easily compare expected time vs. actual time without manually entering data.
3. Adding 7pace App Features Timetracker to the Columns
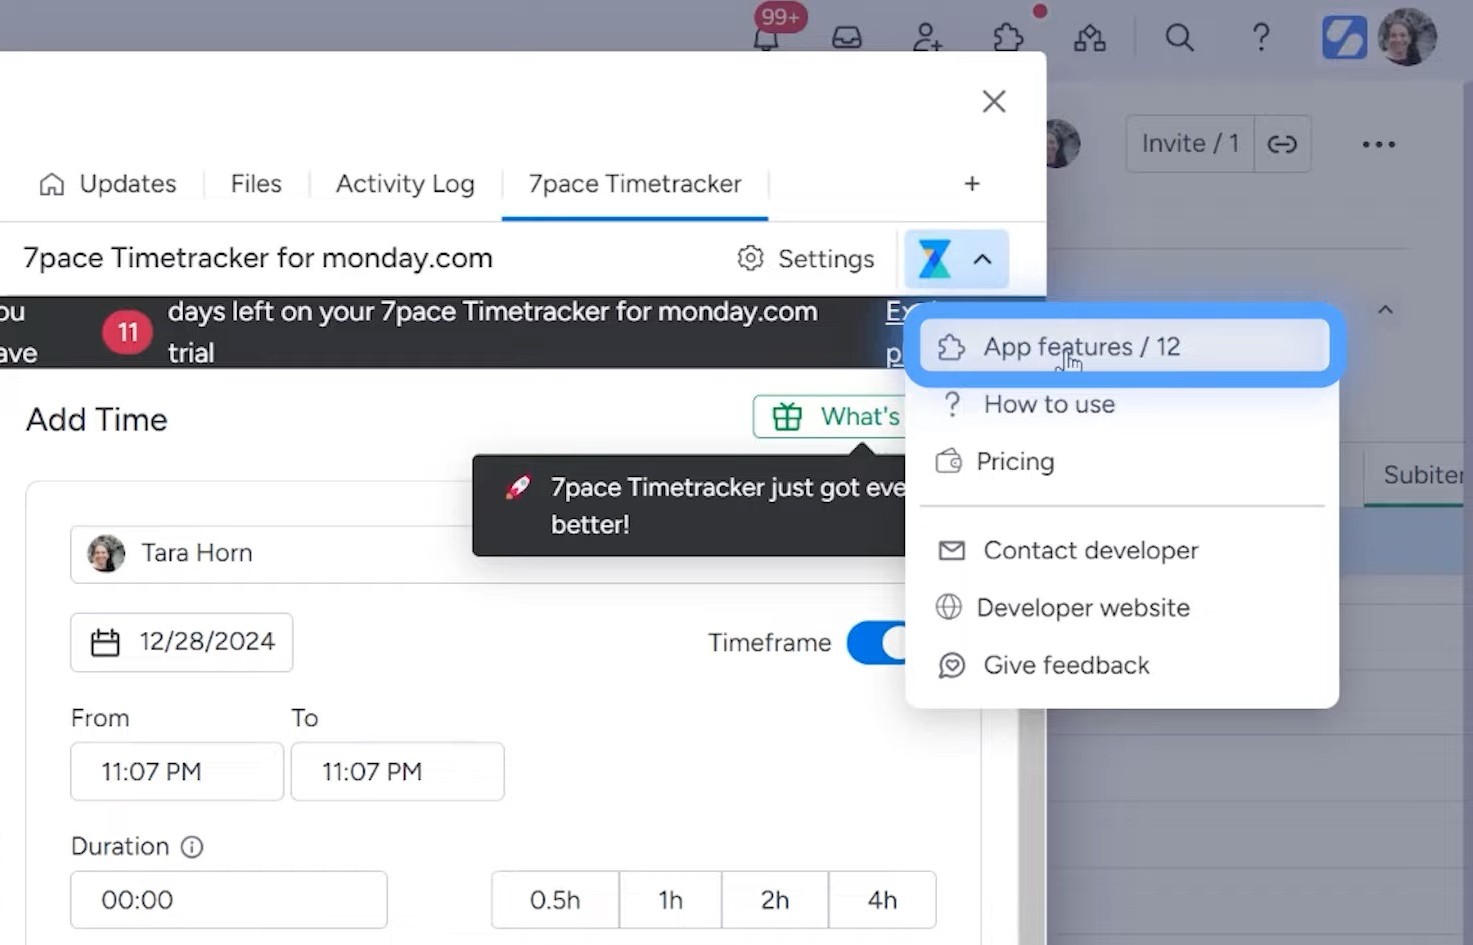
Before using 7pace Timetracker, there’s one more setting to configure. You need to add a custom field for tracking time by clients or projects.
To do this, open the 7pace app settings and navigate to App Features. Click “Create new field,” then choose Client or Project as a dropdown option. This lets you track how much time is spent on specific clients or projects.
Once the custom field is set up, you can assign tracked time to a client or project. Open a task, enter the time spent, select the client, and hit Save. If sub-items also have time logged, the total will automatically update at the item level.
For example, if a task originally had one hour logged and you add two more hours, the system calculates and updates the total time. The same applies at the sub-item level, ensuring everything rolls up correctly.
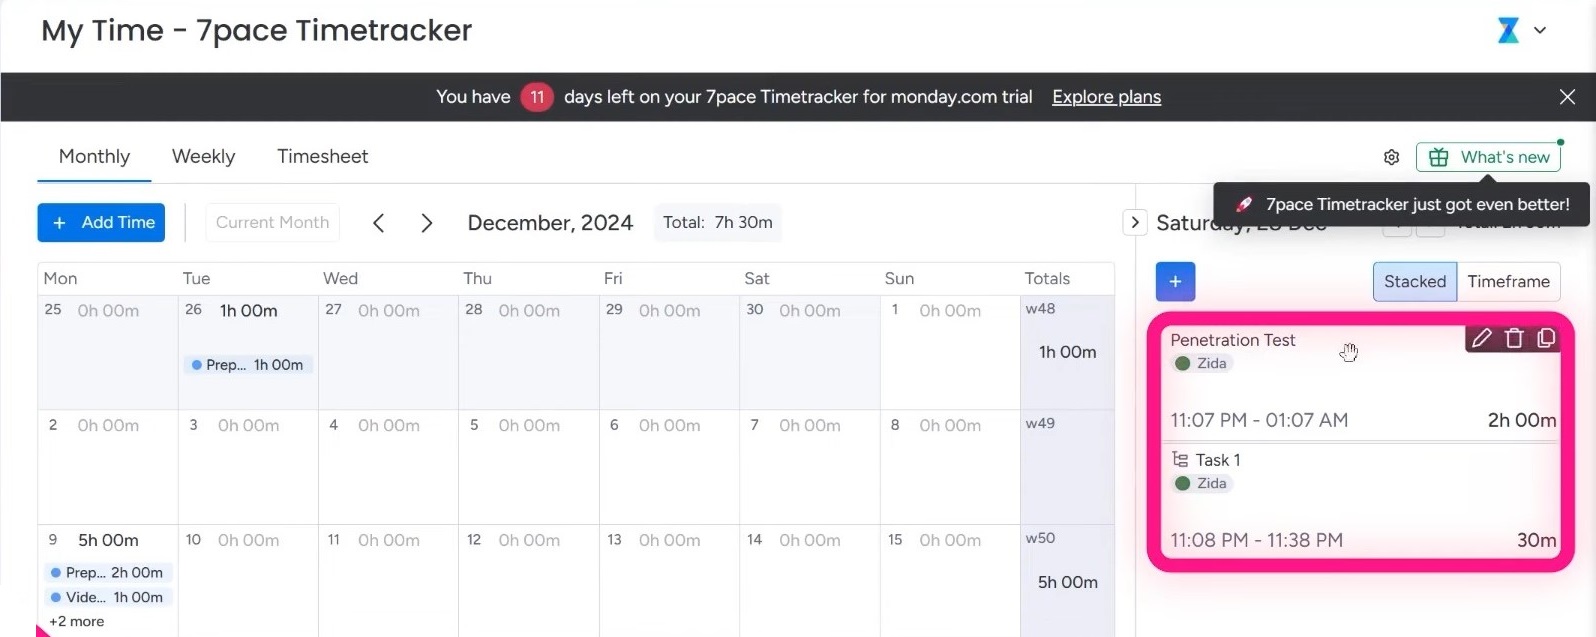
With everything in place, you can now use 7pace Timesheets to see tracked time in different formats, like a weekly view or a timesheet. You can also sort by client to see time breakdowns.
To access that, go to the “My Time” menu on the left panel.
The “All Time” option on the left panel will give you access to all of your time tracking data, which you can sort by clients, projects, tasks, etc.
You can also share the data. Export it at the end of the month for reports. Now, all time tracking details are in one place, making it easy to manage and review.
4. Adding Dashboards, Numbers, and Widgets
To take your board to the next level, you can add dashboards. Dashboards give you a clear, visual way to track your projects and time data.
Start by clicking the plus (+) button to add a new dashboard view. From here, you can add widgets to display key project details.
One useful widget is the Numbers Widget. This lets you track important values, like expected time for all projects. Simply select the expected time column, set a unit (like hours), and add it to the dashboard.
If you want to compare it with actual time, just duplicate the widget and change it to pull data from the actual time column.
Beyond tracking time, you can add other widgets for better project visibility.
- Gantt View – See all your projects in a timeline format.
- Battery Widget – Track the status of different projects at a glance.
- Sorting Options – Organize data by client or group for quick insights.
For even deeper tracking, you can integrate 7pace Timetracker data into your dashboard. This way, all your time-tracking details are in one place, making reporting and project management even easier.
Simpleday can help you implement monday.com into your workflow, just like we did for a cyber security company.
Let us show you how to customize your boards, integrate time tracking, and create dashboards that deliver real-time insights. Contact us to learn more.