
Updating existing items on your monday.com board can be a bit tricky. Many users find it challenging to keep their data current without spending a lot of time manually editing entries. But SuperForm can solve this problem by offering a way to update your items directly through forms. The app simplifies the process of updating information, saving you time, and reducing the chance of errors.
In this blog post, I will walk you through setting up and using SuperForm on monday.com. My goal is to help you make the most of this tool to make your workflow more efficient.
If you want to watch a step-by-step video tutorial, please check the following:
Updating Information via Forms: Use Cases and Benefits
Updating existing items on monday.com via forms can be incredibly useful in various scenarios.
One common situation is client onboarding. When you’re bringing new clients on board, you often need to gather and update their information multiple times. Instead of manually entering these updates, you can use a form to simplify the process. This way, clients can easily update their details themselves whenever necessary.
Another scenario is updating contact information. Imagine you maintain a large database of contacts. Over time, people’s email addresses, phone numbers, or company details change. Allowing them to update their information directly through a form ensures your data remains current without the hassle of back-and-forth emails or phone calls.
There are clear benefits to letting users update their information via forms:
-
- No-signup data editing. It allows external users to view and edit data without accessing the monday.com board directly.
-
- Flexibility. Different users may require only viewing certain read-only fields. Others need editing options to update specific details. The forms can be tailored precisely for each use case.
-
- Improved workflows. Data collection through forms allows teams to consolidate feedback collection into pre-filled feedback forms. Supervisors can gain visibility through dashboard reports on form submissions.
-
- Enhance accuracy. When users input their own information, the likelihood of errors decreases. They are more likely to provide correct and up-to-date details, ensuring your records are accurate.
Creating the Form with SuperForm App
Suppose, we have a client onboarding board that we want our clients to view and edit information (if necessary) without actually accessing the board.
The first step is adding the SuperForm app to your account from the monday marketplace. Then, you need to add the app to that client onboarding board.
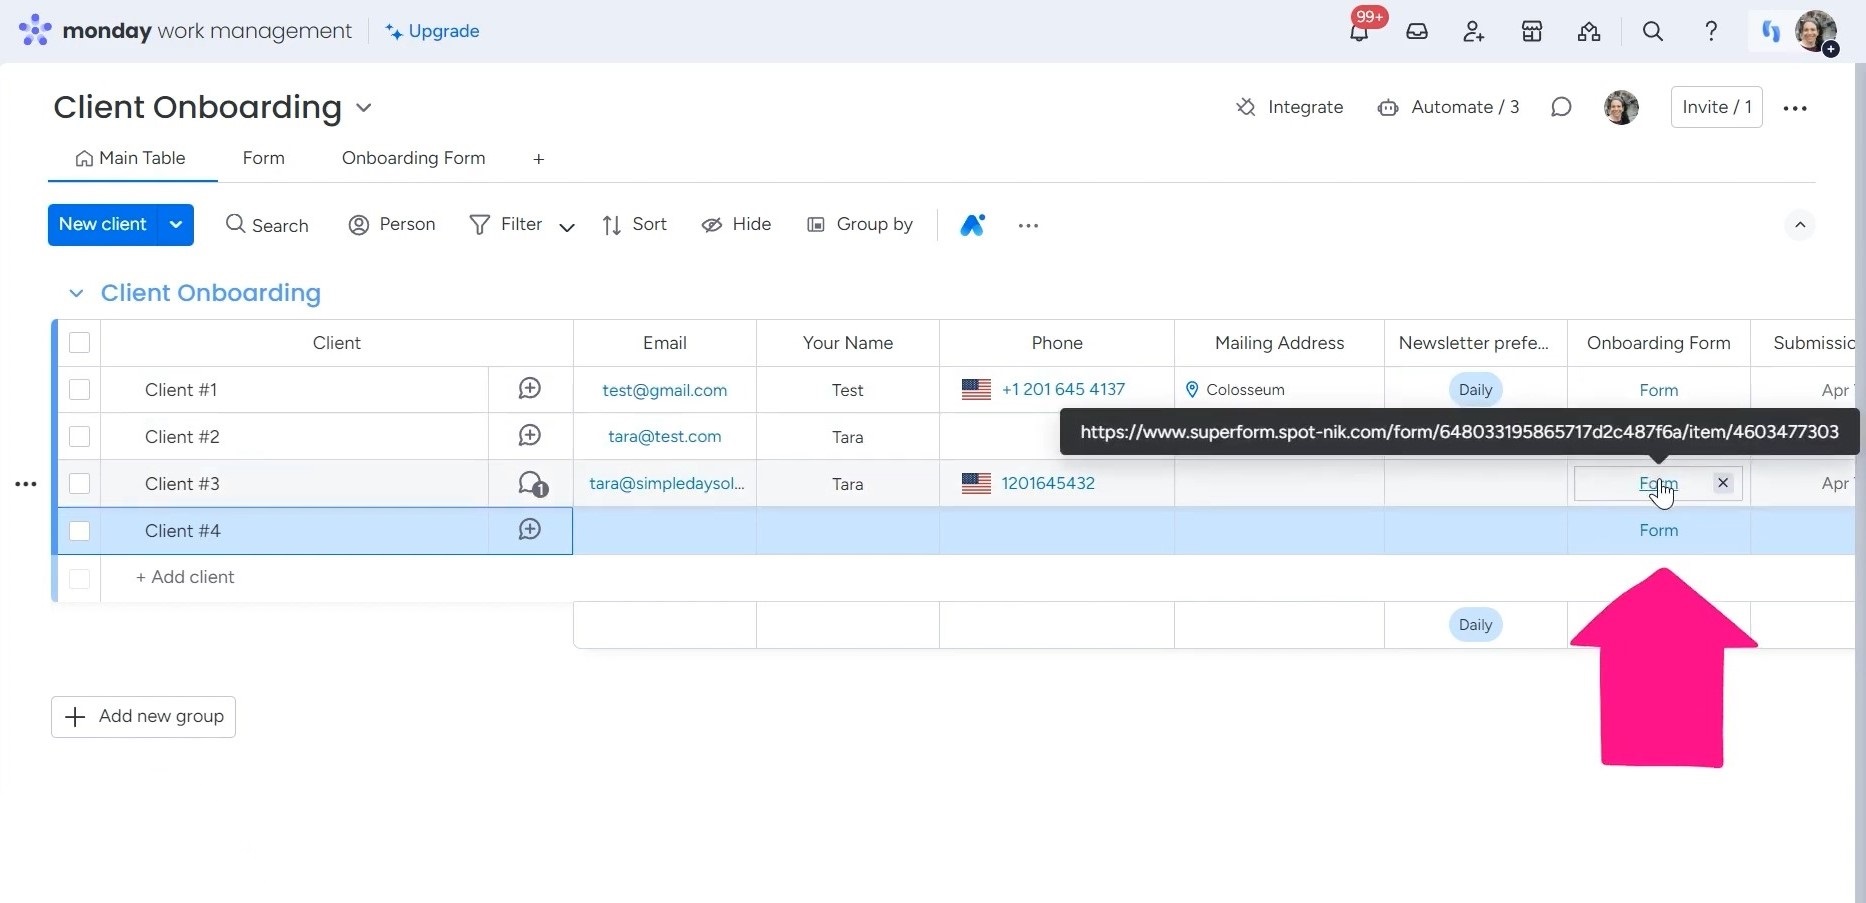
Click the plus button on the border menu and add the app to the board from there. So, for each client, I’ve created a form that is automatically populated with an automation. Clients can also view the information of these forms with a shared link.
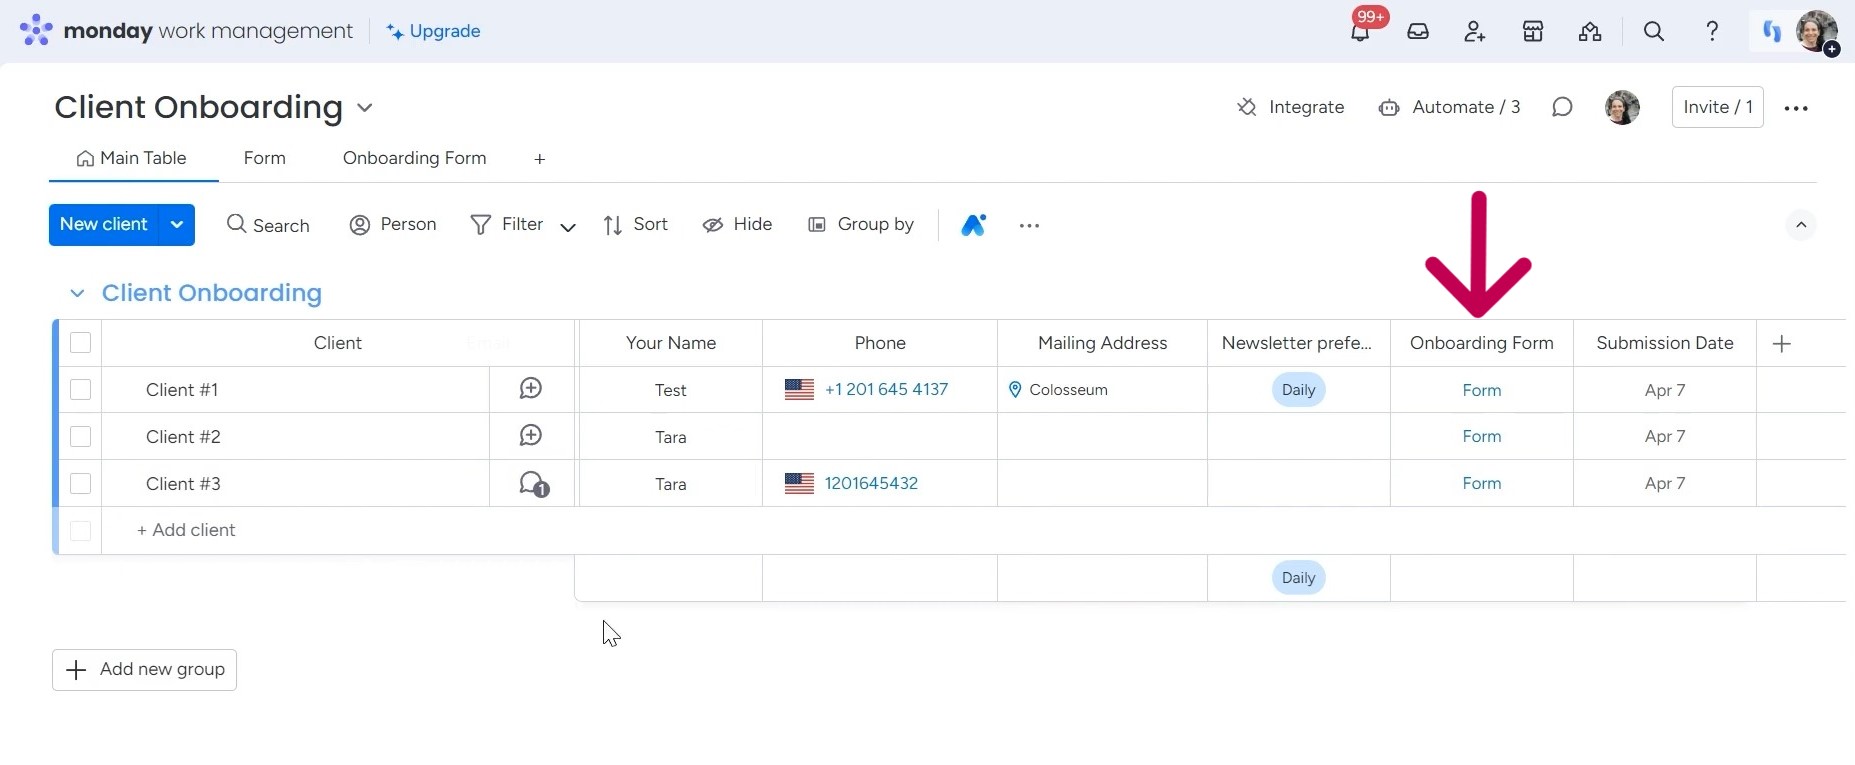
The first step of setting this workflow up is to design your columns. You can create any columns that suit your needs. Once the columns are arranged, you need to establish a link column. This special column will contain the connection to the forms. Over in this section, you’ll see it is marked as the link column since that is where we will place the form’s URL.
With the columns prepared, the next task is building the form. I’ve already created a form that I’ll use in this tutorial.
When you open the form, you’ll find questions to gather important details. When configuring the form’s settings, you must select “Update” rather than “Insert” here.
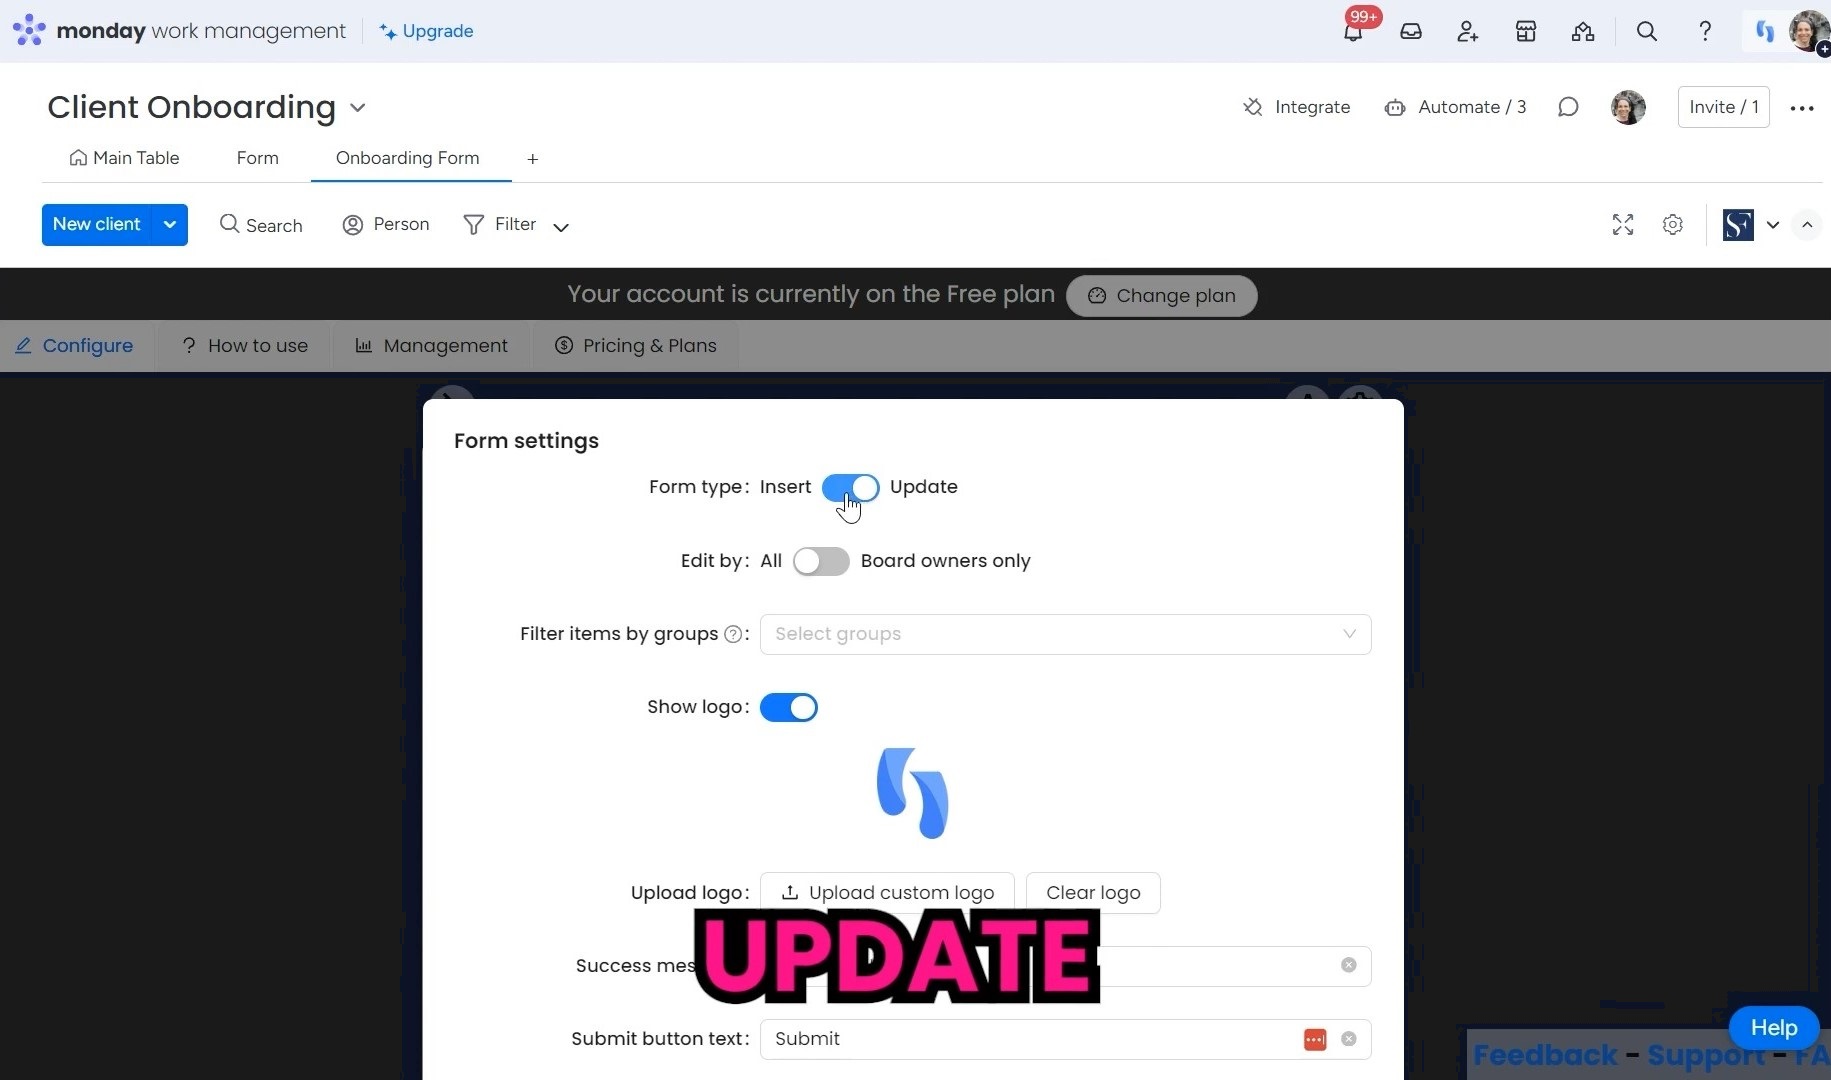
“Insert” will generate a new record each time instead of updating an existing one like we need. Getting this right ensures the form smoothly links our data to the prepared columns on the board.
Now, we’ll do some customization to the columns that we want to be in the form. For example, selecting “Company Name” as a required field. Meanwhile, fields like “Submission Date” or something else don’t require changes after the first input, so hiding them makes sense.
The options you want the clients to edit should have the “Allow update” box checked on. If you want to keep some fields visible to the clients without the option to edit, just uncheck the “Allow update” box.
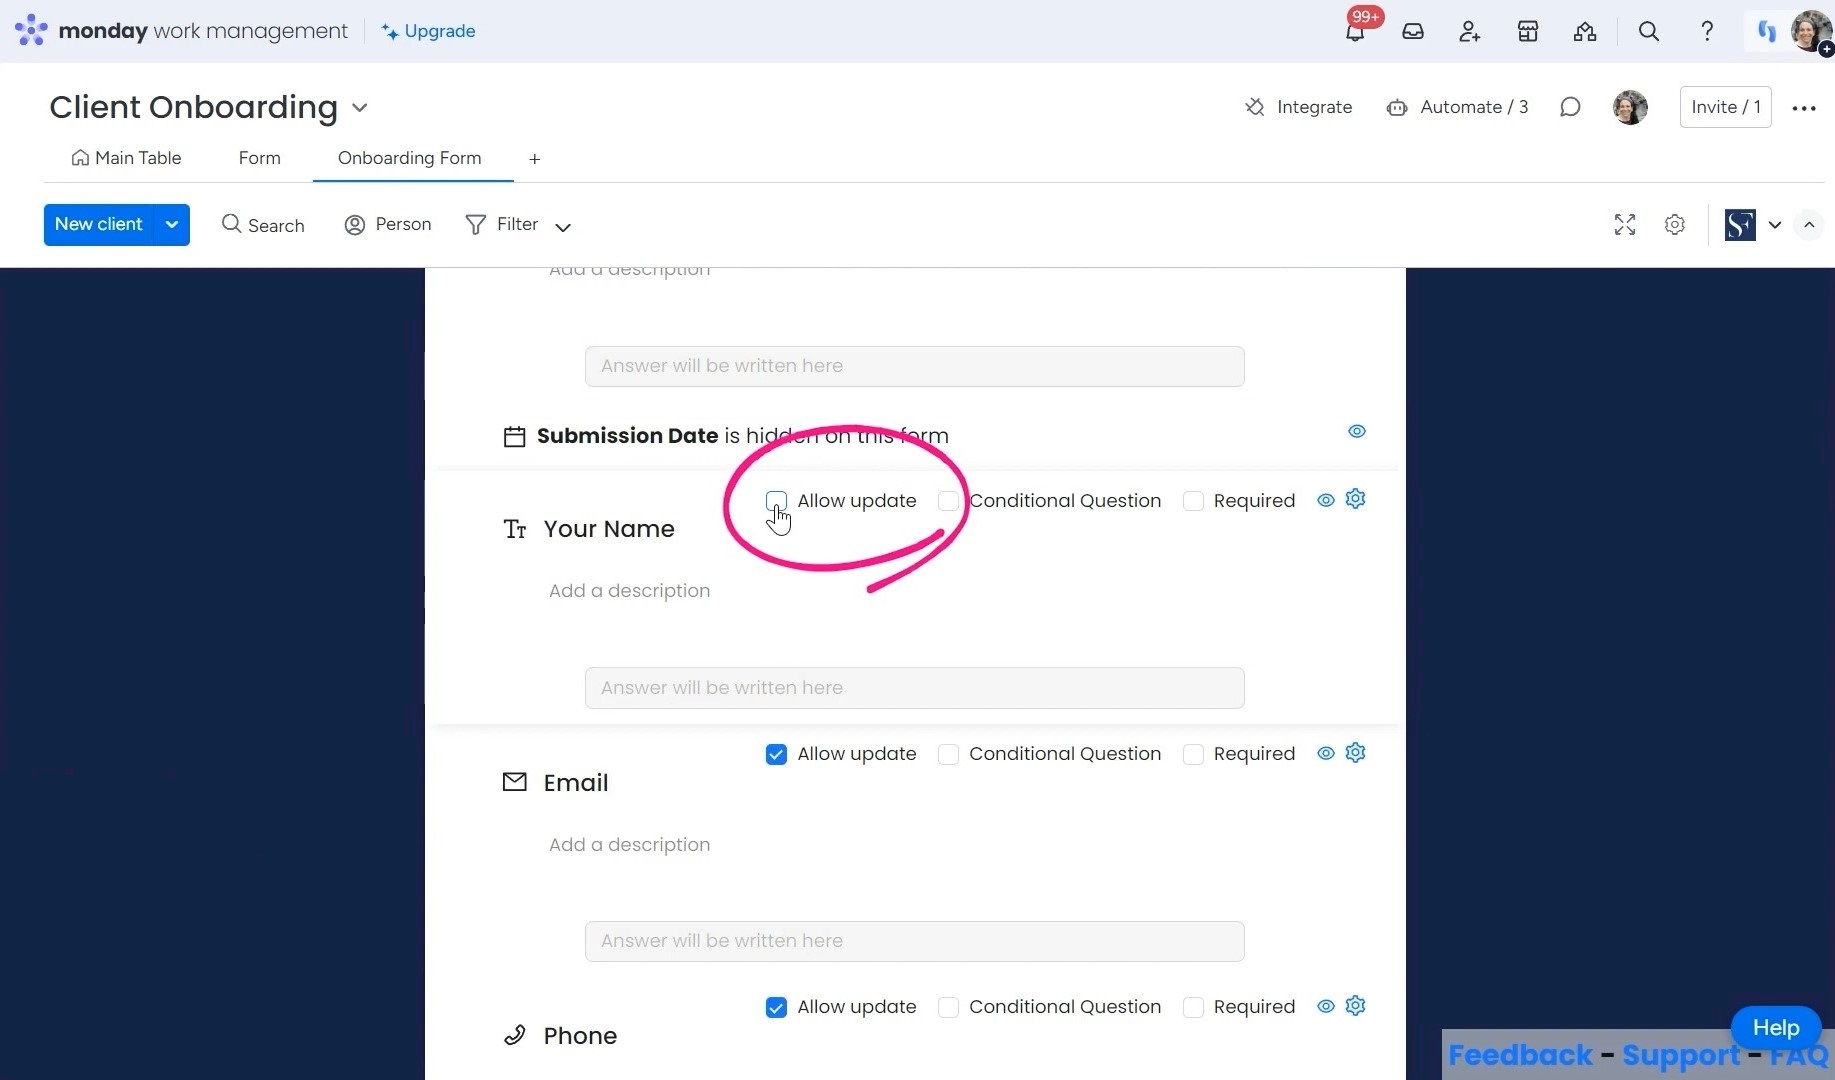
This covers how mandatory fields, editable details, and visible but locked information are distinguished on the board.
Automating Form Links
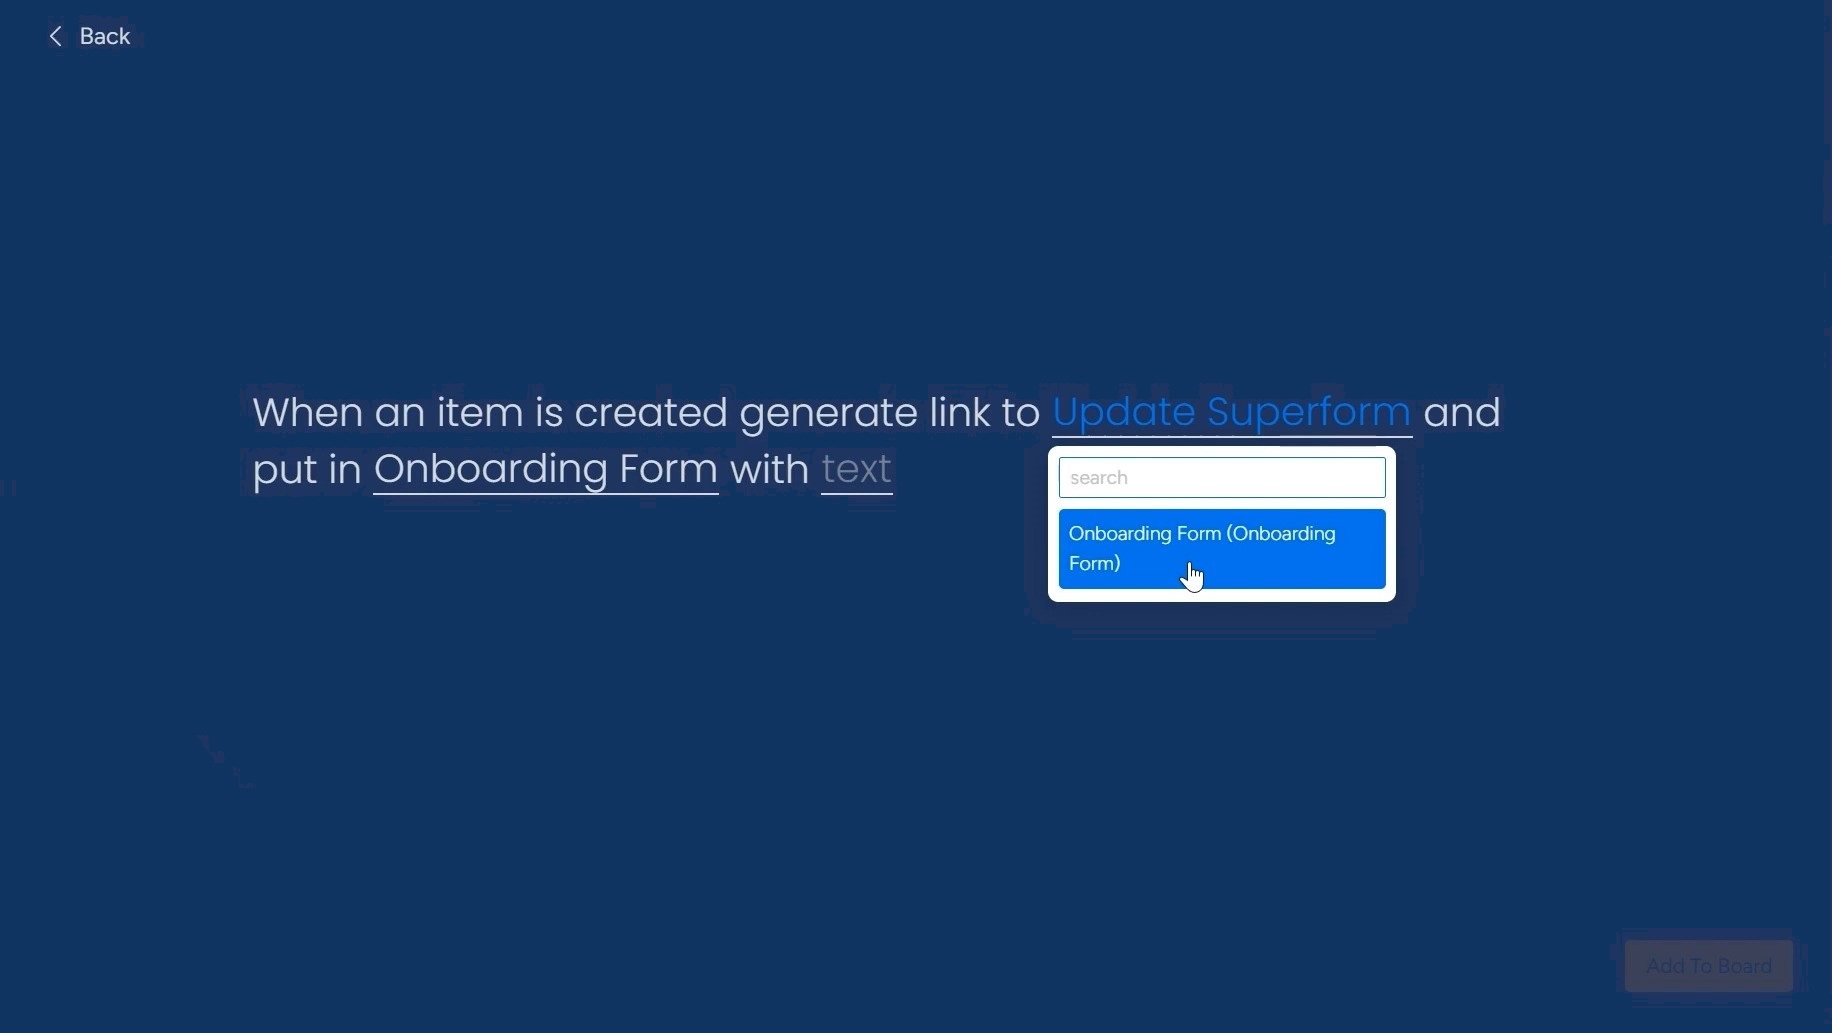
To connect the form to the board automatically, you need to configure an automation. Navigate to the automation center and search for “SuperForm”, which contains some templates.
The first selection, “Generate link when item created”, suits this purpose. After setting it up, it will drop a link into the designated “Link” column whenever a new record is added.
So, how will this automation work? Suppose, a fourth client signs up and is added to the board. Immediately, a nested link populates the cell under their name that says “Form”. Clicking it launches the onboarding questions for the new contact.
And if you need to update the details of a client, such as client #3 for this example, send them the form link, which they can use to edit the required information.
This automation smoothly ties the board data to the form in real-time, avoiding separate form distribution workflows. The setup does the work of gathering and organizing client profiles in one central board.
Are you ready to streamline project management and improve collaboration? Book a free session with Simpleday to learn how monday.com can transform your workflows and take your business to new heights.