
Are you new to monday.com and struggling to manage your projects on the platform? You’re in the right place! This tutorial is perfect for beginners who want to understand project management. I’ll explore how to set up your boards and get familiar with all the features monday.com offers.
I’ve explained all the basic features of maintaining your projects on monday.com. If you want to watch a tutorial, check the video below:
monday.com Project Management Basics: A Tutorial for Beginners
Before jumping into those features, I’ll give you a basic idea about workspaces and boards. You can consider workspaces as large folders where you can keep everything organized. Each workspace can have different boards, which act like your table of contents. This structure helps you manage your tasks better.
Setting up the Boards
Creating a new board on monday.com is simple. You can start from scratch or choose a template. If you pick a template, it will give you a head start with a ready-made layout.
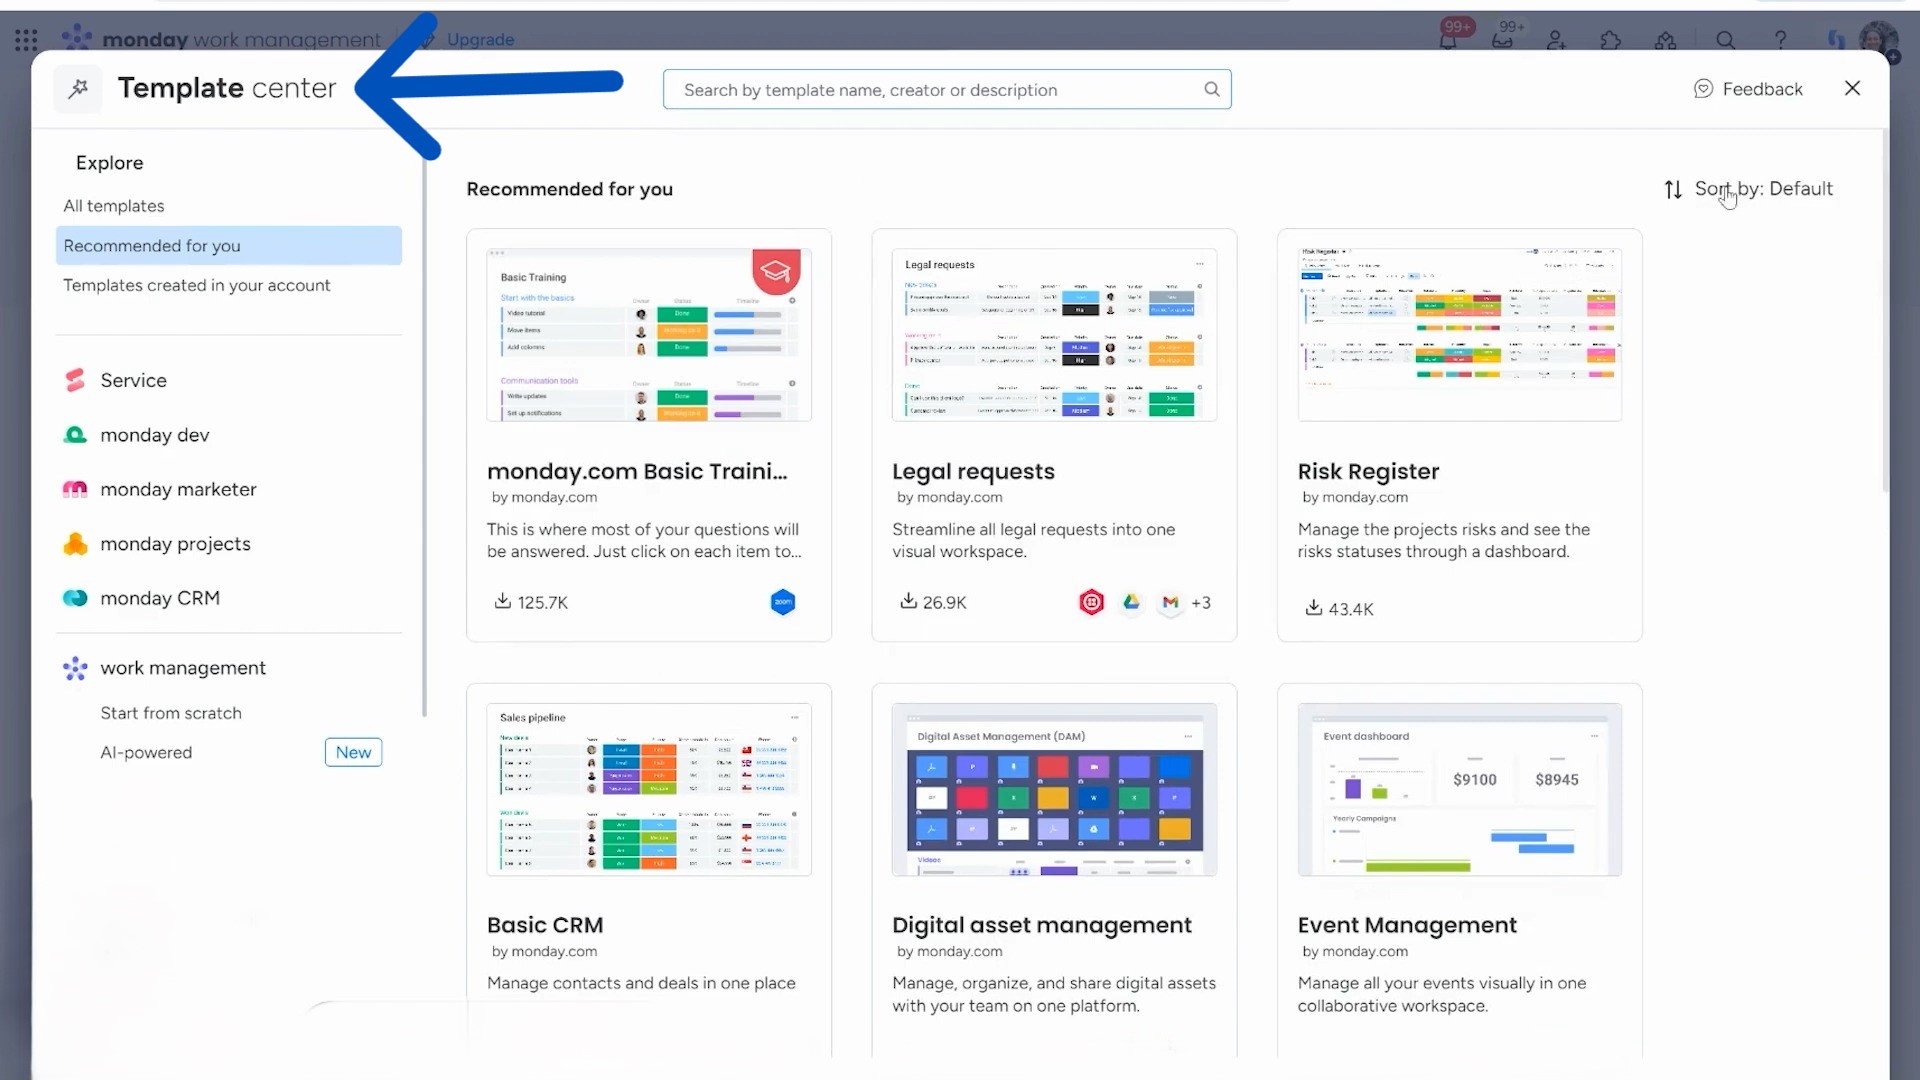
However, building your board from scratch lets you customize it exactly how you want.
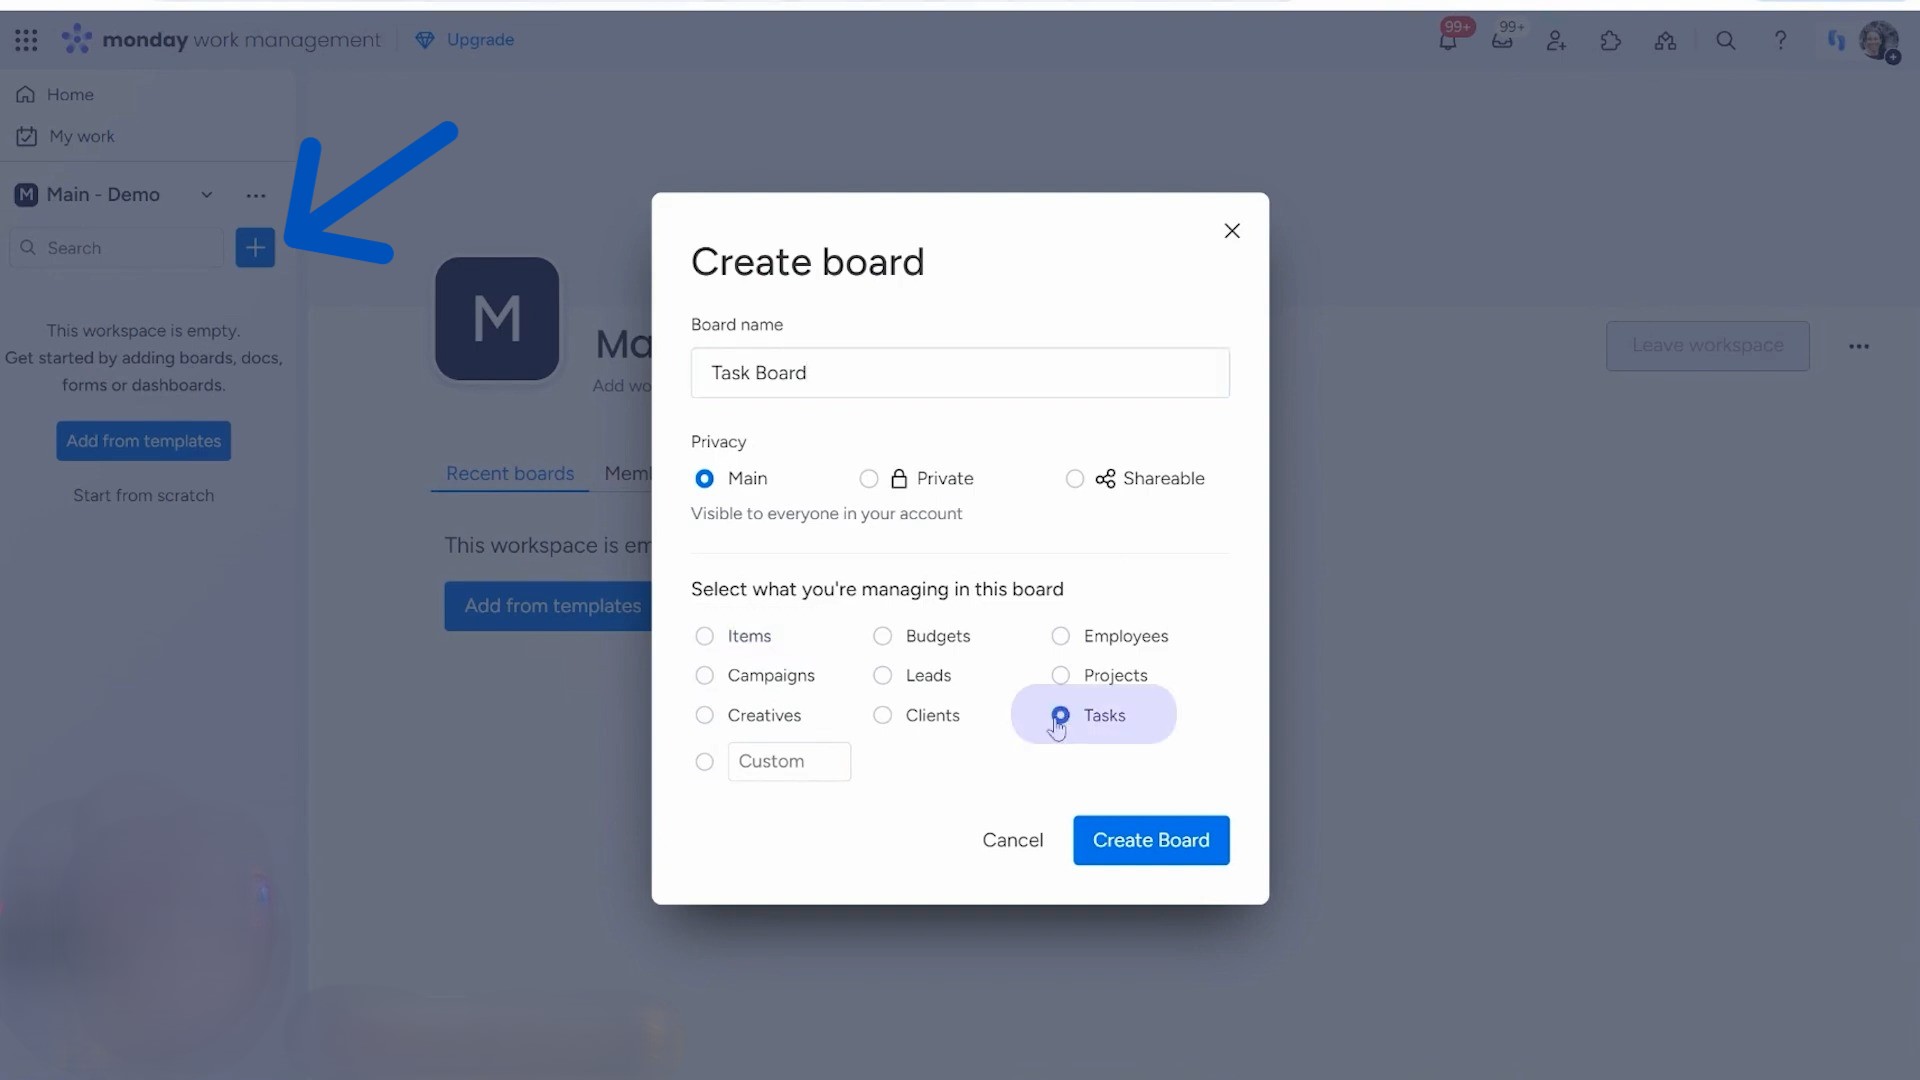
You can choose from different types of board. There are three options:
-
- Main
-
- Private
-
- Shareable
A main board is visible to everyone in your company. A private board is only for selected people, while a shareable board allows external users to join in. Pick the one that fits your needs best.
After choosing the type, you have to set up the columns in the board. You might want to name it “Tasks” or something else to keep things organized. This column will hold all the tasks you need to complete. You can also customize the columns later if you want to add more details.
Finally, don’t forget to add a description to your board. This is a great way to explain what the board is for. You can even choose an emoji to make it fun or add it to your “favorite” list.
The Structure of the Groups
Boards in monday.com are organized into groups. These groups help you sort tasks easily. For example, you might have groups for “Open Tasks” and “Completed Tasks.” This way, you can see what’s still on your plate and what you’ve finished.
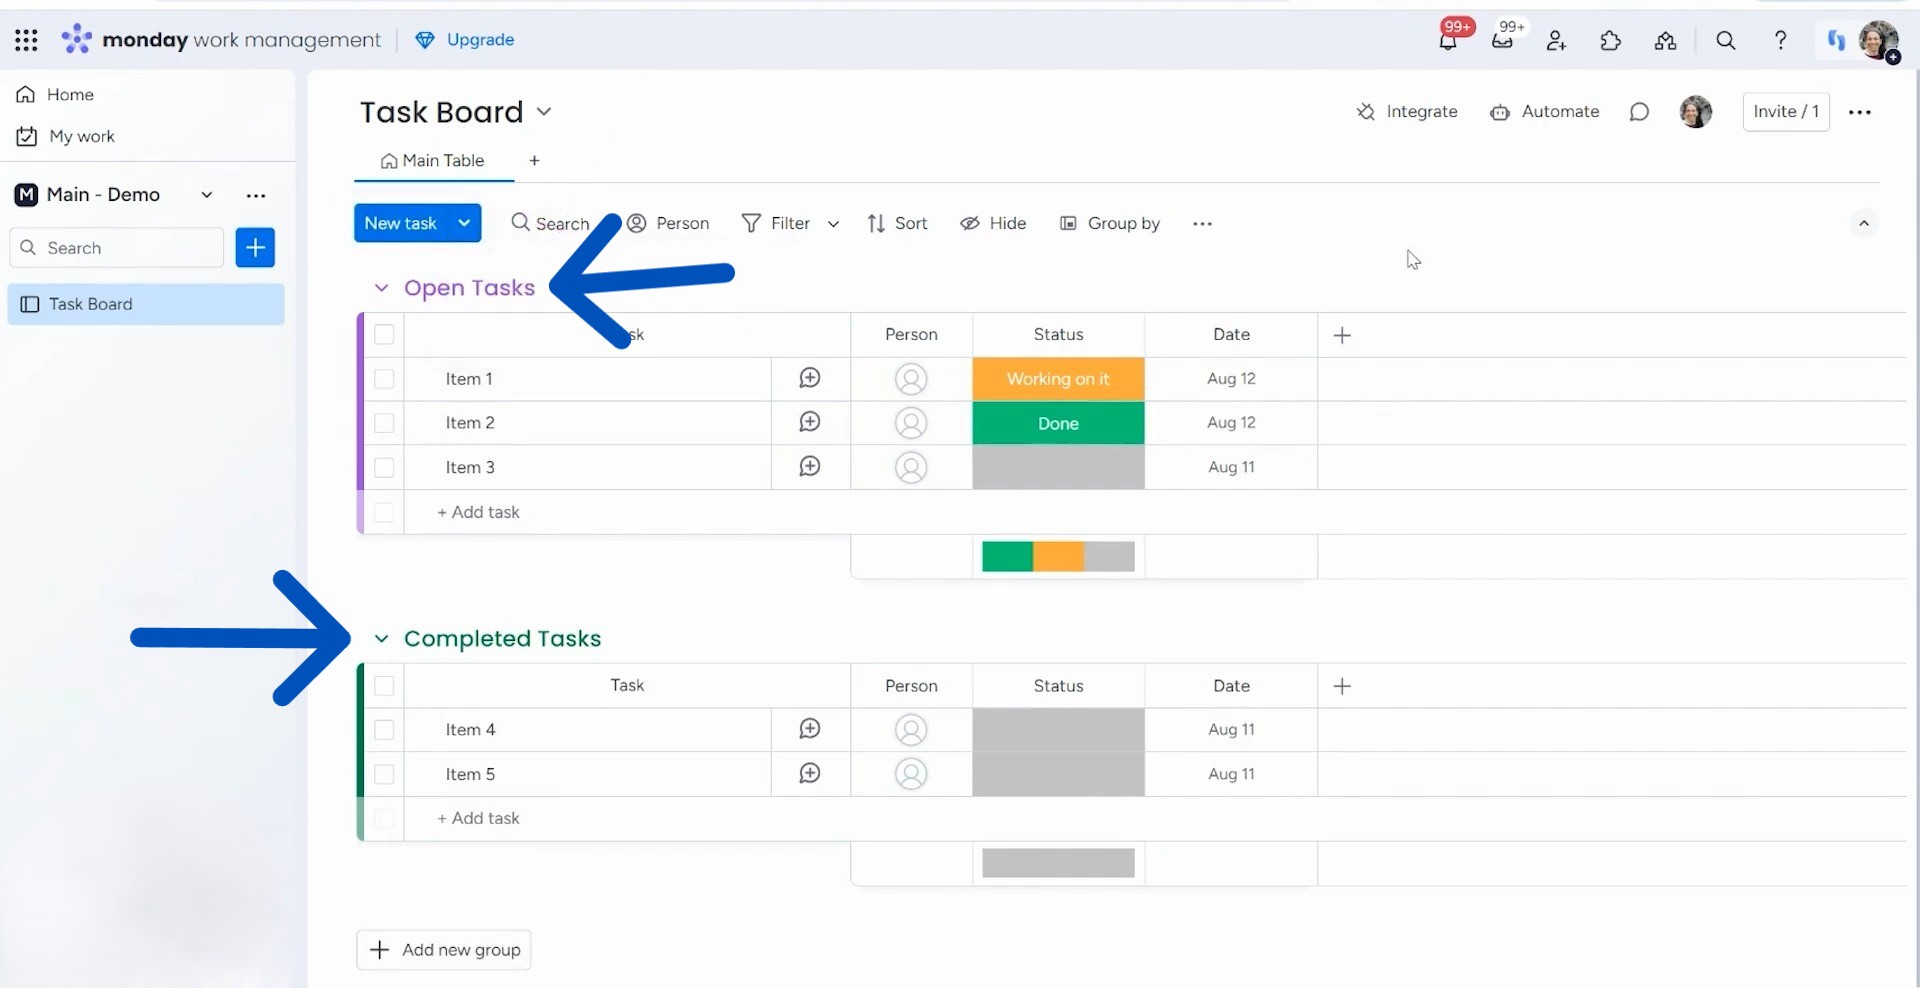
You can also collapse or expand these groups. Collapsing a group hides the tasks inside, making your board look cleaner. If you need to see those tasks again, just expand the group. It’s a handy way to keep your focus on what matters most.
If you find you need more categories, you can add new groups anytime. This flexibility helps you adapt your board to your workflow. Whether you want to track different phases of a project or separate tasks by team members, adding groups makes it easy.
Adding Columns
Adding columns to your board is a great way to organize information. Every board comes with three standard columns:
-
- Person
-
- Status
-
- Date
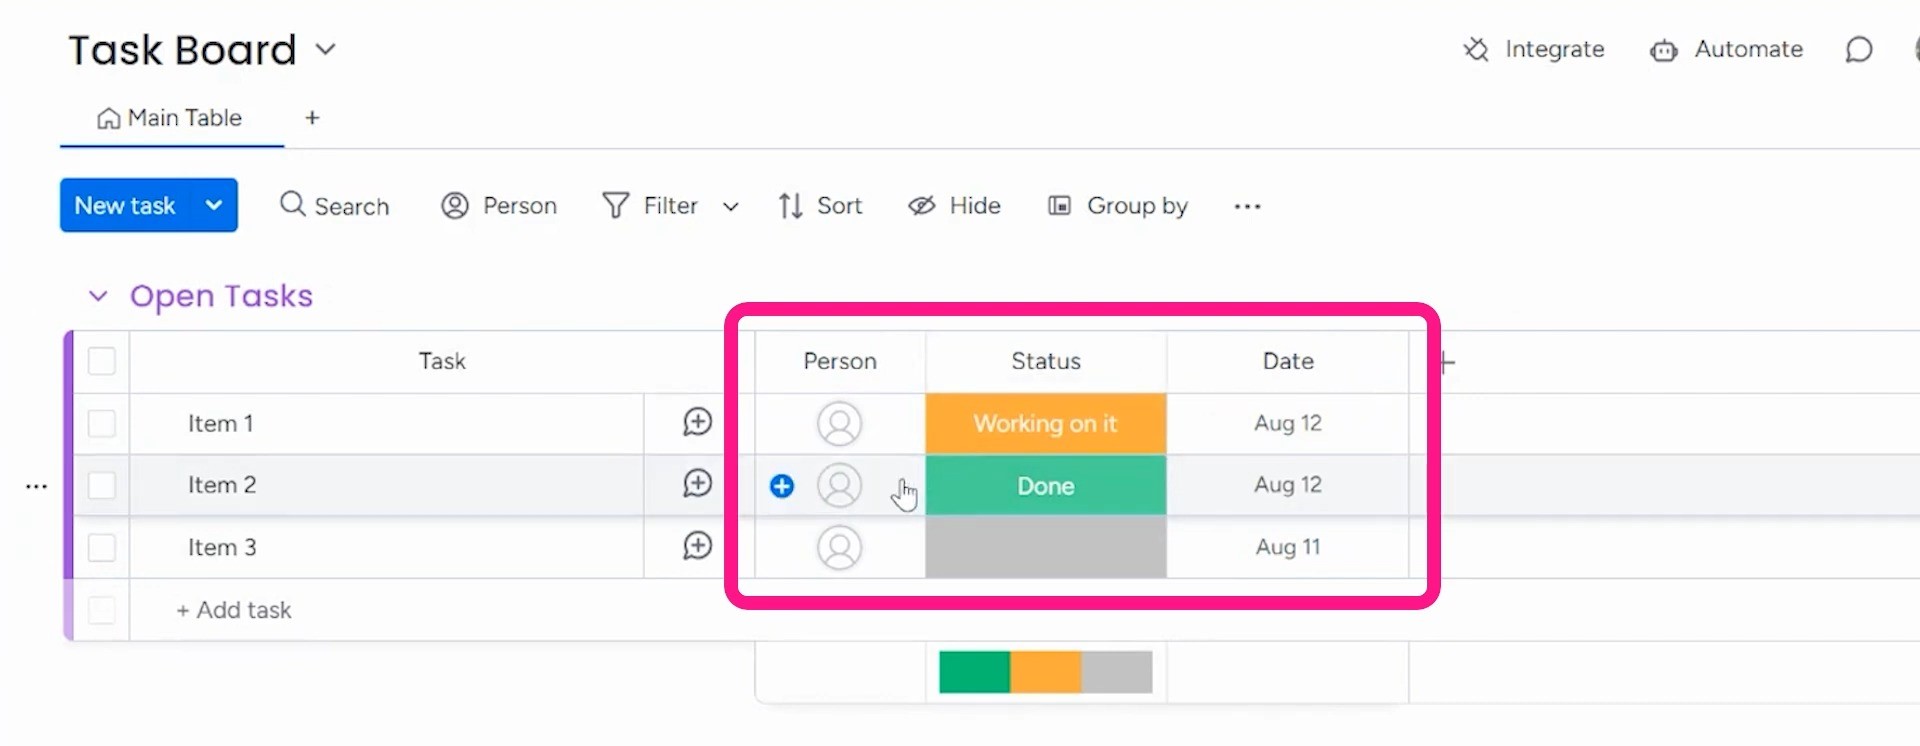
The “Person” column lets you assign tasks to team members. The “Status” column shows how far along a task is, like “Not Started” or “In Progress.”
The “Date” column shows the date of the status column tasks. It has some extra features like showing time or week number and syncing with Google Calendar or other calendar apps. You can also use a “deadline” mode for this column.
You can add more columns by clicking on the “+” button on the board. For example, if you need to write more details, the “Text” column allows for longer descriptions. Want to show task dependencies? The “Dependencies” column tells you which tasks rely on others. You can also use “Formulas” for calculations and “Dropdowns” for quick selections.

You can edit any column to fit your needs. Change the names, adjust settings, or even delete columns that aren’t working for you. This flexibility helps you create a board that truly matches your workflow.
Using Filters and Views
Using filters in monday.com makes finding tasks a breeze. You can choose from quick filters for a fast search. These let you narrow down tasks based on simple criteria, like status or assigned person.
If you need something more detailed, advanced filters allow you to combine multiple criteria. This way, you can pinpoint exactly what you’re looking for.
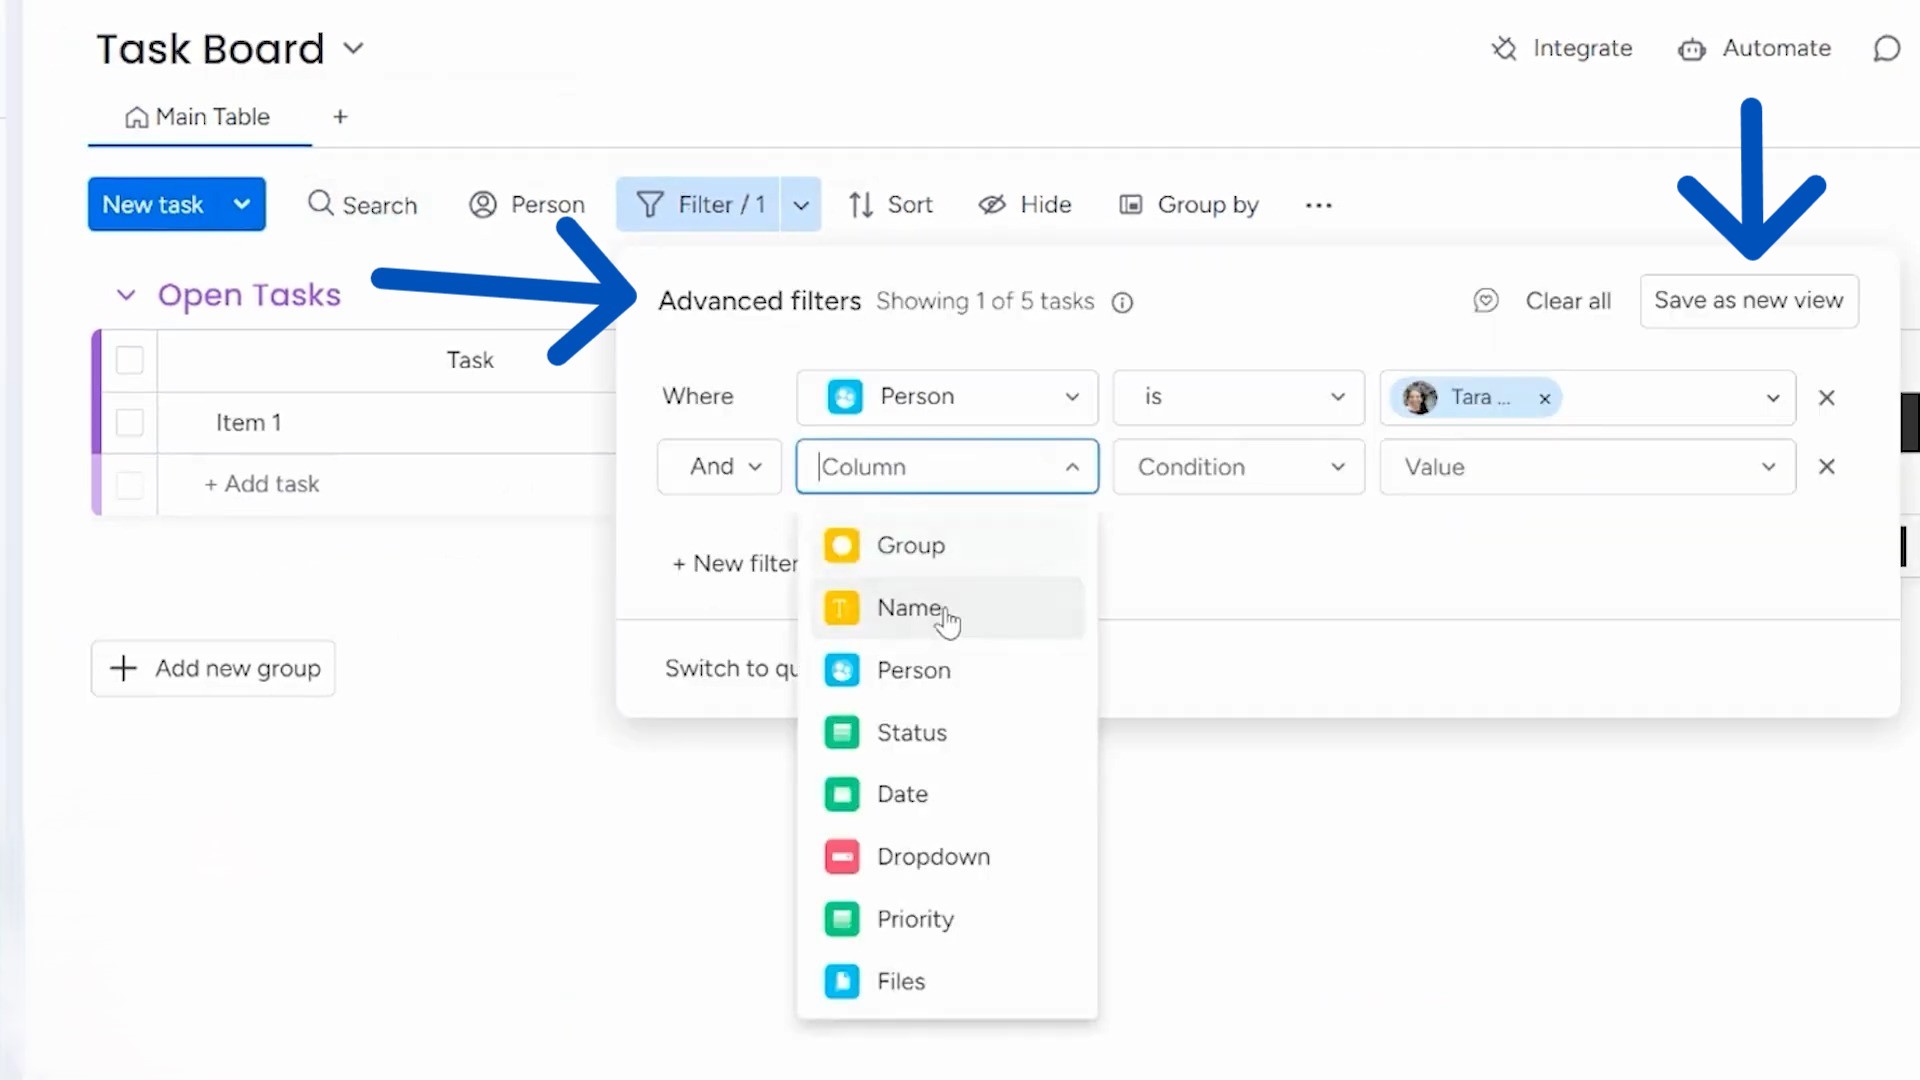
Once you’ve set your filters, you can save them as views. This is helpful for quick access later. Instead of setting the filters every time, just click on your saved view. It saves you time and keeps your workflow smooth. You can also hide some columns if you want. There’s an option to group items by column.
Automating Tasks
Automating tasks can save you a lot of time. You can start by using ready-made automation templates. These templates offer common tasks that many users find helpful.
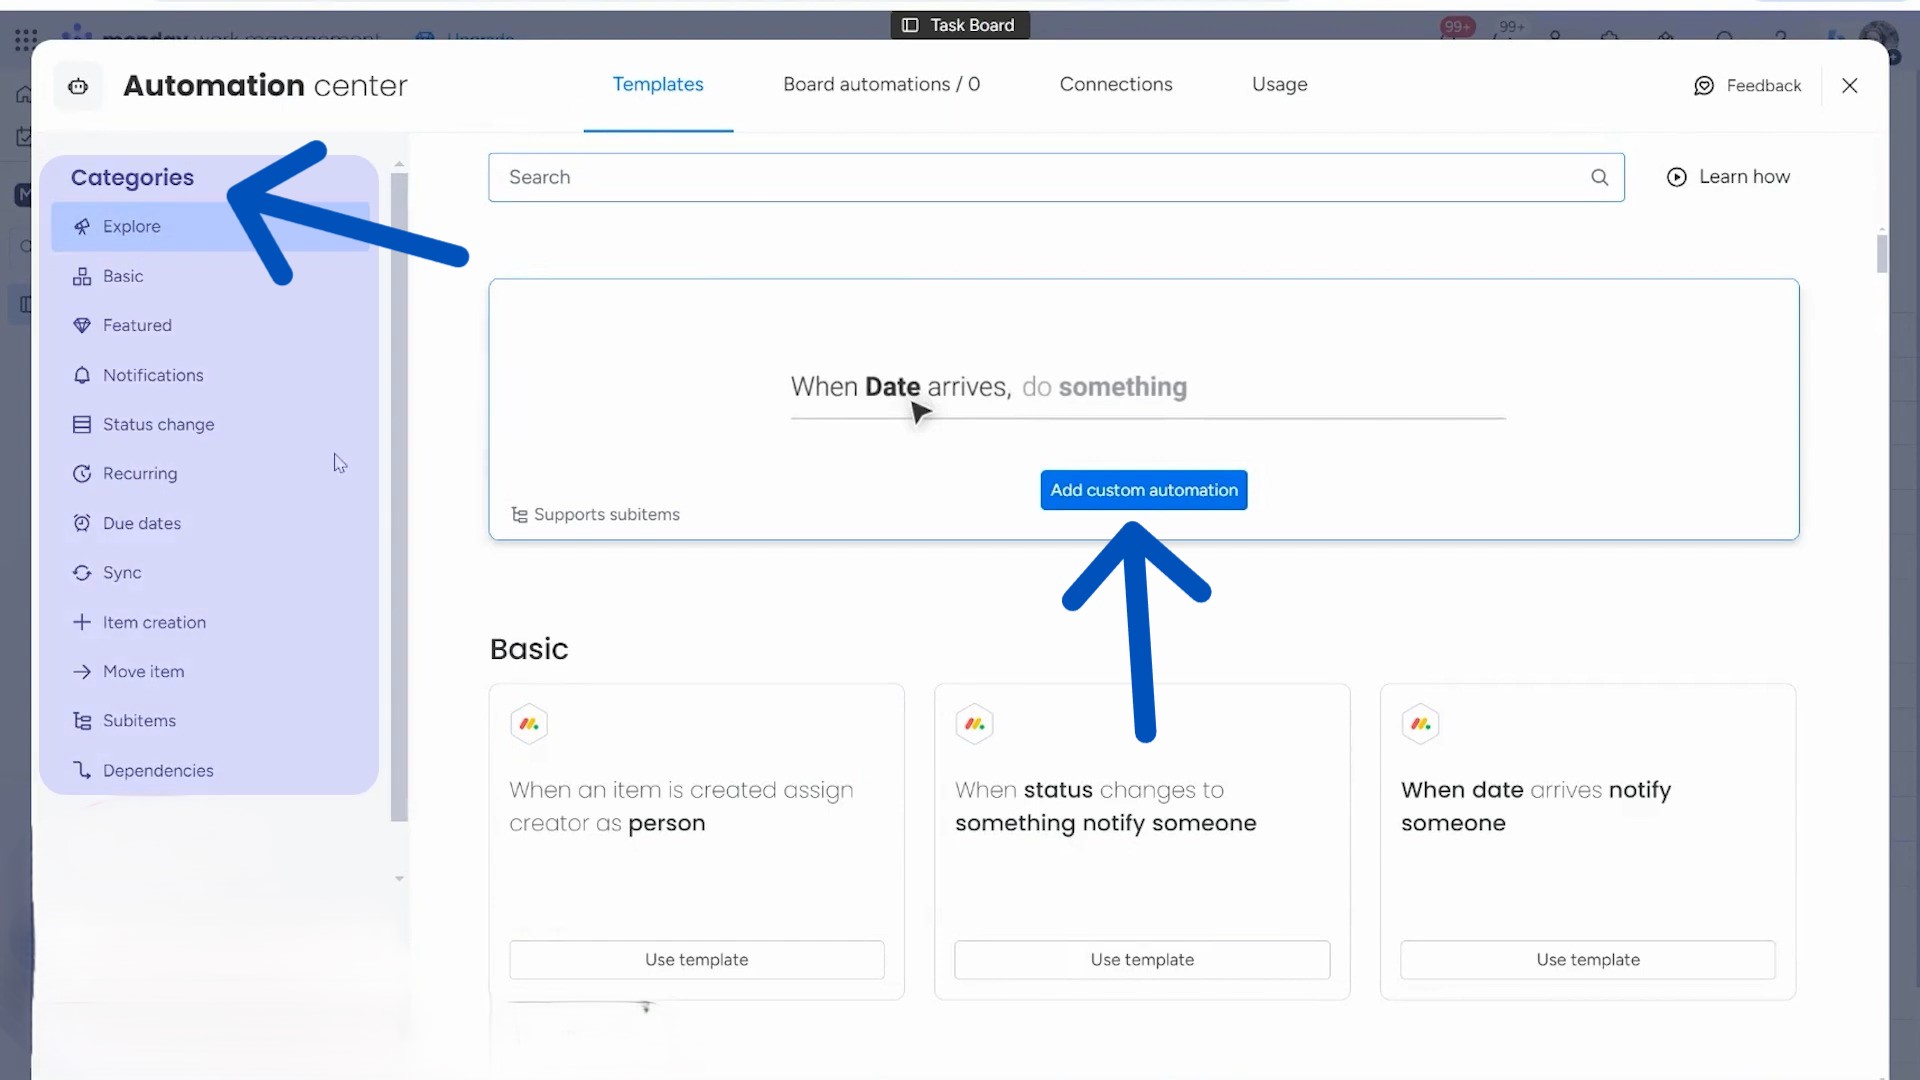
If none of them fit your needs, you can create custom automations tailored to your workflow. Setting up automations is straightforward. First, you choose a trigger. A trigger is an event that starts the automation, like when a task’s status changes.
Next, you define the action that follows. For example, you might want to set a due date automatically when a task is created. Another action could be moving tasks to different groups when they reach a certain status.
By automating these processes, you reduce manual work and ensure nothing falls through the cracks.
Board Settings and Permissions
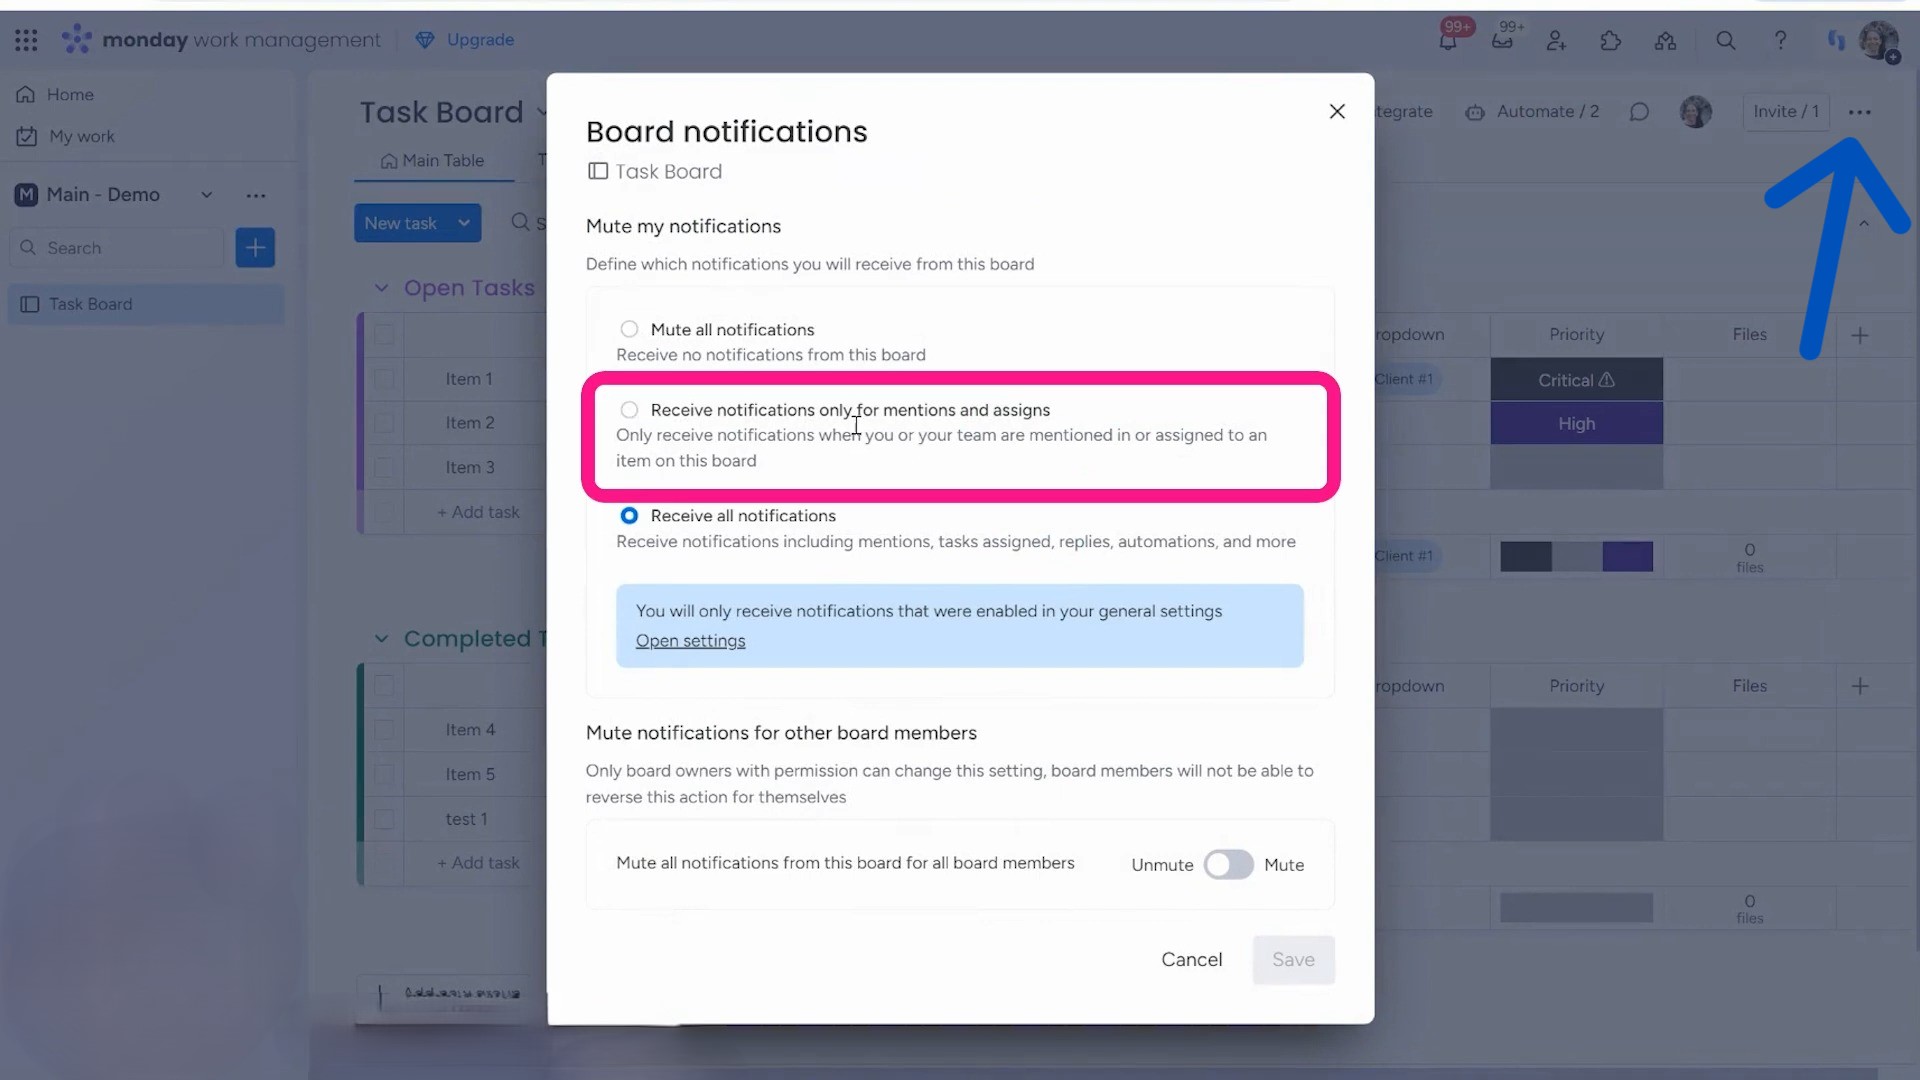
Managing board settings and permissions is essential for a smooth workflow. First, you can set your notification preferences. This helps you control how and when you receive updates. You can choose to mute notifications, receive alerts for mentions, or get all notifications. Adjusting these settings ensures you stay informed without feeling overwhelmed.
Next, you can set permission levels for board members to determine who can do what. For example, some members may only need to view the board, while others might need editing rights. If you’re an admin, you can manage settings and permissions. Clear permissions help everyone understand their roles and responsibilities.
You can also change board settings whenever needed, such as renaming it, removing it from your favorites, or changing its type, like switching from a private to a main board. These options give you flexibility to your project management.
Best Practices for Task Management
To manage tasks effectively, it’s best to put all tasks in a single task board. This centralizes everything, making it easier to track progress and ensure nothing is overlooked. With everything in one place, you can find the important ones at a glance.
Next, you can assign tasks to team members and set clear due dates. This accountability helps everyone understand their responsibilities. When team members know who is doing what and when it’s due, projects run more smoothly.
Using tags and filters is another great way to categorize and prioritize tasks. Tags can help identify task types or urgency levels. Filters then let you focus on specific tasks, whether by priority, assignee, or status.
You can also create views tailored for individual team members or specific tasks. Customized views help team members see only what’s relevant to them. This way, they can focus on their priorities without distractions.
Another great feature is “My Work.” This lets you see all tasks assigned to you across different boards. It’s like having a personal dashboard where you can track everything you need to do.
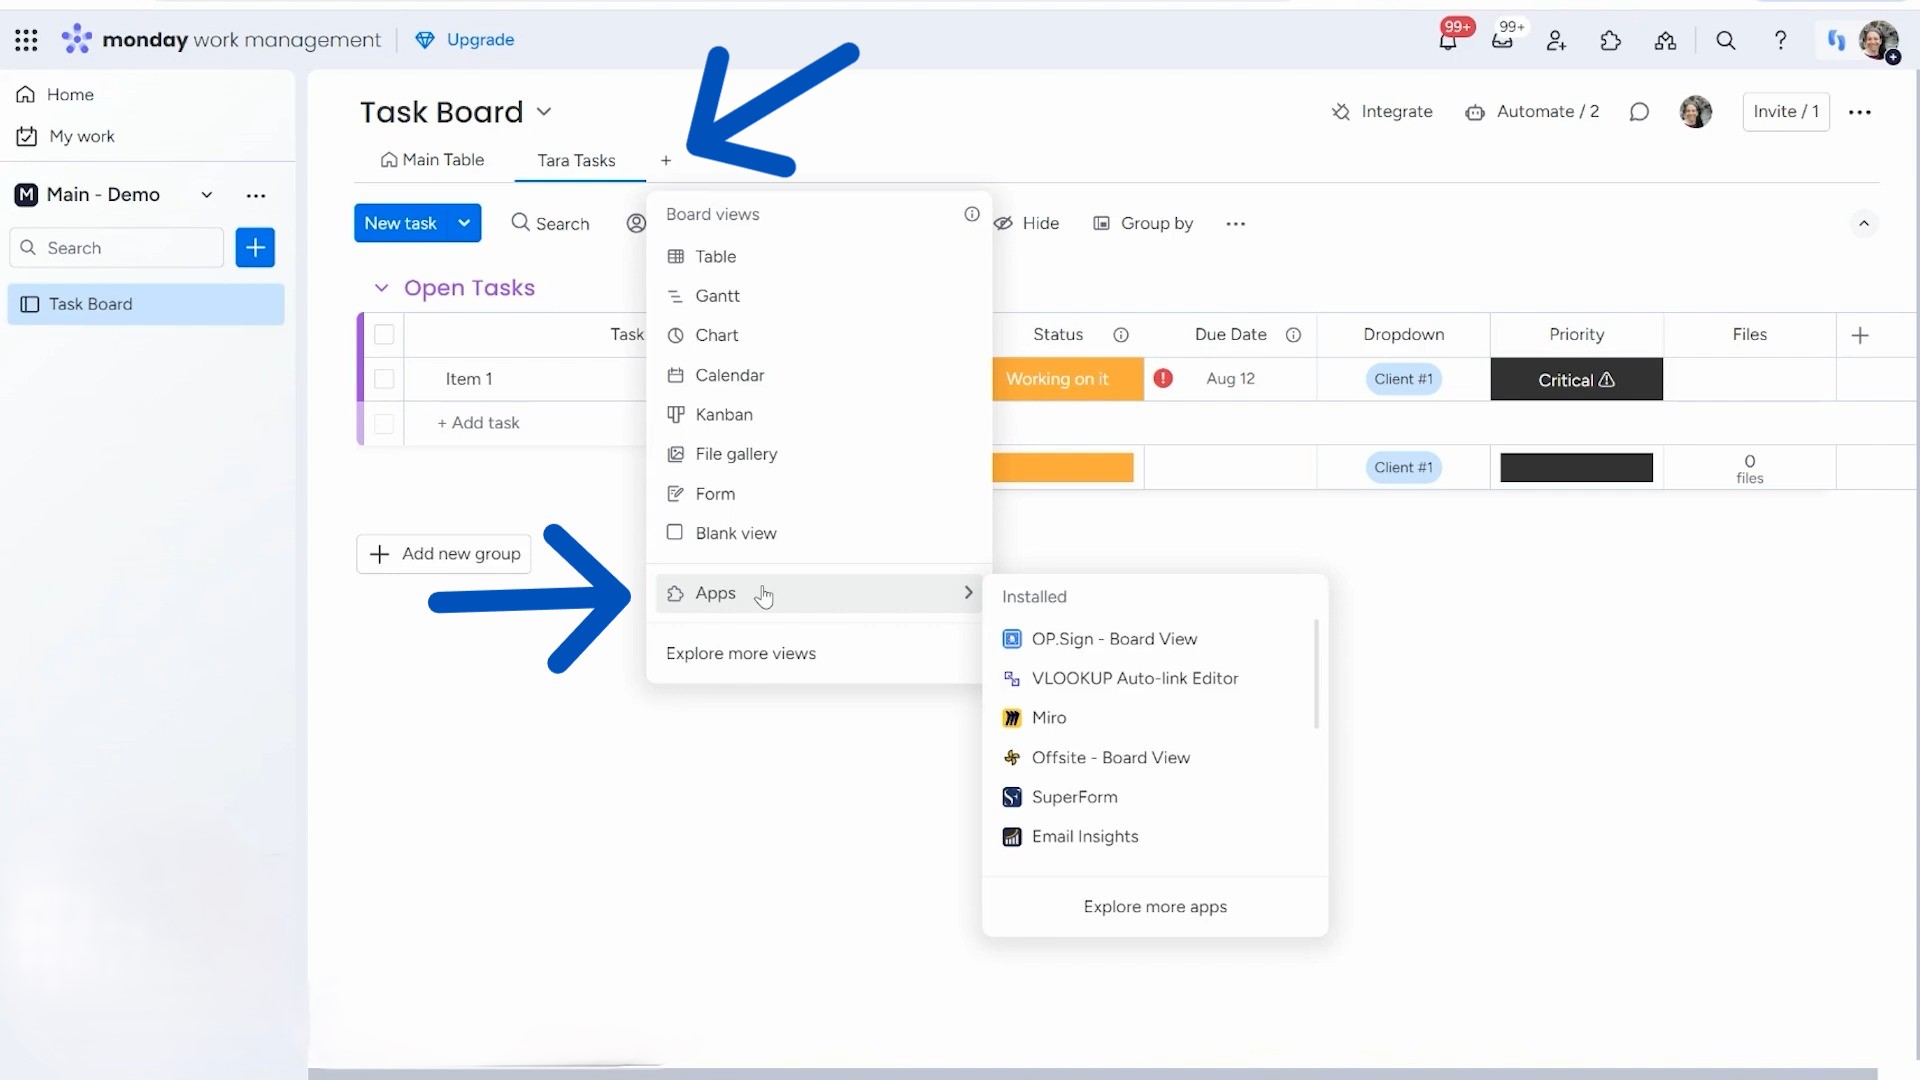
Adding Apps and Widgets
Adding apps to your monday.com boards can enhance your productivity. You can choose from a variety of useful apps like SuperForm, Miro, and e-signature tools.
SuperForm allows you to collect information easily from team members or clients. Miro provides a space for brainstorming and collaboration with visual tools. E-signature tools make it simple to sign documents without needing to print anything. Integrating these apps can streamline your workflow and save time.
You can also create custom dashboards using widgets. Dashboards give you a quick overview of important information. With widgets, you can add charts to visualize data, display numbers for key metrics, or show calendars for upcoming deadlines. These visual tools help you track progress and make informed decisions at a glance.
By combining apps and custom dashboards, you can tailor your workspace to fit your needs. This flexibility allows you to focus on what matters most and keep your projects organized.
Ready to streamline your workflow with monday.com? Let Simpleday help you understand its features and implement them seamlessly into your projects. Our expert guidance will make task management easier and more efficient. Contact us to get started!