
Do you feel like drowning in too much information when looking at your monday.com boards? Views are the solution if all you need is a quick glance at a few key details. With this feature, you can pull out just the important stuff when you need it.
I’ll show you how views let you arrange everything in ways that actually make sense for your workflow. In just a few quick steps, you can make your boards way more digestible.
How to Create a New View
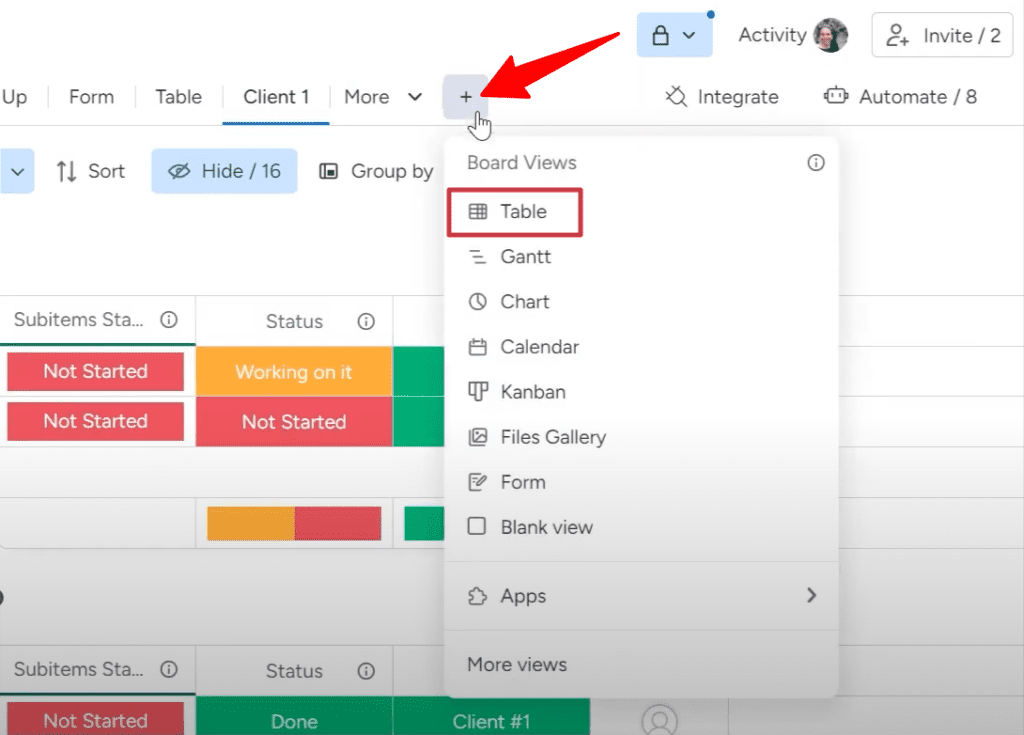
So the first thing you’ll want to do is create a new view we were talking about. Click on the “+” button on your task board and choose “Table.” Rename it. For example, I have named it “test,” since I’m doing this for a test purpose.
Then, you can add your board’s existing columns into that “test” table. Now, it’s time to choose only those columns that you want to display on the “test” view.
How to Customize the View
Now we get to make this view our own! The first thing is getting rid of any columns you don’t need cluttering things up.
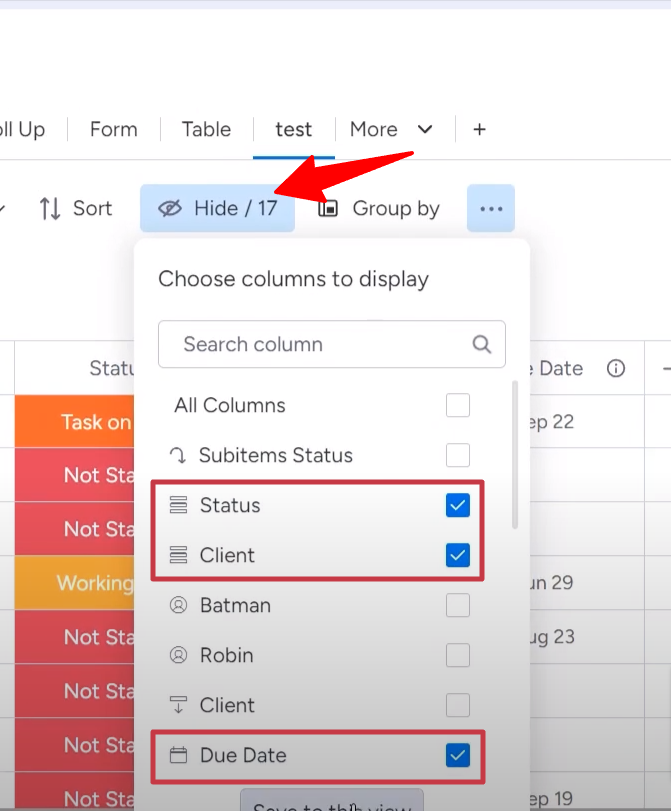
Click on the “test” view and there will be a row of options underneath it. Click on the option labeled as “Hide.” It will show the available columns in a dropdown menu.
Now, keep the blue ticks beside only those columns that you want to keep in that view. In my example, I have kept “Status,” “Client,” and “Due Date” columns.
Once you’ve picked your columns, click on the “Save to this view” button at the bottom to save this view. And just like that, you’ve got yourself a customized view that only shows exactly what you want.
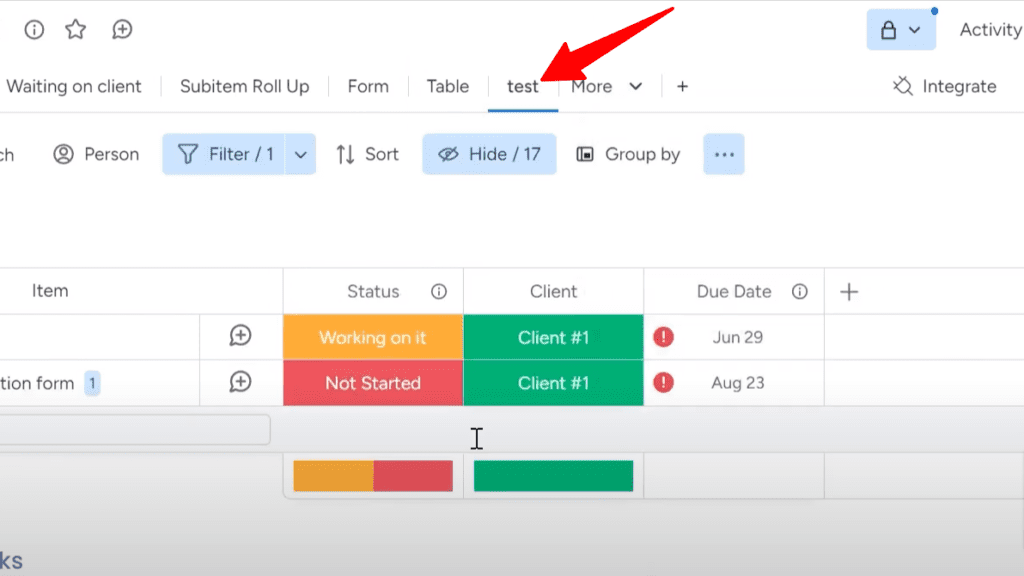
Now, go to your main table and all the views you have created will be on the top menu. Choose the view that you want to see; I’ll choose the “test” view that I’ve just created.
You’ll notice it only shows the columns you selected earlier.
Don’t forget, you can always go back and forth between views too and customize them as you like. Having these customizable views makes peeking at your board so much more manageable.
Additional Filter Options You Can Use
There are a few different ways you can filter the views to show relevant information. This allows you to easily view data without being overwhelmed by everything in the system.
1. Limiting by Assignee
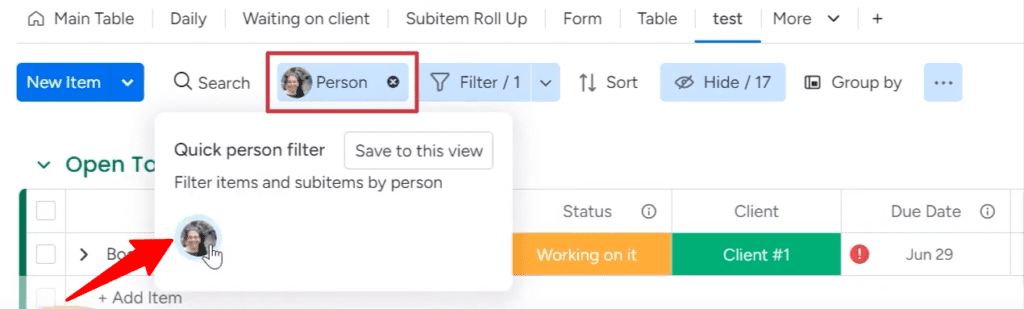
One simple way to filter is by the person the items are assigned to. For example, you can limit the view to only show things that are assigned to you.
In the view setup, go to the “Filter” section and select “Person” to choose the assignee. When you save and view the list, it will show the tasks assigned to the chosen person.
This is useful if you only want to see the tasks or cases you are responsible for working on, rather than everything in the system.
2. Using Advanced Filters
For more complex filters, you can use the advanced filter options. Here you can add multiple criteria to really narrow down the views.
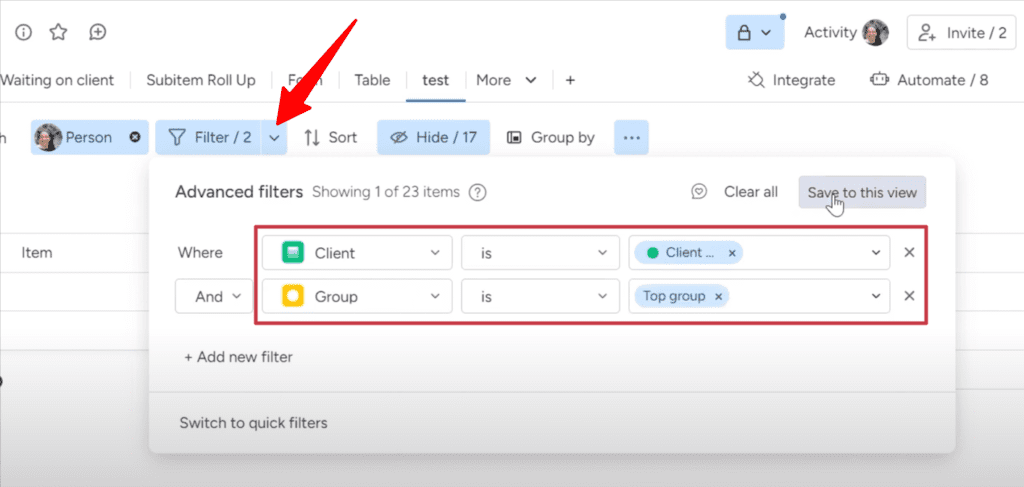
For instance, let’s say I only want to show items for Client #1 where the group is “Top group”. In the advanced filter I can add two criteria – “Client” is equal to “Client 1” and “Group” is equal to “Top group.”
Then hit save and the filtered view will only contain matching records that meet both of those filter rules. This allows you to display the data in very specific ways.
The different filter options allow you to categorize the available tasks and information. This keeps your workspace tidy and focused on just the relevant subsets of data.
Need more help setting up your monday.com boards and workflows? Our experts at Simpleday can help. We also provide onboarding and training so your whole team feels comfortable navigating the platform. Schedule a free consultation to discuss further.