
Transferring data from an Excel spreadsheet to monday.com can be a tedious process if done manually. Row by row, you’d need to copy and paste information, wasting precious time and energy. Thankfully, there are two effortless ways to upload all your Excel data directly into monday.com boards, saving you the hassle.
Whether you’re adding data to an existing board or creating a brand new one from scratch, these methods will have you seamlessly transferring information in no time.
If you rather prefer watching a video, check my YouTube tutorial:

Method 1: Uploading to an Existing Board
The first method involves uploading the Excel file to an existing board. I’ll explain the entire process, so you can perform the task without any problem.
i. Access the Import Tasks Menu
I’ve previously downloaded my task board into an Excel file. You can watch the process here.
I will utilize this Excel file to re-upload the information, a useful strategy for mapping your columns and titles based on your board layout. Using this file as a template, you can enter your data in Excel and subsequently upload it to the board.
Now, locate the dropdown arrow next to the “New Task” tab. Click on it and select “Import Tasks” from the menu.
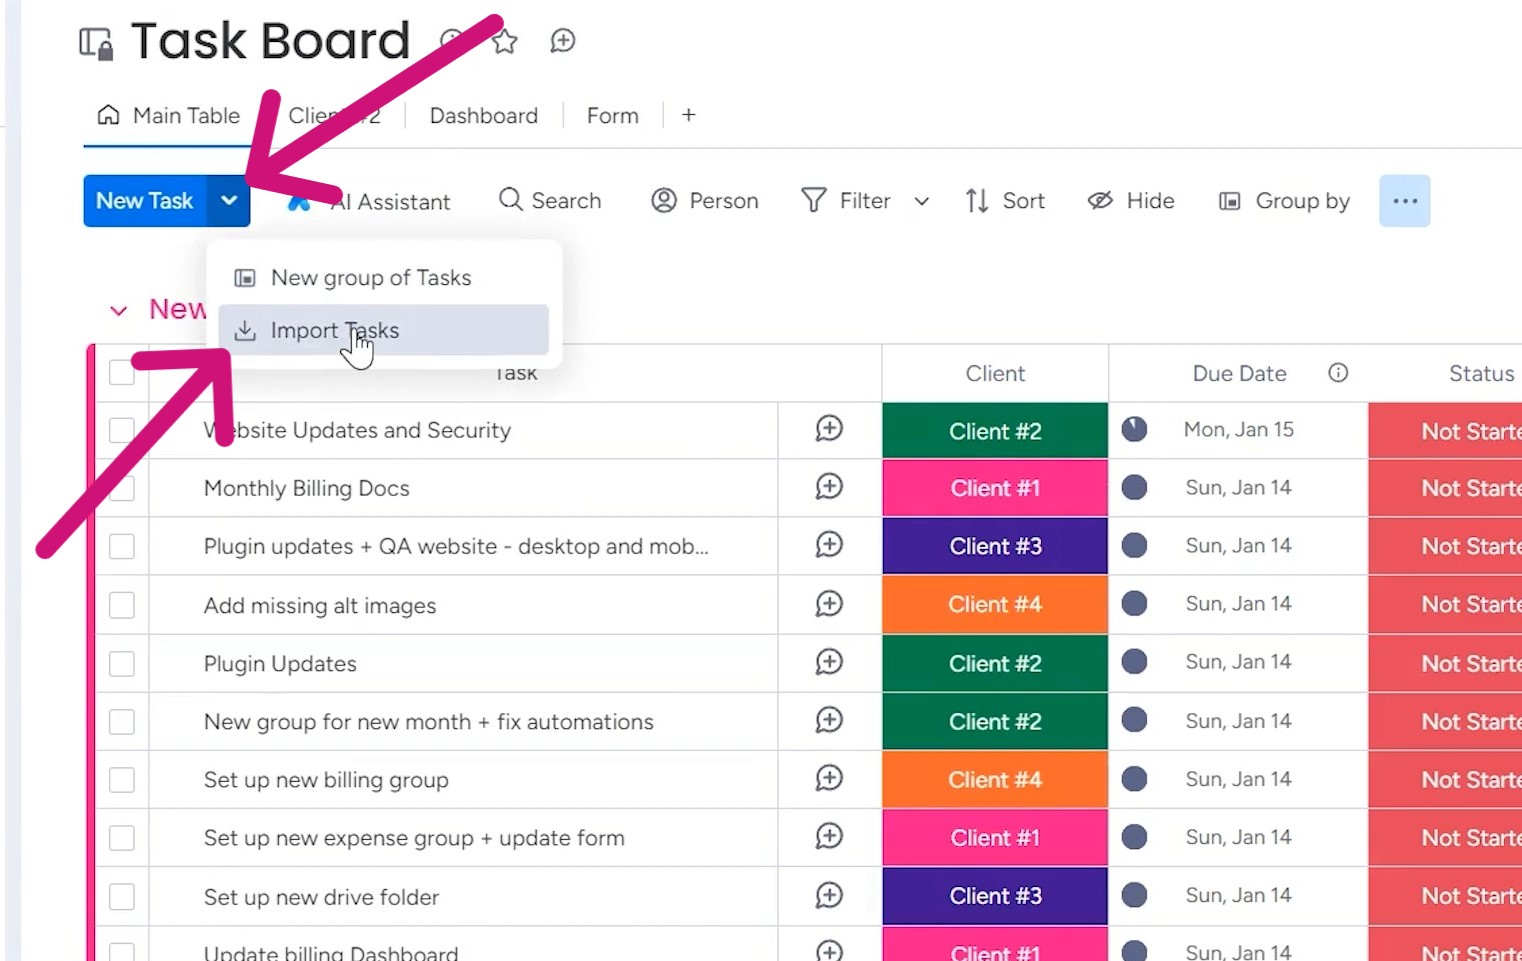
The option allows you to import data directly into your existing board.
ii. Map Your Data
Once you’ve selected your Excel file, you’ll be prompted to map the columns from your spreadsheet to the corresponding columns in your board.
Go through each column carefully, ensuring that you match the correct column types. For instance, if you have a “Client” column in your Excel file, you’ll want to map it to the “Client” column in your board.
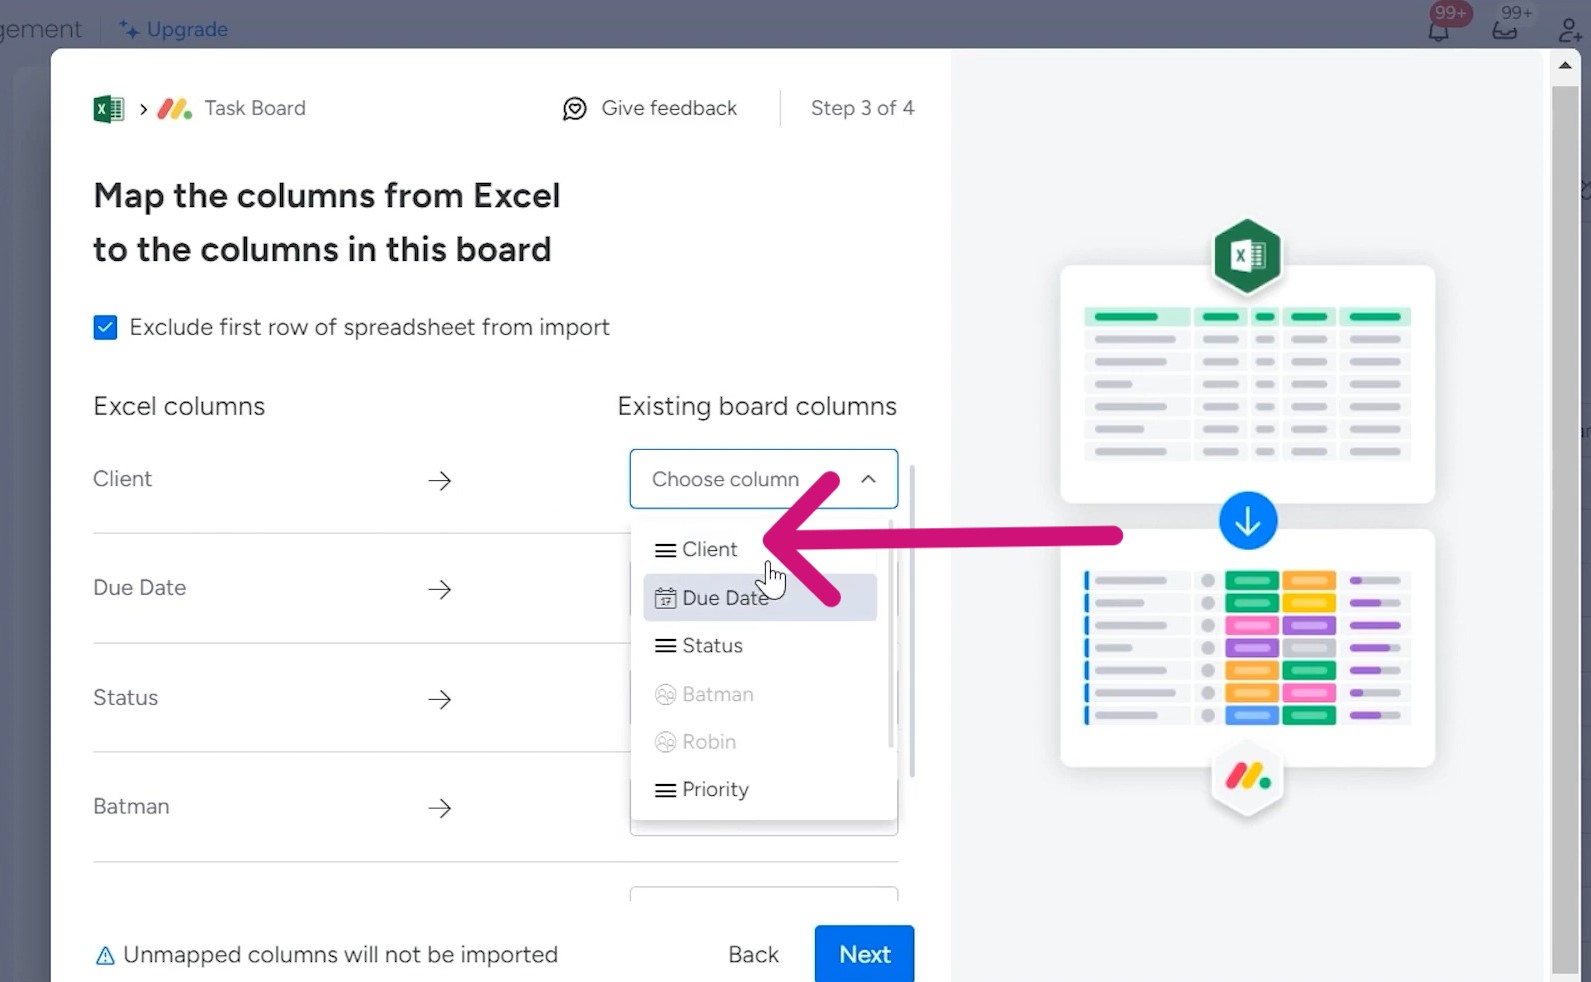
However, not all column types are compatible for direct import from Excel. Specific columns, such as those designated for people, may not be importable.
In such cases, you’ll need to either skip those columns during the import process or plan to update them manually later.
iii. Choose Import Options
Before finalizing the import, you’ll have the option to decide how to handle potential conflicts with existing items in your board.
You can choose to create new items, skip items that already exist, or overwrite existing items with the imported data.
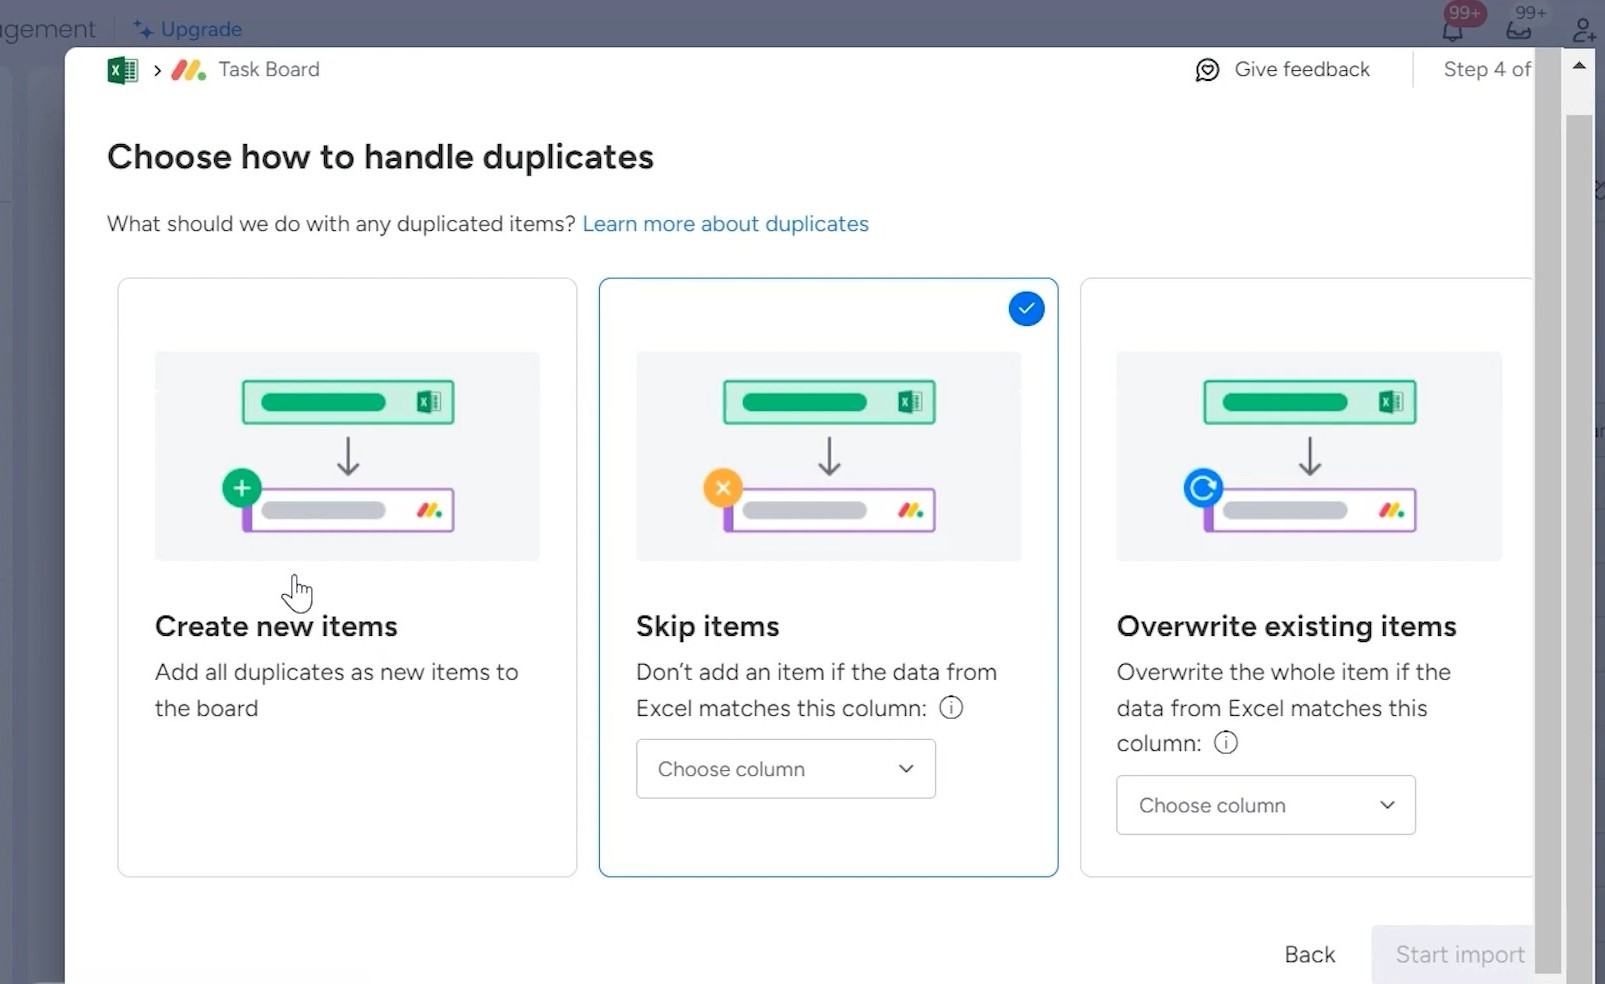
In this instance, I’ve chosen the “Create new items” option.
iv. Review and Import
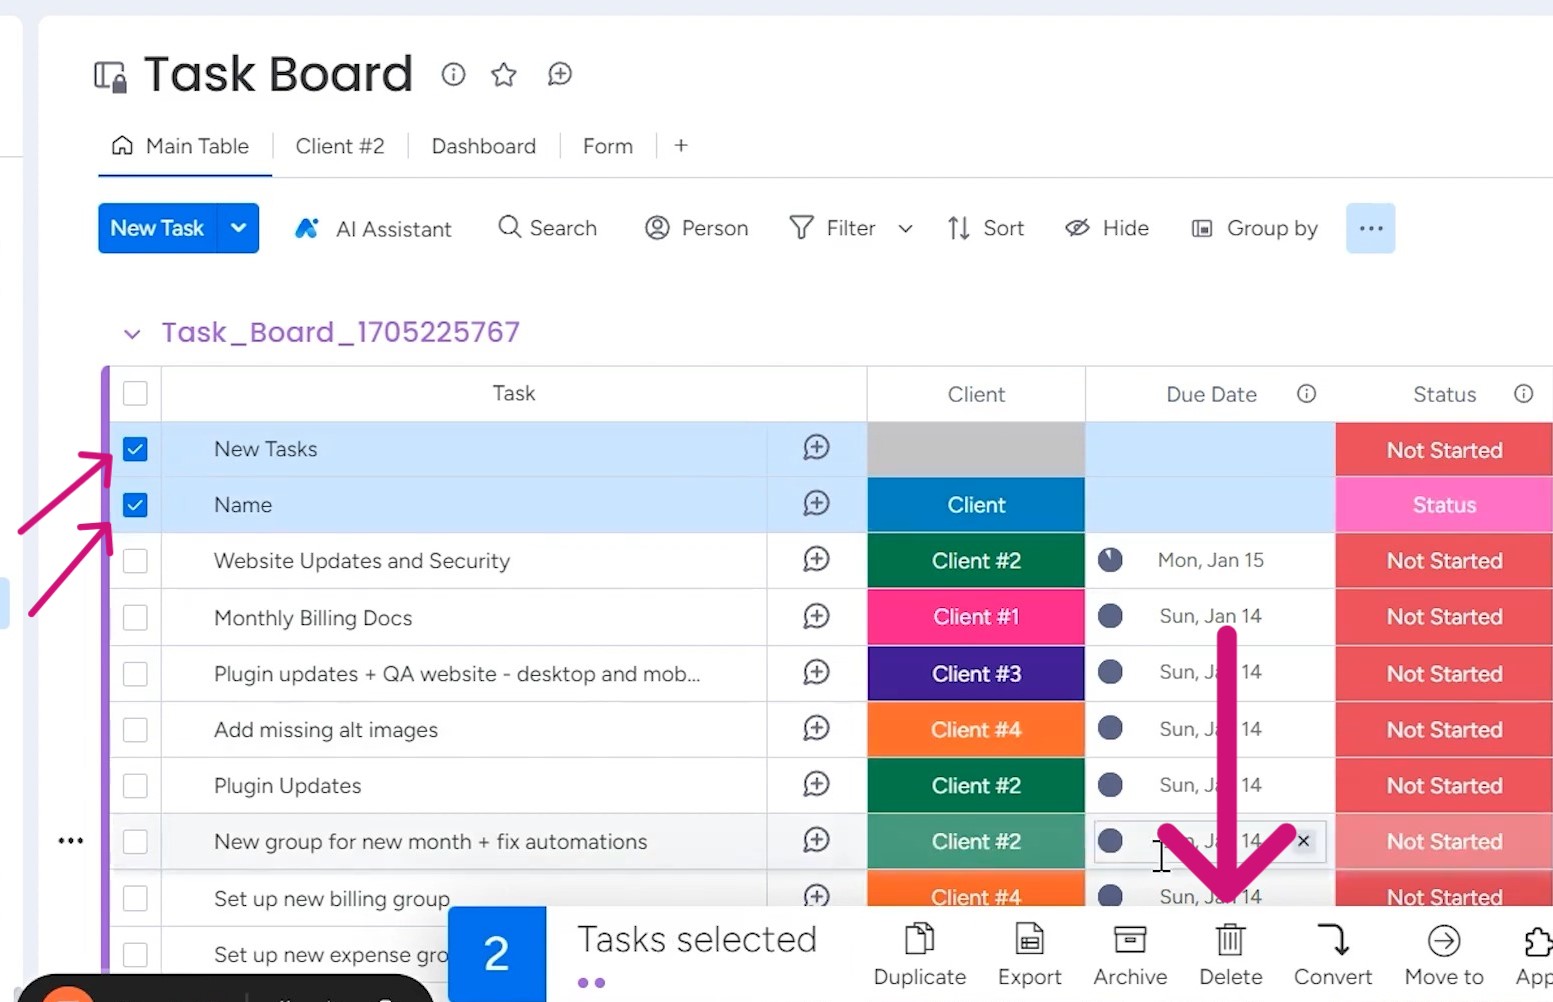
After double-checking your column mappings and import settings, initiate the import process. As the data uploads, a new group will be created within your board, containing all the imported items from your Excel file.
Sometimes, the top row from your spreadsheet may also be imported, so you might need to clean up any unnecessary headers or data after the import is complete.
With this method, you can quickly populate an existing board with data from an Excel file.
Method 2: Creating a New Board from Excel
The second method involves directly importing the data from Excel, which will create a new board on monday.com. Let’s find out how to do this:
i. Access the Import Data Menu
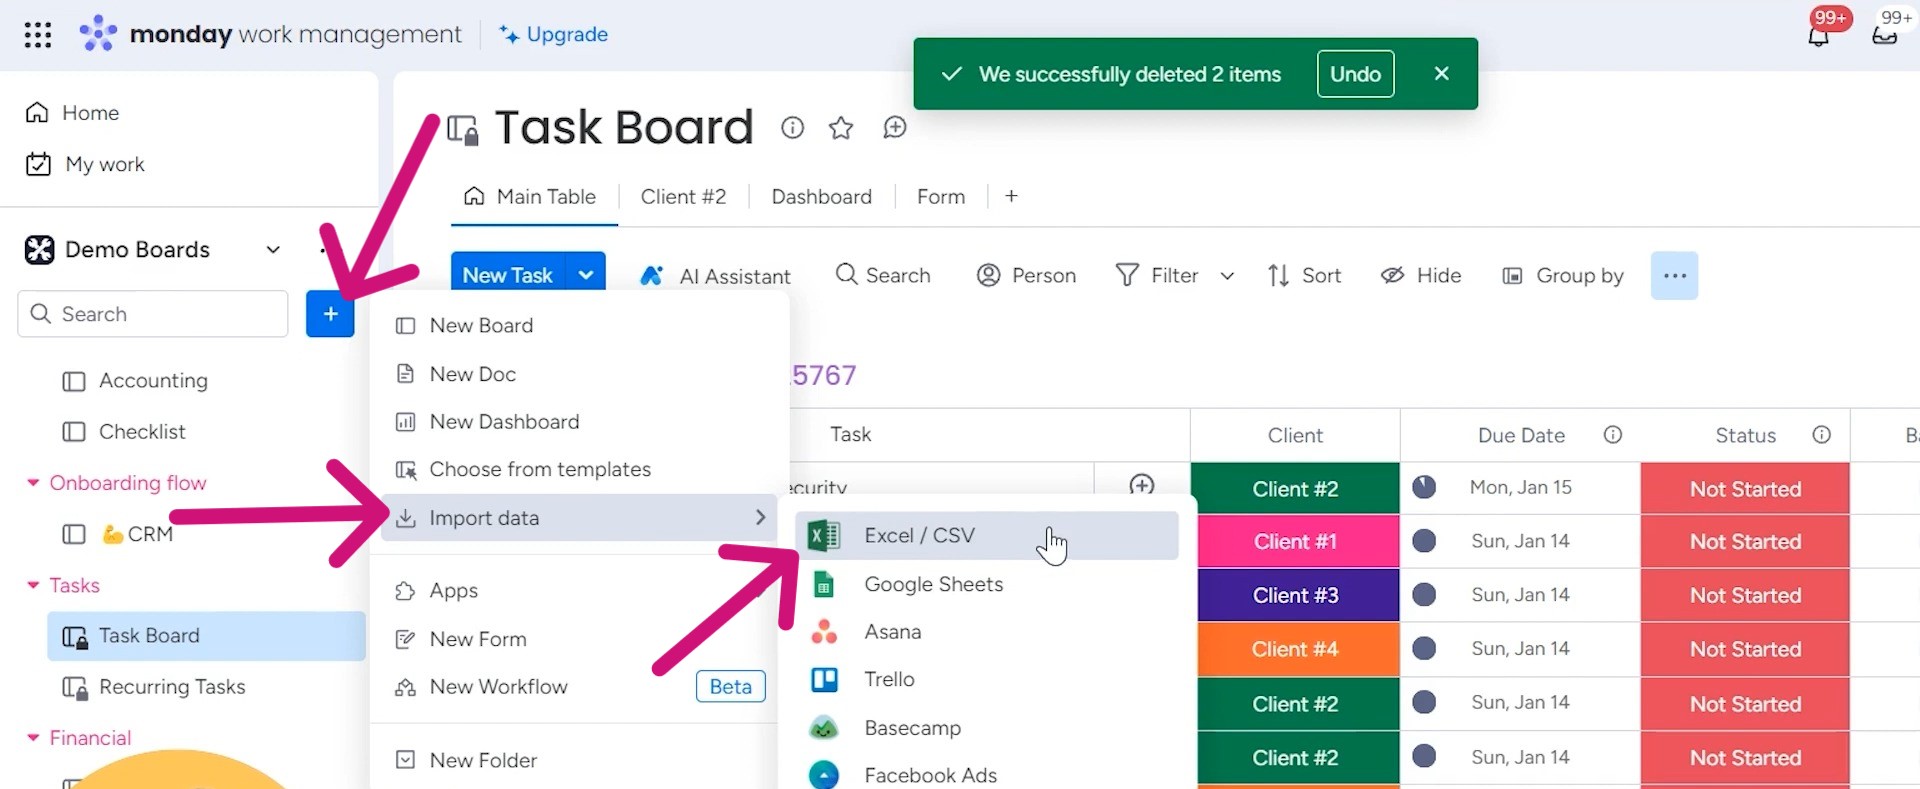
From the tool panel on the left side, click on the plus (+) icon located in the top navigation bar. It will reveal a menu with various options, including “Import Data.”
Select this option to begin the process of creating a new board based on your Excel data. Among the list of supported data sources, choose “Excel” to import your spreadsheet.
You’ll then be prompted to browse and select the specific Excel file you wish to upload. Once selected, you can customize the settings for your new board.
ii. Customize Board
A crucial step is identifying the correct row in your Excel file that contains the column headers.
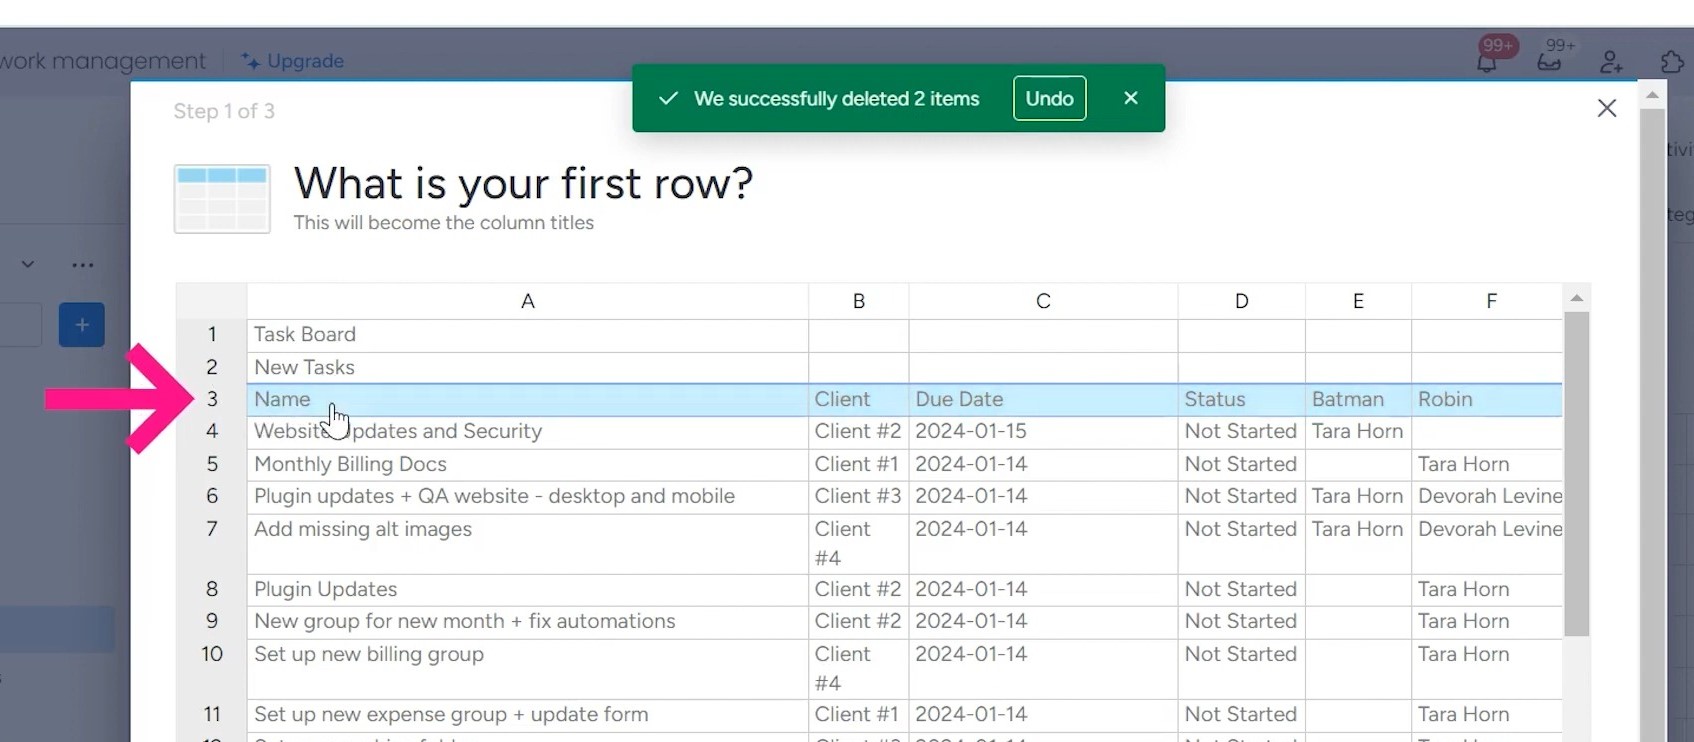
This row will define the structure of your new board, so it’s essential to select the appropriate one.
Take your time to ensure you’ve chosen the right header row before proceeding.
iii. Map Your Data
After confirming the header row, you’ll need to map each column from your Excel file to the corresponding column type in your new monday.com board. For example, I’ve changed the “Date” column to “Status” column because that’s what I have in my Excel sheet.
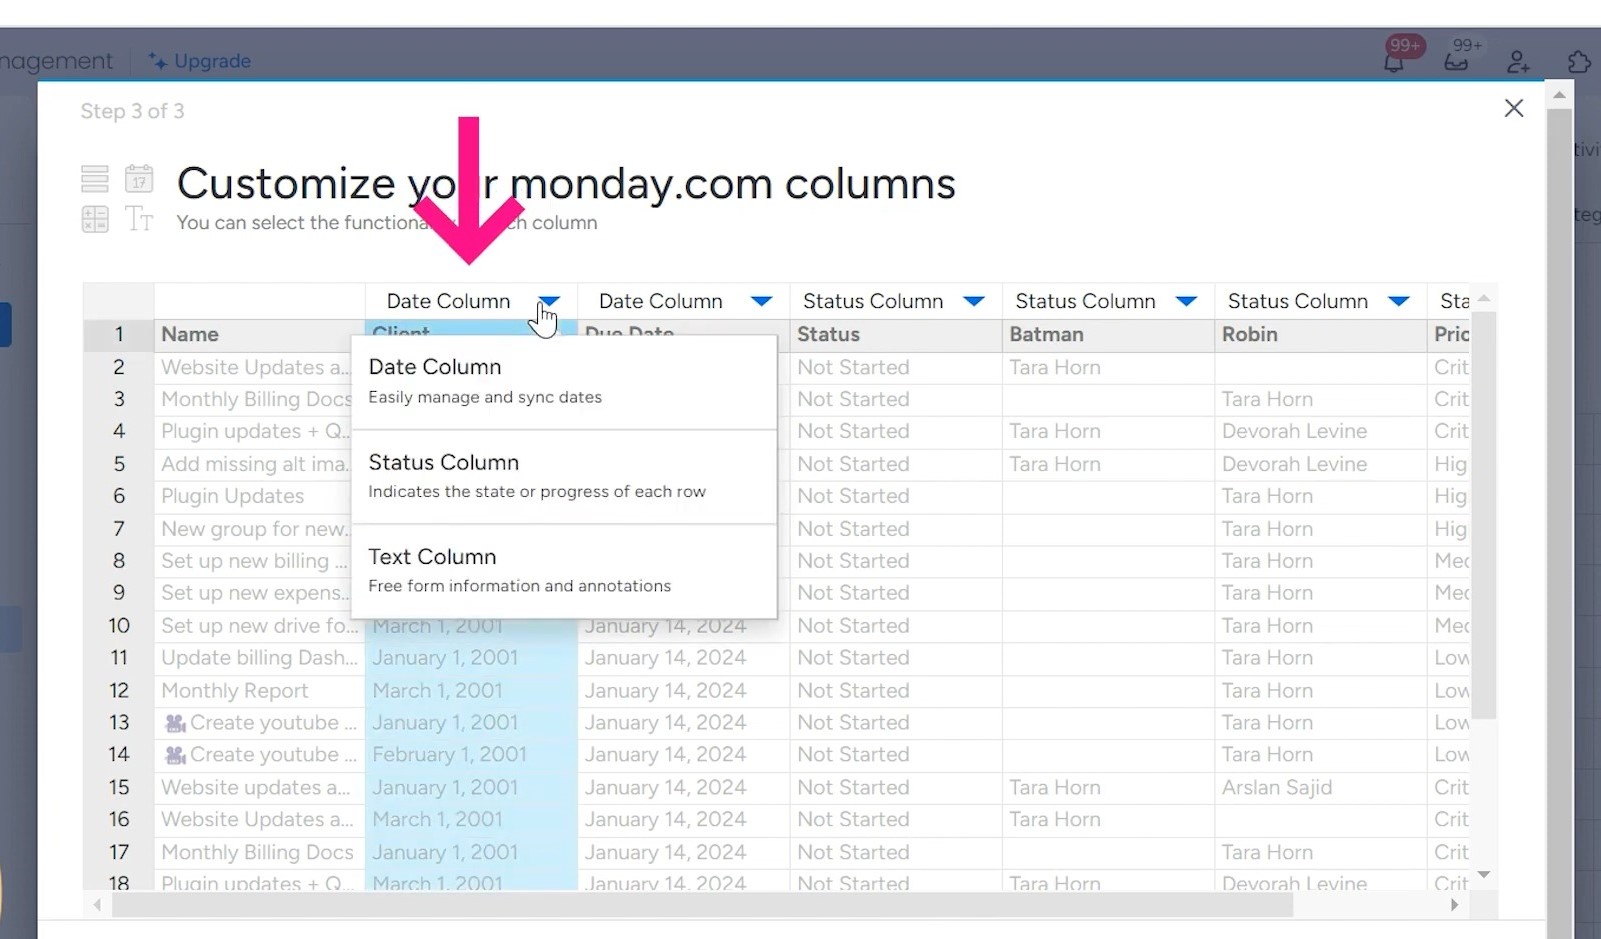
Pay close attention to any mismatches, as certain column types may not align perfectly with the data in your spreadsheet.
If you encounter a situation where a column type isn’t compatible with the data you want to import (e.g., a “People” column), don’t worry!
You can temporarily map it to a different column type during the import process, and then change it to the desired type after the board is created.
iv. Create New Board
Once you’ve meticulously mapped all your columns, click the “Create Board” button to initiate the import process.
Within moments, a brand-new board will be created, populated with all the data from your Excel file, organized according to the column mappings you specified.
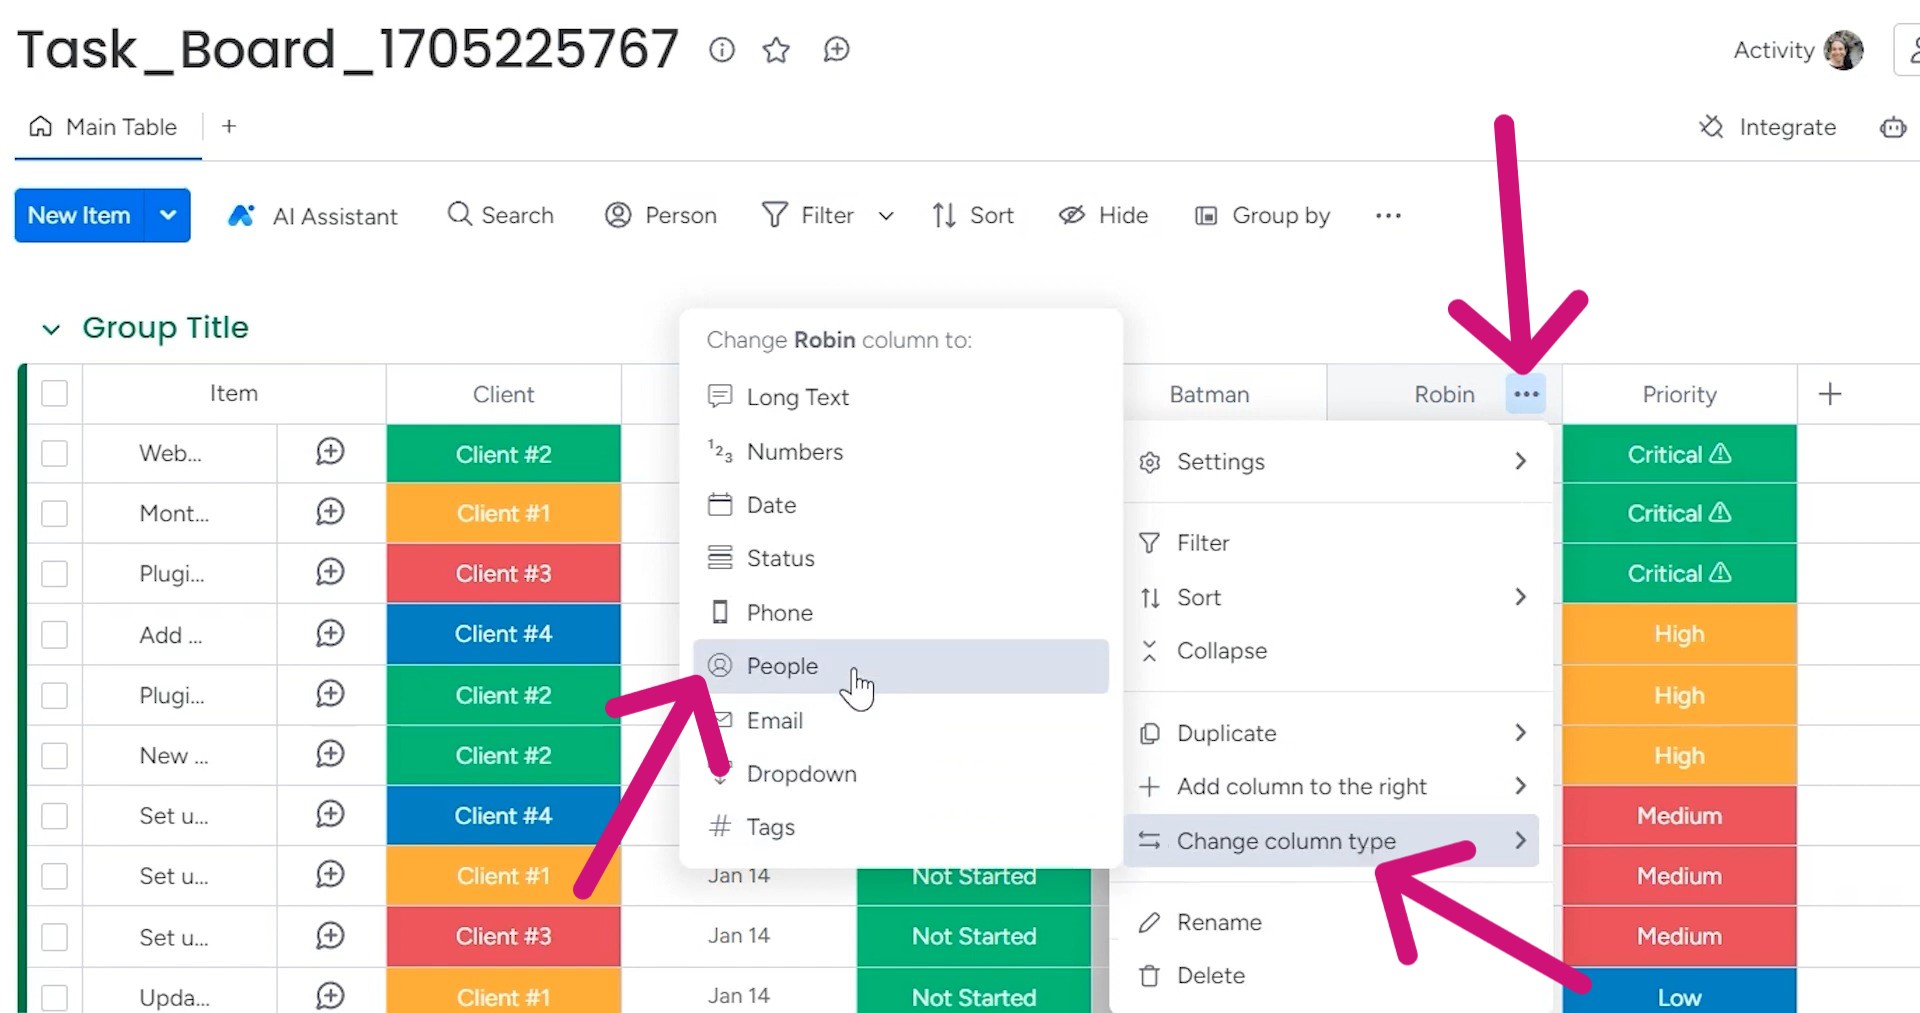
To change a column type, locate the column, click on its settings, and select the appropriate column type from the available options.
Need help with monday.com implementation? It’s time to embrace efficiency with Simpleday’s expert guidance. Our expert team will help you utilize the platform as per your business needs. Get in touch!