
Gathering client information is crucial for any business. Whether during the onboarding process, for a marketing campaign, or just routine data collection, you want it to be as simple as possible.
This is where a tool like monday.com can be a real lifesaver. You can quickly set up boards and forms within the system to collect whatever info you need from clients, things like their contact details, newsletter preferences, and any documents.
Clients can then fill out the forms online whenever it’s convenient for them, and upload all the files you requested. Best of all, the platform allows you to integrate with other apps too, so you can collect e-signatures and more.
How to Set Up Your Monday Boards to Collect Information from Clients
I’ll discuss two different ways to set up a board in monay.com to collect information from clients.
Monday WorkForm
Setting up a monday Workform is an easy way to collect information from clients. It takes just a few minutes.
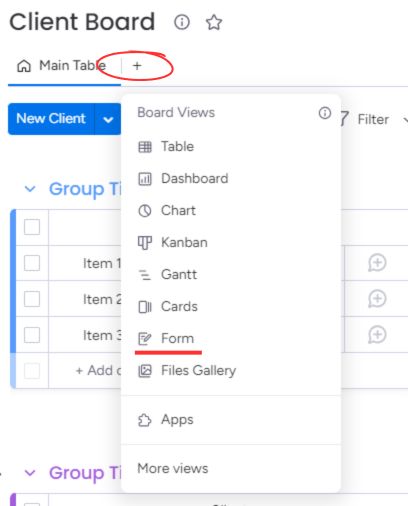
Create a board with the columns you need, like client name, email, phone number, mailing address, and newsletter preferences. Next, click the “+” icon and and choose the “Form” option.
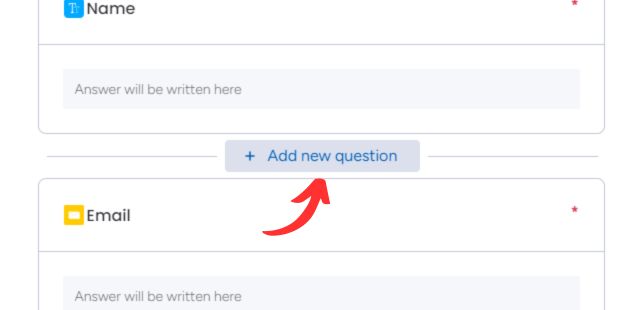
Edit the form by selecting the type of question. It could be anything you deem necessary for your project, like a client’s location, email address, rating a specific product or service, etc. Click “Add a new question” to add more.
If you want a question to be required, click the question and check the “required” option.
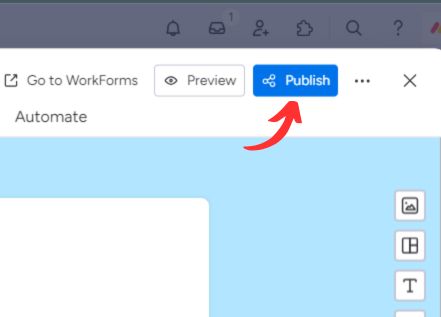
Once you’ve added all the questions you need, click “Publish.” This gives you a URL for the form. Email that URL to your clients.
When a client fills out the form, their answers will automatically show up in your Monday board under a new line item. This is important to stress, you are not adding this information to something that is already on your board, rather just a new item is being created.
A downside is each form fills a new line. So, if you update a client’s info, it adds another line. But you can make another board with an automated email containing the form URL. If information changes, you can update the main board using the form.
The SuperForm App
SuperForms are a great way to collect client info on monday.com. They help update existing entries instead of creating new ones, perfect for CRM where you may need more information from your client during the onboarding process. Here’s how they work:
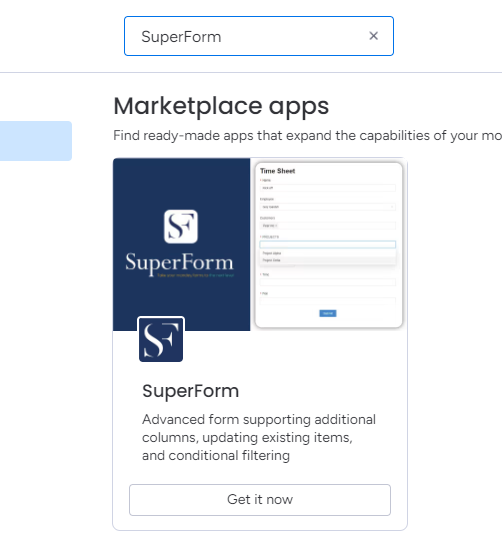
You need to firstly add this app to your account. If that is not done, go to the app marketplace and add it there.
Once it is installed on your account, follow the below steps.
Click the “+” and choose “More views.”
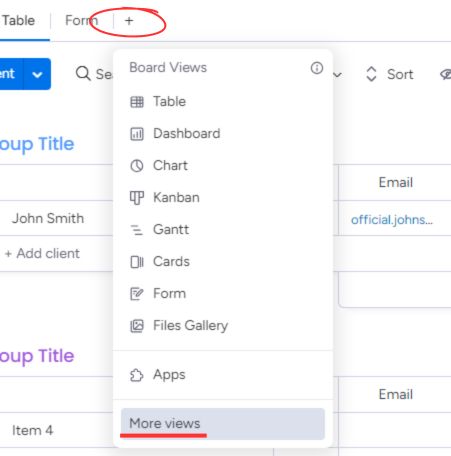
Search for and add “SuperForm.” Name your form and add a description. Then click the gear icon for settings to update the settings in your form.
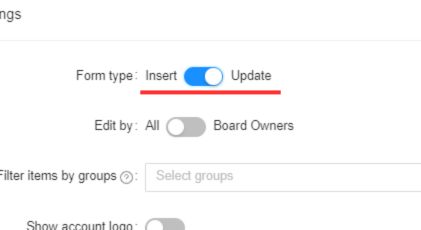
You’ll see “Insert” and “Update” options. For new clients, choose “Insert,” so the form inserts their information into a new line. For this example, I chose “Update” because I will update the information of an existing client.
Just like normal monday forms, you can add questions and mark them required.
Next, set up an Integration that generates a SuperForm link and places it in a column. I set one up to “When an item is created, generate a SuperForm link and put it in the ‘Link’ column.”
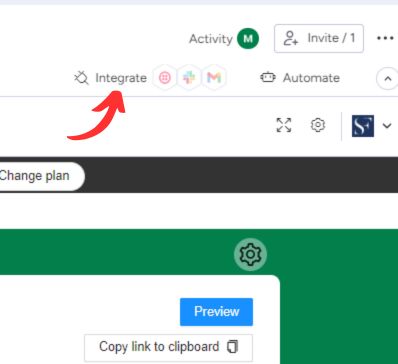
Search for “SuperForm” in the Integrations Center and copy your client’s SuperForm link. Email your client the SuperForm link. When they submit it, their info will be updated on your board with the relevant item.
Final Words
Using forms in monday.com is an easy way to gather client details without as much back-and-forth. No more chasing them down with endless follow up emails!
Need a hand setting up forms on monday.com? Let’s set up a quick call where we can walk you through the basics.