
Are you drowning in data on your monday.com boards? If you’re spending too much time scrolling through rows of tasks, you can take advantage of a powerful feature: filters. The feature helps organize the task items according to your needs.
In this blog post, you’ll learn how to use filters the right way. If you want to watch the process in a tutorial, check the video below:
In this blog post, you’ll learn how to use filters the right way. If you want to watch the process in a tutorial, check the video below:
The Simple Options: Search and Person Column
Apart from the “Filter” option, you can use the “Search” and “Person” features to filter your board. These simple options are perfect when you need to find something quickly.
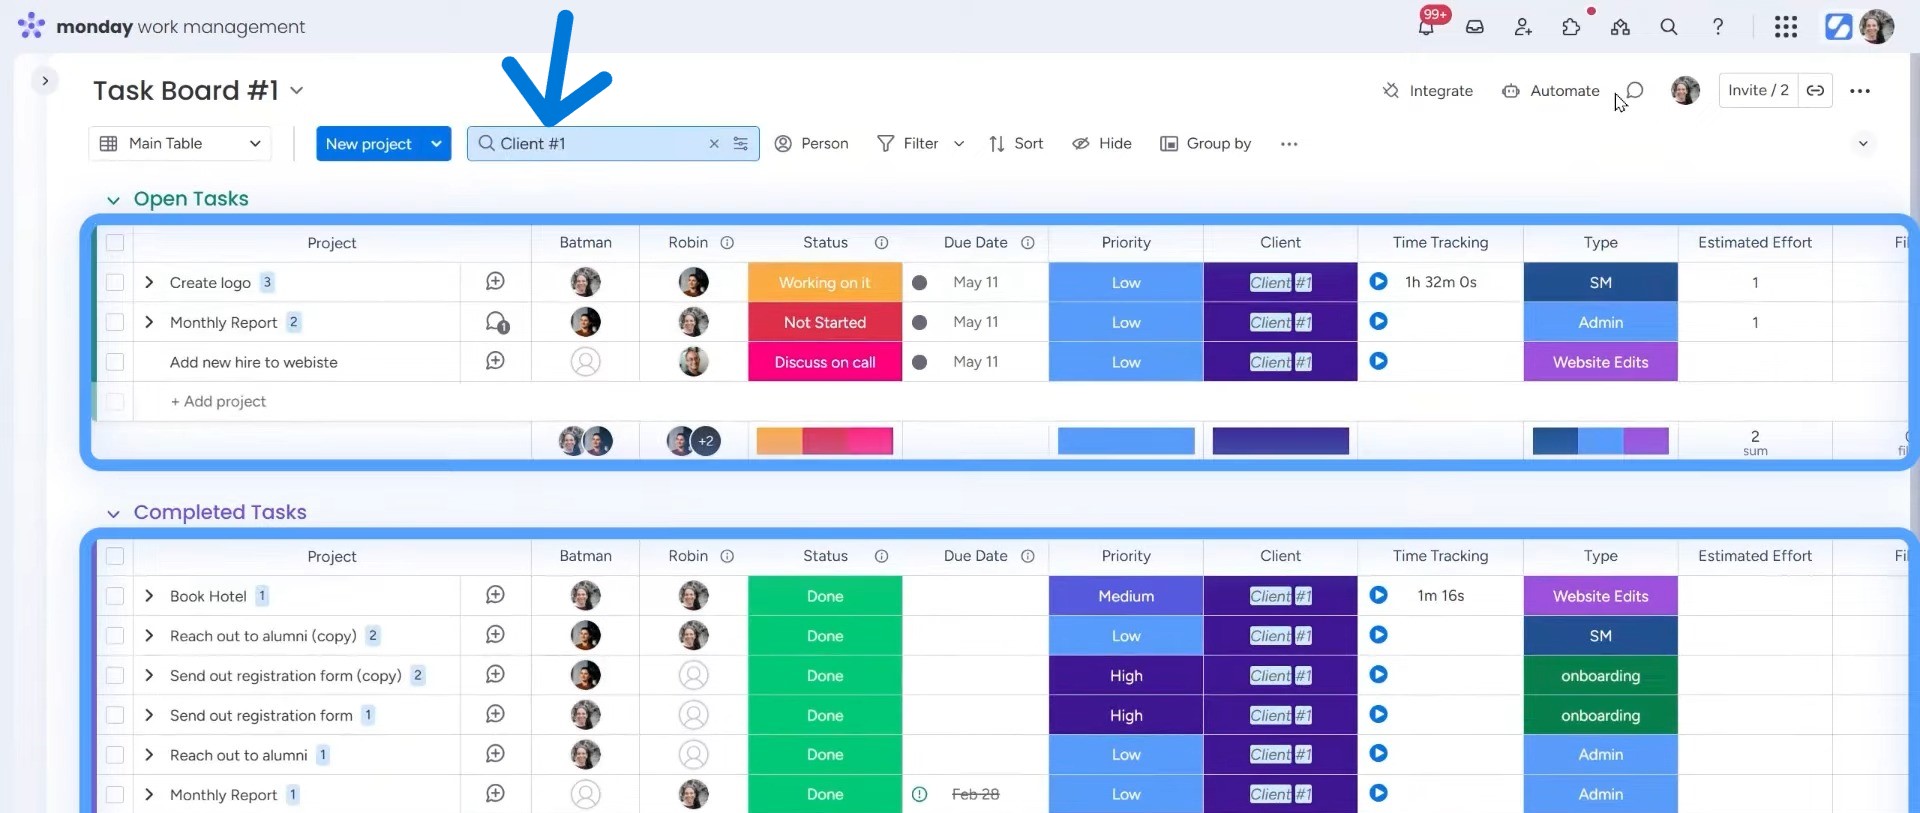
The top menu of your monday board has a “Search” option. A search bar will appear when you click on it. Just type in a keyword there, for example, “Client 1.” Right away, your board updates to show only items that match “Client 1.”
If you want to organize everything by tasks assigned to specific people, you can use the “Person” option. Click the “Person” column. You’ll see a dropdown with team members’ names.
Want to see the tasks assigned to you only? Click your name and it will be organized accordingly. Want to check what your colleague Danny is working on? Just click her name and the board will update instantly.
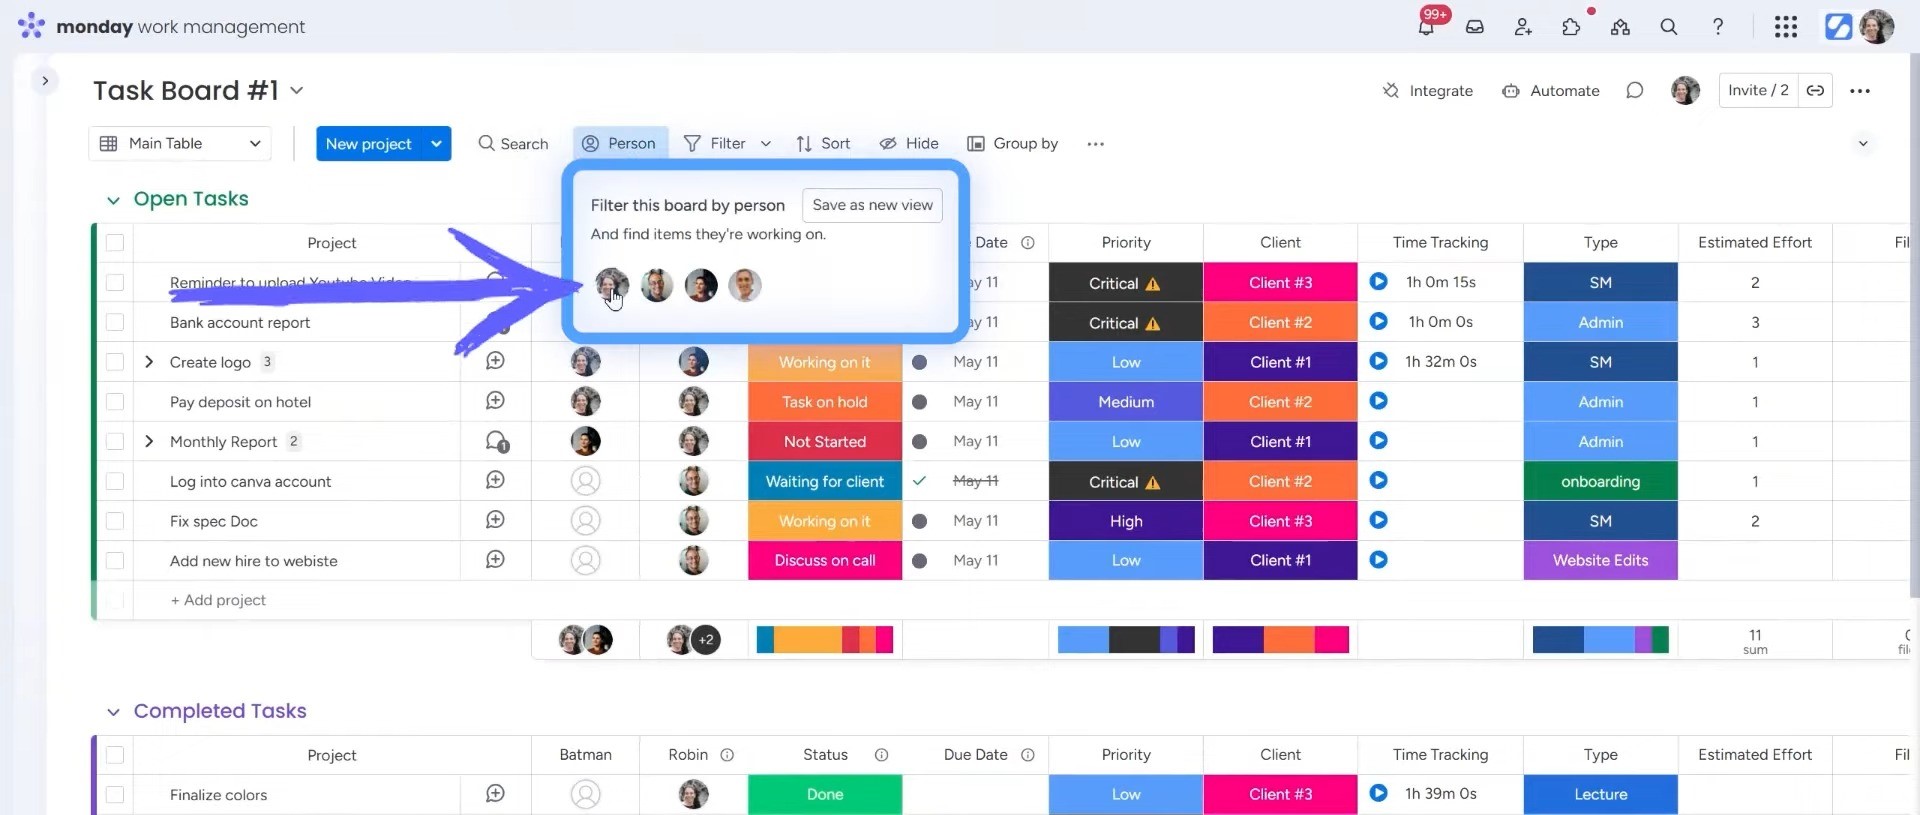
This is great for team leads or managers. It gives you a fast view of each person’s workload without clicking around or building anything fancy.
How to Use the Filter Feature
The Filter feature gives you two options: quick and advanced filters. I’ll discuss both, so you get a clear idea about all the things you can do with them.
1. Quick Filters (Column-Based Filtering)
Click the “Filter” option to open what’s called a Quick Filter. It shows all your columns, like Status, People, Tags, and more.
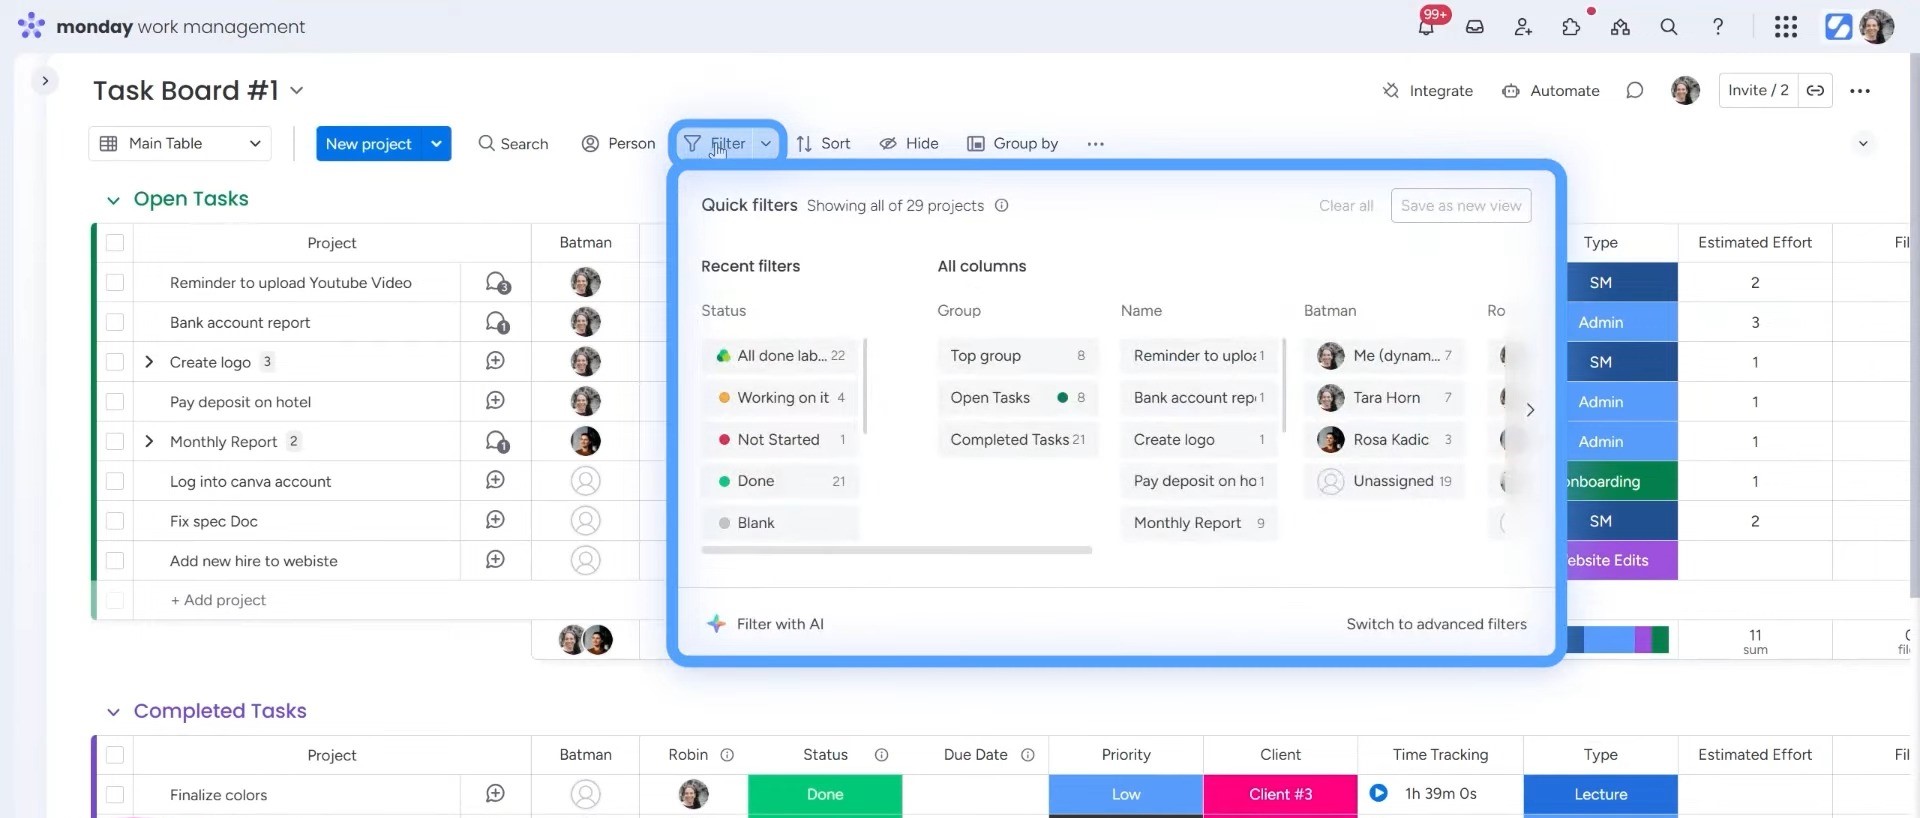
Say you want to see tasks that are “In Progress.” Just check that status.
Want to see tasks assigned to you and that are about “Social Media”? Select both filters. Each filter you add narrows the results more.
Pro Tip: You can save this view. After adding your filters, click “Save as new view” option. Give it a name like “Tara SM In Progress.” Now you have a custom view you can access anytime.
2. Advanced Filters
If quick filters aren’t enough, it’s time for the Advanced Filters.
Click the small arrow (caret) next to “Filter,” and choose “Advanced Filter.” This opens a panel where you can build more specific rules.
Pick a column, like Group, and set the rule. Maybe you want tasks where the group is “Top Group.” Then add another condition: where the person is “Tara.”
You can add as many rules as you need. Use “AND” to match all conditions, or “OR” to match any.
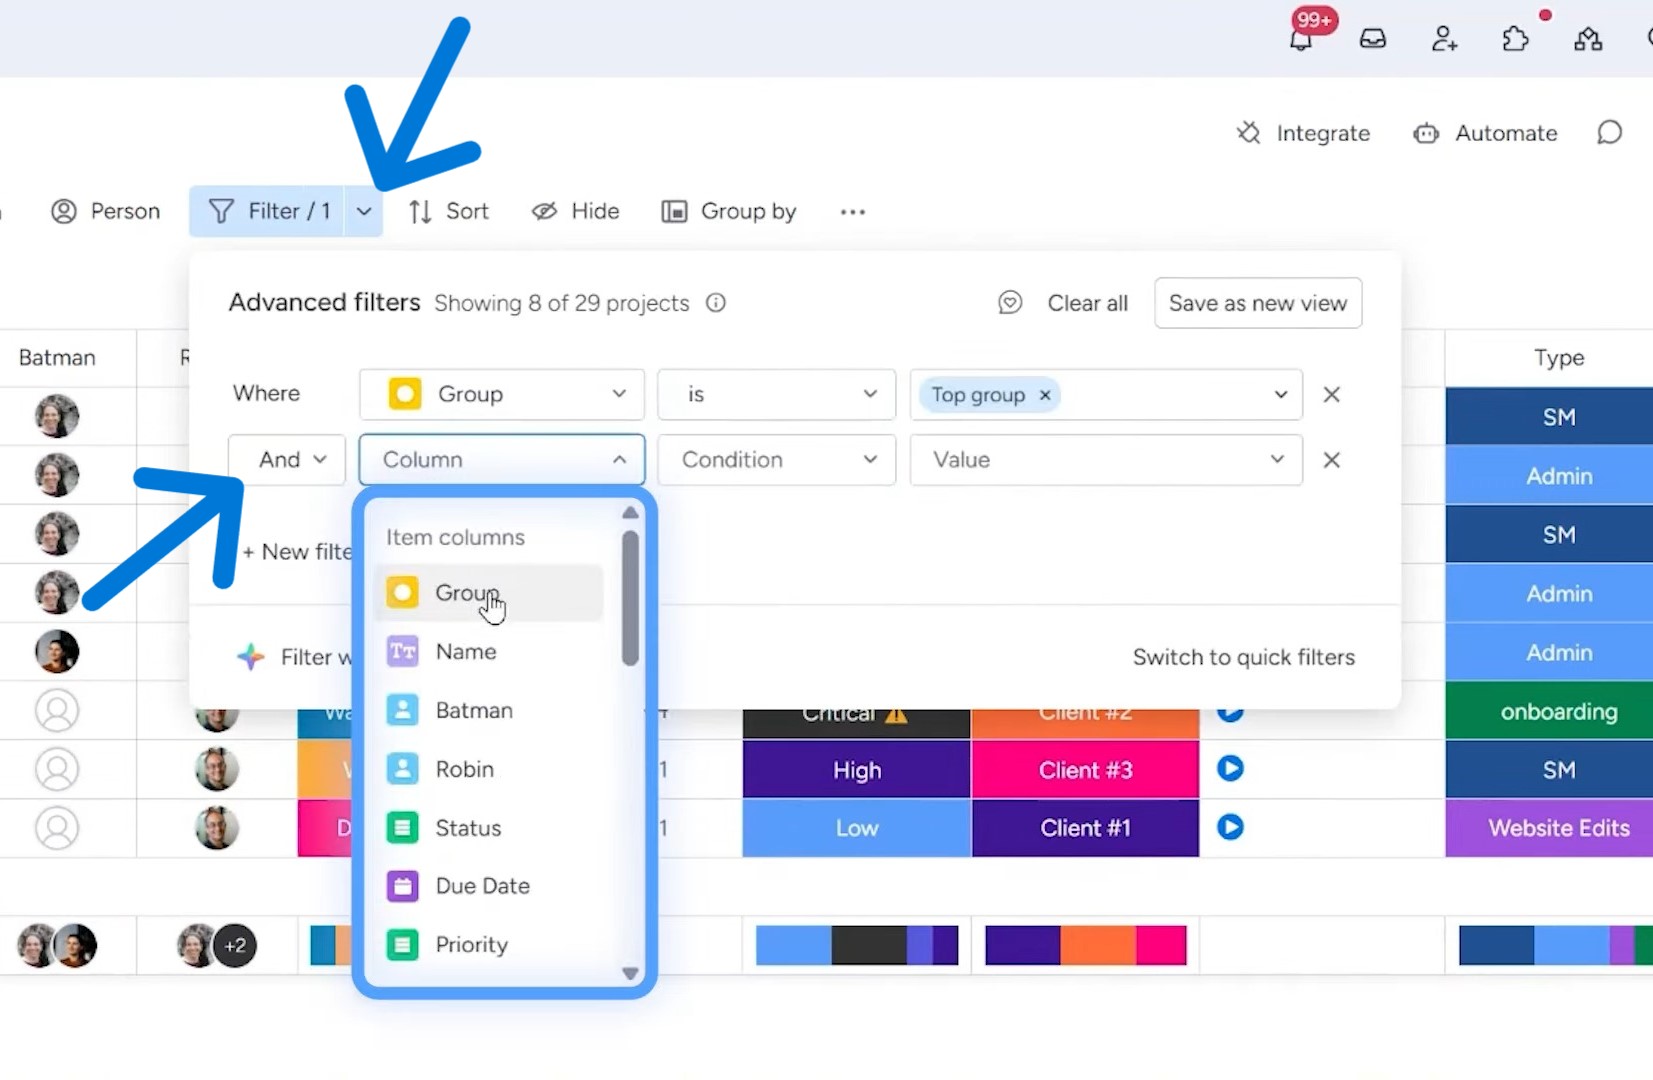
You can also filter sub-items here. For example, find tasks in “Top Group” where the sub-item status is “Not Started.” This is a powerful feature to sort the tasks in a complex project.
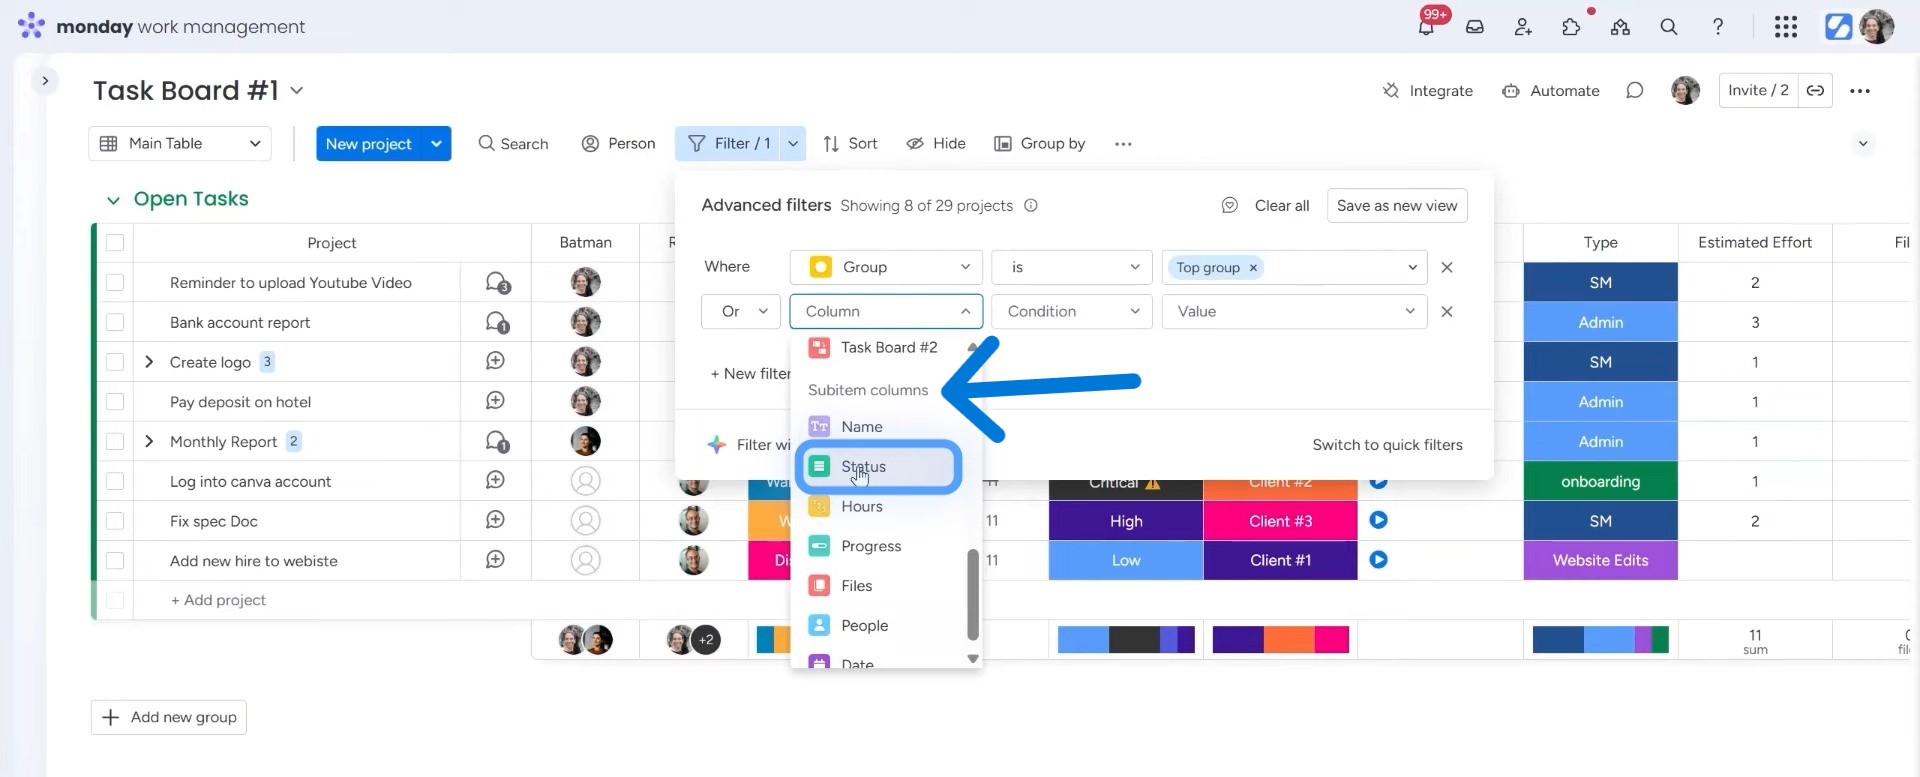
And just like before, you can save your advanced filter as a view with a custom name.
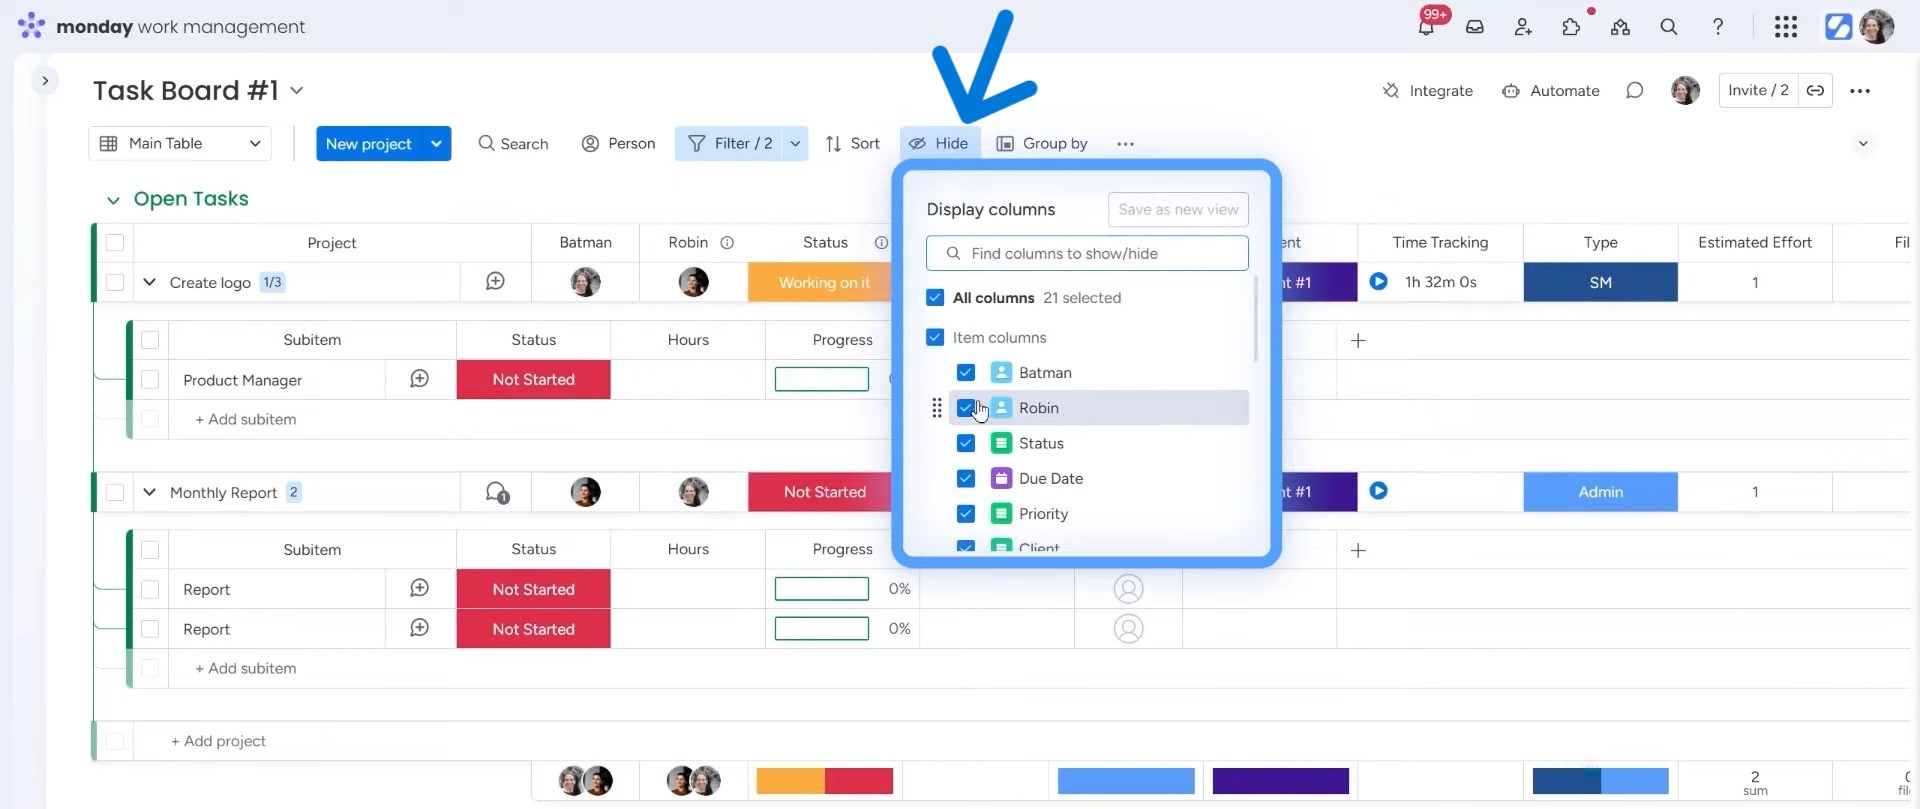
Extra Features
You can use two extra features, which are Hide columns and Me (dynamic) view, for filtering your boards.
You can hide the columns that you want to filter out of your view. Maybe you just want the task name, person, and due date. You can hide other columns and then save that layout in your view.
The “Me (dynamic)” feature works with any person column, and you can access it from the Advanced Filters option.
Let’s say you set a filter where “Assigned to” is Me (dynamic). When you look at that view, you’ll see all your tasks. But when someone from your team, for example Danny, opens the same view, she will see only hers. It adjusts automatically based on who’s logged in.
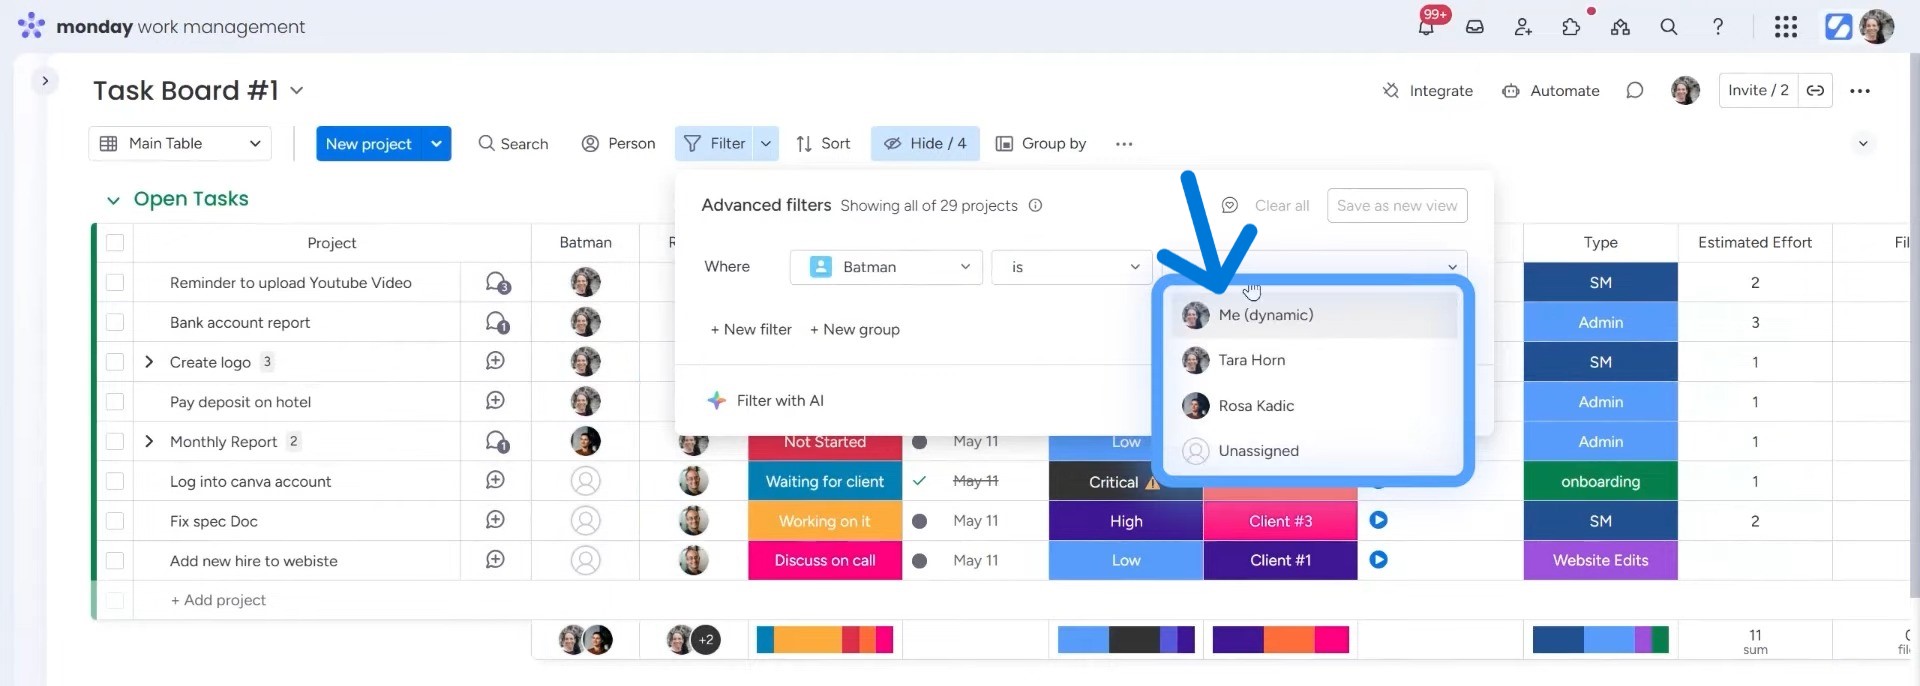
This is a very useful feature for teams. Instead of building separate views for each person, you build just one. Everyone uses it, and everyone sees what they need. You can name this something like “My Daily View” and pin it to your sidebar.
Want help making monday.com work for you? Simpleday takes the guesswork out. We’ll set up smart filters, custom views, and workflows tailored to your team, so you save time every day. Contact us to learn more.