Tax season can be a stressful time. Between gathering countless documents from various accounts, organizing everything in a coherent manner, and keeping track of deadlines, the process can quickly become overwhelming.
But you can use monday.com to streamline and organize the entire process, while preparing for submitting the tax.
Streamlining Your Taxes with monday.com
I’ve divided the entire process of managing taxes into four steps. I’ll explain each step in detail so you can implement them easily.
Would you rather prefer watching a tutorial? Check out my YouTube video below:

1. Building Your Board
The first step of your tax organization is creating a dedicated board for your taxes.
Simply click the “+” button and give it a clear name like “Taxes.” The board will serve as your command center for all things tax-related. Then, click on the “Create Board” button.
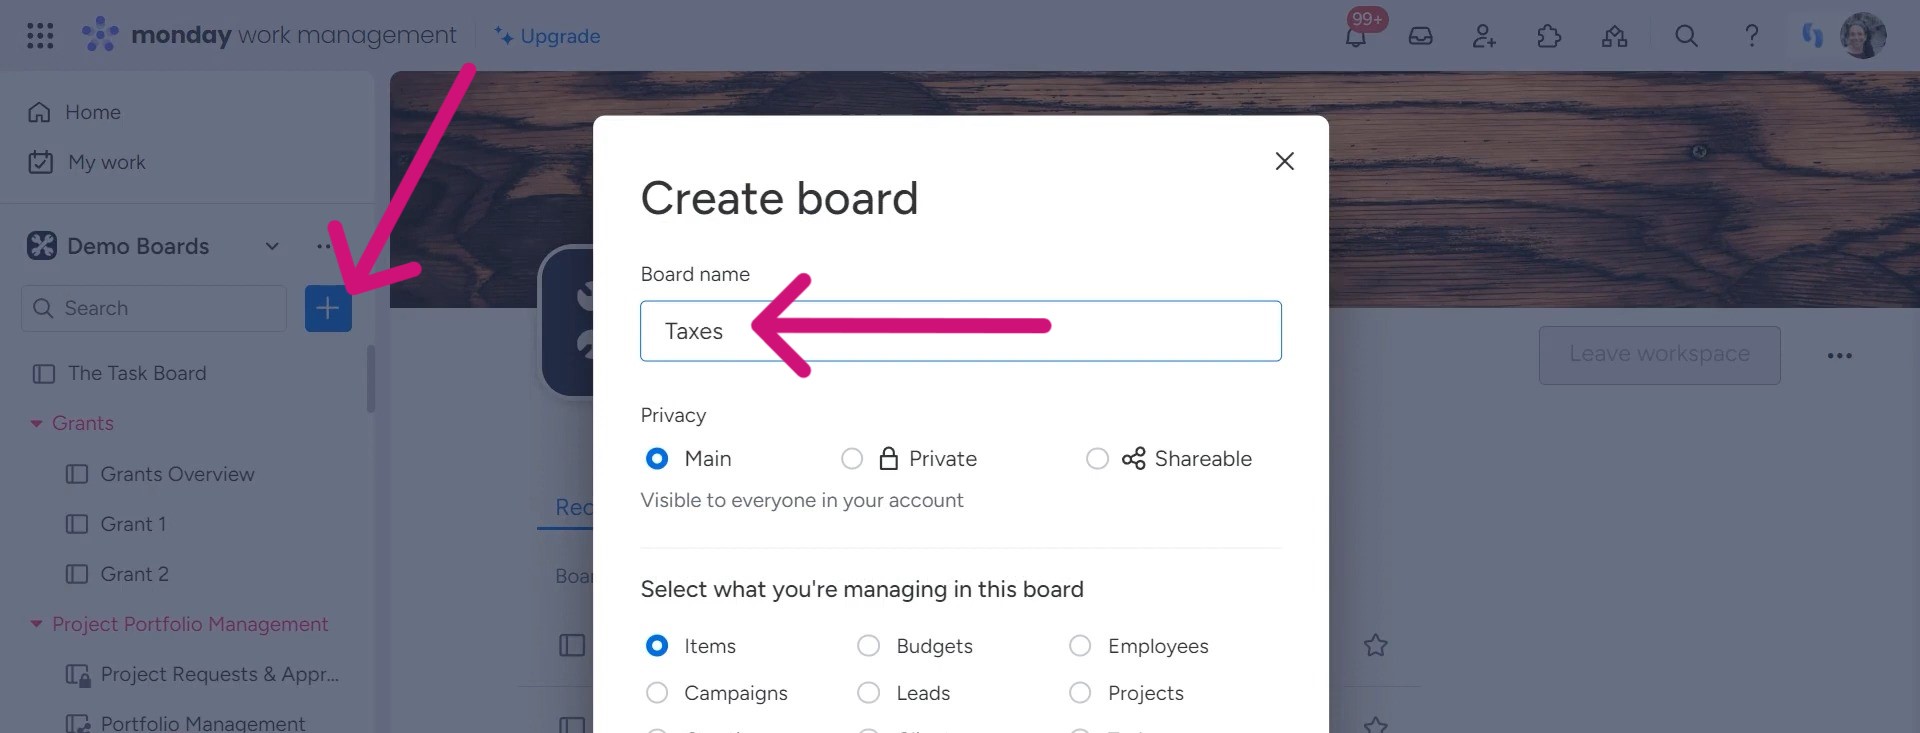
Think about the documents and information your accountant might need. You need to organize them.
Customization is key to making the board work for your specific needs. If you’re filing individually, you can remove irrelevant columns like “Person” or “Date” to declutter your view.
On the other hand, if you’re working on taxes for a family or company, those columns might be useful for tracking responsibilities and deadlines.
Next, consider creating groups to separate different tax years. For the current year, you could have a group titled “2023.” You can just duplicate this group to use as a template for the coming years.
Statuses are a powerful way to visualize your progress. Create custom options like “Working on it,” “Not started,” “Done,” and “On hold” to reflect your tax preparation workflow accurately.
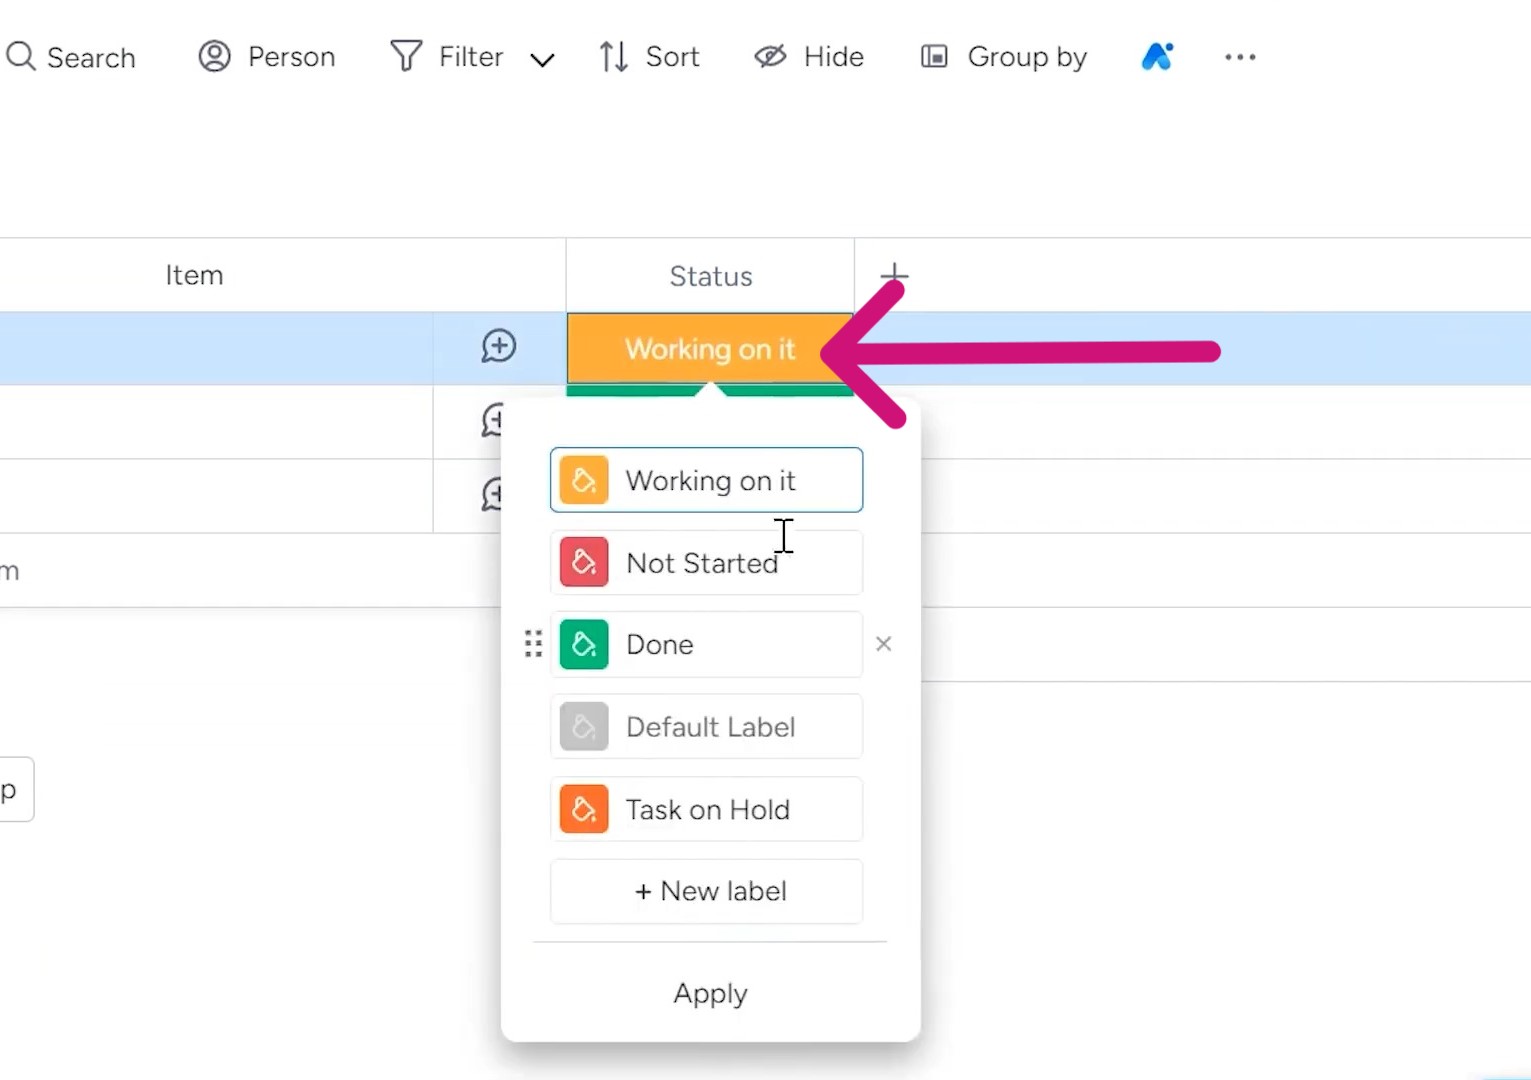
This way, you can quickly identify which items need attention and which are complete.
2. Categorizing and Organizing
Now that you’ve set up the foundation of your tax board, it’s time to start organizing your documents and information.
If you’re filing jointly or have dependents, consider adding a “Person” column to categorize items by individual. It can be helpful when dealing with accounts or documents specific to each person.
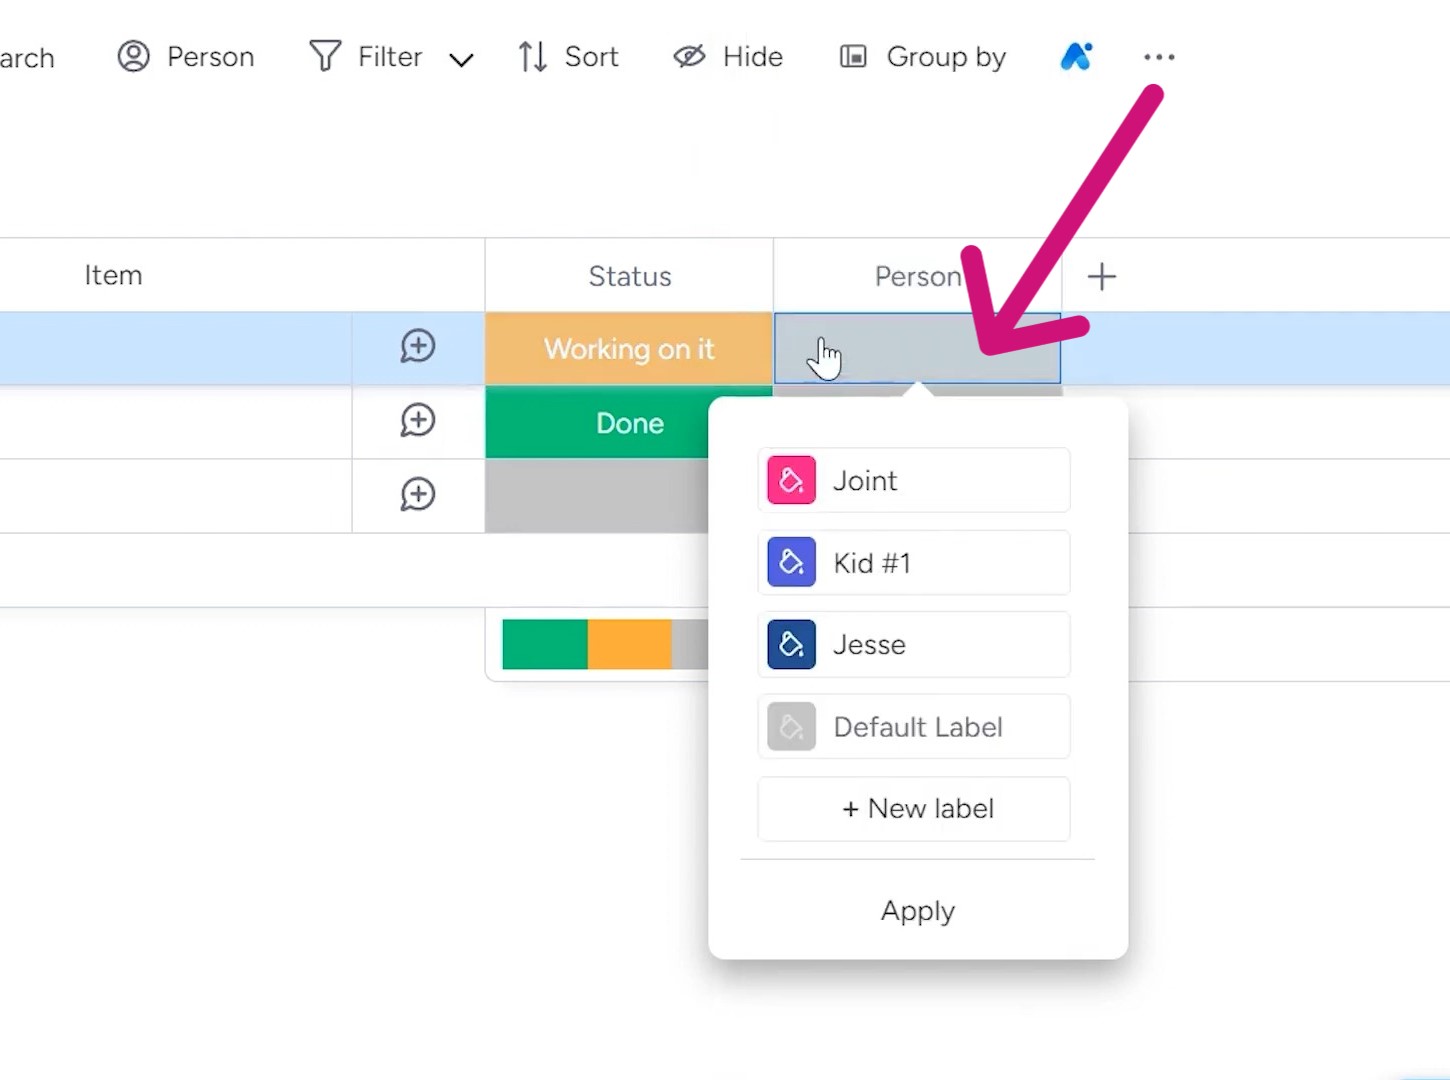
To keep track of your progress, a simple checkbox column can work wonders. Use it to mark off items as you upload their corresponding documents to a shared storage solution like Dropbox. That way, you can easily see what’s been taken care of and what’s still outstanding.
Alternatively, monday.com allows you to attach files directly to your board items. You can do this by adding a “Files” column. It could be a convenient option if you prefer to keep everything in one place.
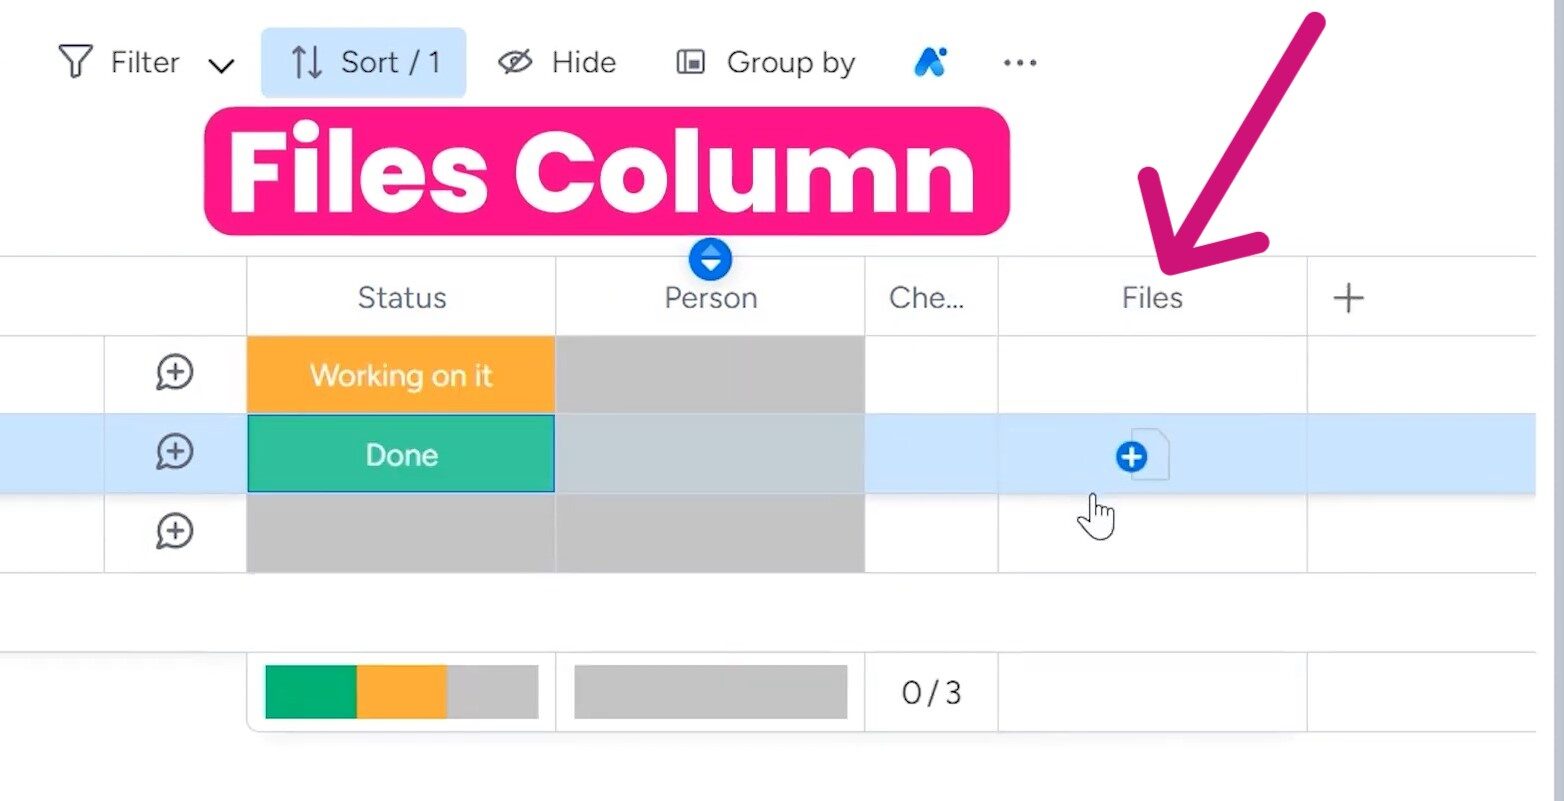 Plus, you can share the entire board with your accountant by making them a guest to your board. It’ll give them instant access to all the necessary documents and information.
3. Adding Information and Duplicating for Future Use
With your board structure in place, it’s time to start adding information. Let’s say you need to gather documents from various accounts like Bank of America, Community Savings, and E-Trade.
Simply create a new item for each and specify details like account type, the document required (e.g., K-1 or 1099), and any other relevant notes.
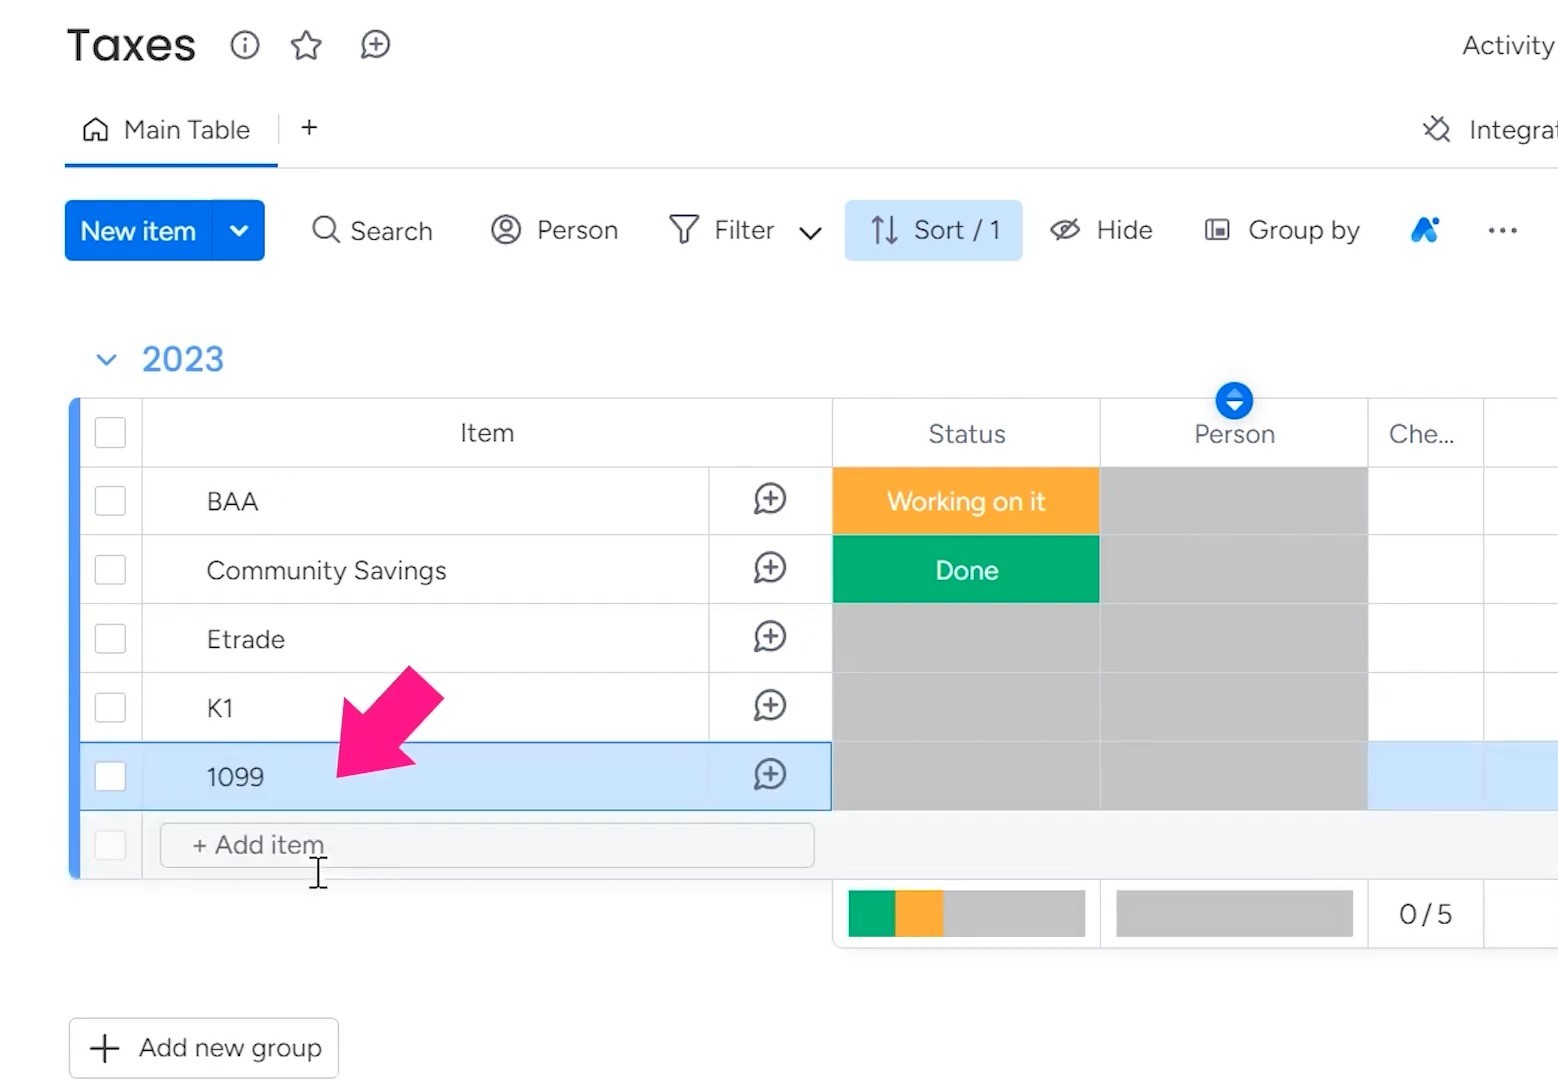
As you progress, use the columns you’ve set up to categorize each item accordingly. Is this a joint account? Assign it to the relevant “Person.” Have you uploaded the documents to Dropbox? Check that box!
This will give you an overview of all the documents, their statuses, who they are for, and other relevant information.
Once you’ve wrapped up the current tax year, you can duplicate the entire group of items, creating a clean slate for next year’s taxes. Rename this duplicate group something like “Template 2024” to distinguish it from your completed work.
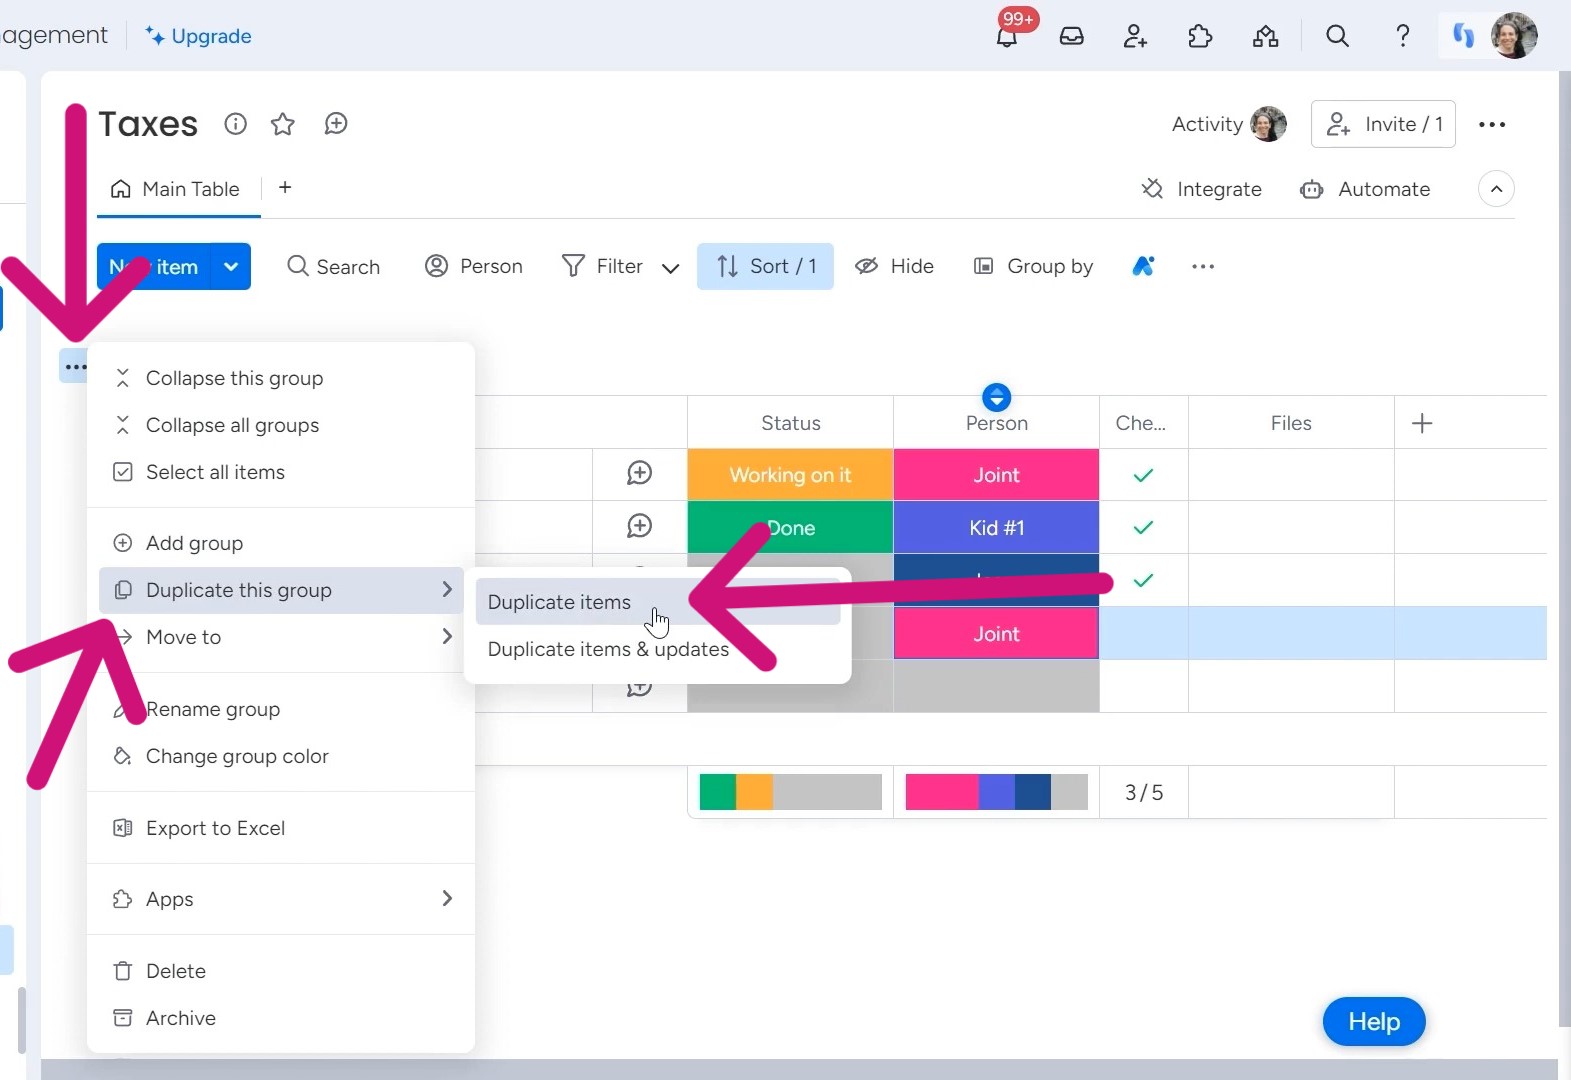
In this template group, clear out any specific account details or document names from the previous year.
What you’ll be left with is a perfectly structured framework, complete with customized columns and statuses, ready to hit the ground running when tax season rolls around again.
4. Sharing with Your Accountant (Optional)
If you prefer to keep your accountant in the loop throughout the tax preparation process, monday.com offers a convenient sharing feature. With just a few clicks, you can convert your board to a “Sharable” type, allowing you to grant access to a guest.
To do this, simply navigate to the board settings and change the “Board Type” to “Sharable.”
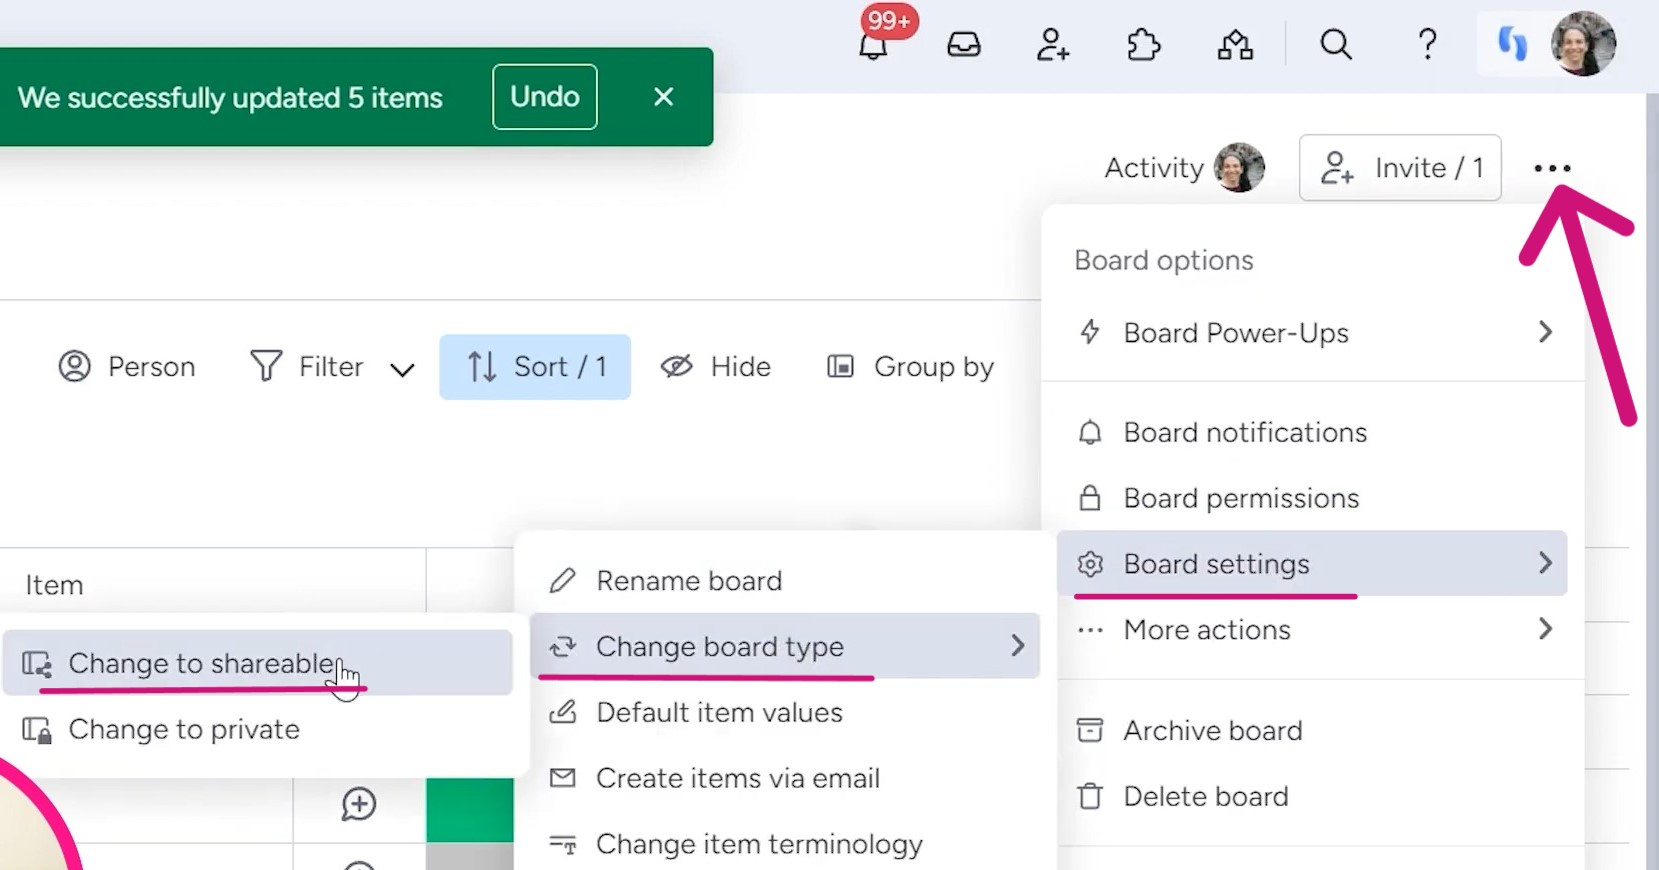
This will enable a new “Invite” option, where you can enter your accountant’s email address and send them an invitation to view and collaborate on your tax board.
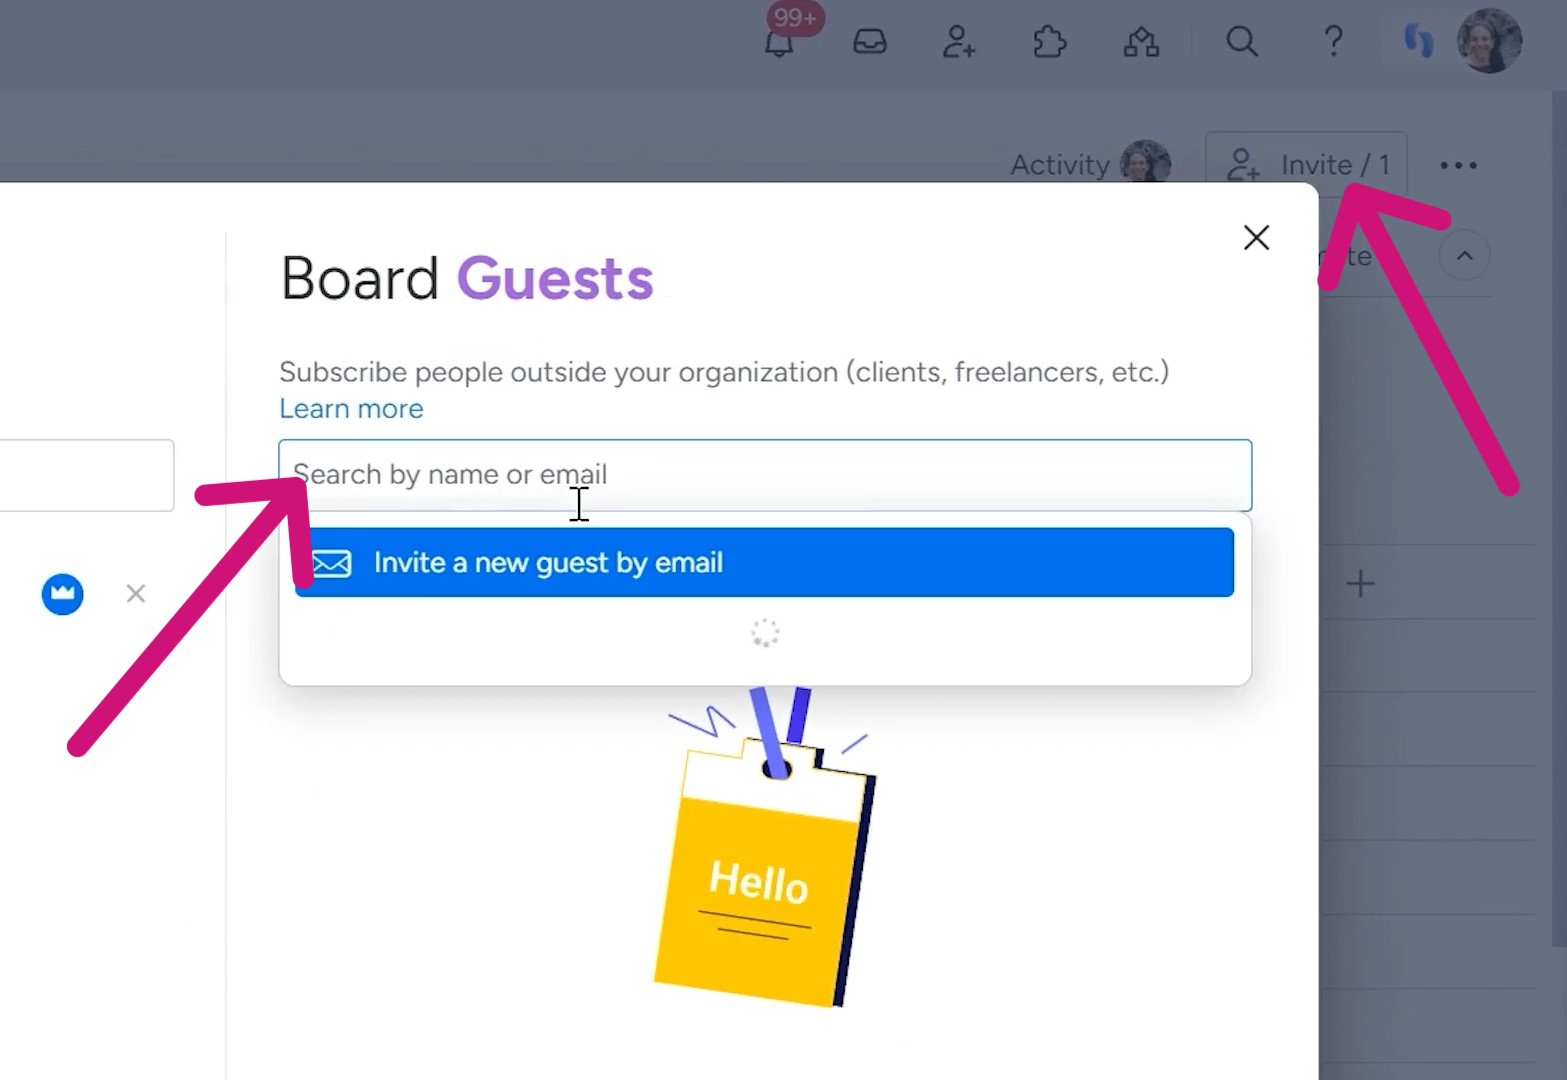
By granting your accountant access, they’ll have a real-time view of your progress, uploaded documents, and any additional notes or categorizations you’ve added. It can ensure a more efficient tax filing experience for everyone involved.
At Simpleday, our experts are dedicated to helping individuals and businesses understand the monday.com features. Don’t let another tax season, project launch, or crucial initiative slip through the cracks. Get our services and experience the game-changing impact on your business.


