
Overview of the monday.com Boards
Before setting up the onboarding automations, we first need to understand the key boards being used: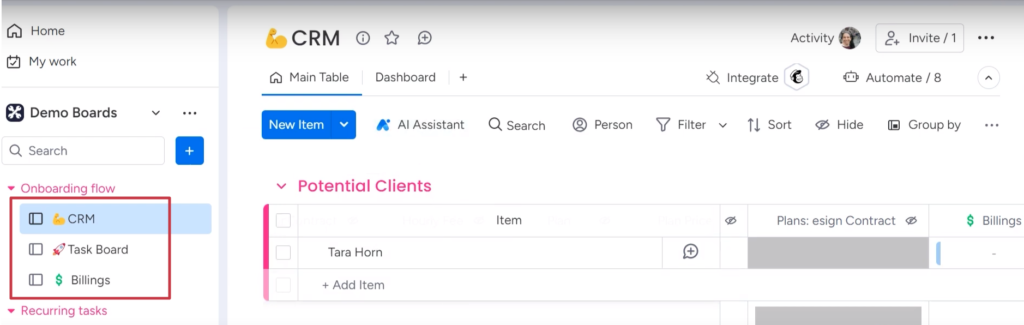
The CRM Board
The CRM board keeps tabs on potential leads and current clients. It’s the hub for managing relationships from initial outreach to signed contracts. The status of each contact is visible at a glance.The Task Board
This lists any onboarding tasks that need completing for each new person. It tracks tasks like setting up accounts, assigning equipment, providing training, and more.The Billing Board
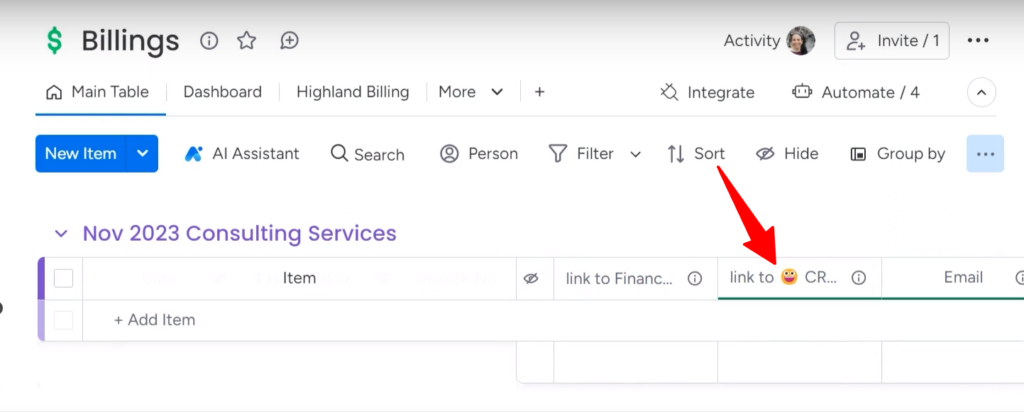
Each month, this board shows the billing clients according to active contracts. It pulls in billing details to automate the invoice generation. By connecting these boards, you get a centralized view of your pipeline. Need to see where a new client is in the onboarding process? Check the task board. Want to verify their billing details? It’s on the billing board. Everything is there for easy monitoring.How to Automate the Onboarding Process
When you set up the monday.com automations, they will automatically handle all the key onboarding steps. Let’s look at the specific automations you can create:Moving to Current Clients
This automation switches a new contact from “Potential Clients” to “Current Clients” in the CRM board after signing the contract.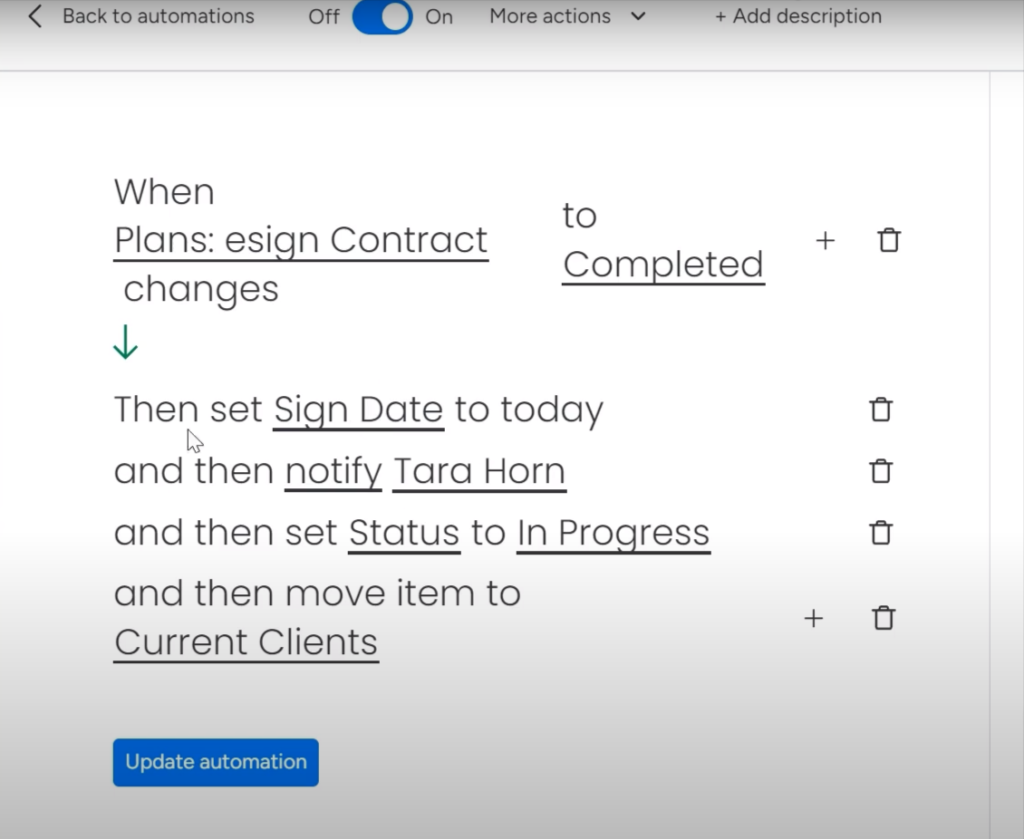
Creating Onboarding Tasks
On the task board, you can generate a predefined set of subtasks for each new person under one master “Onboarding” task.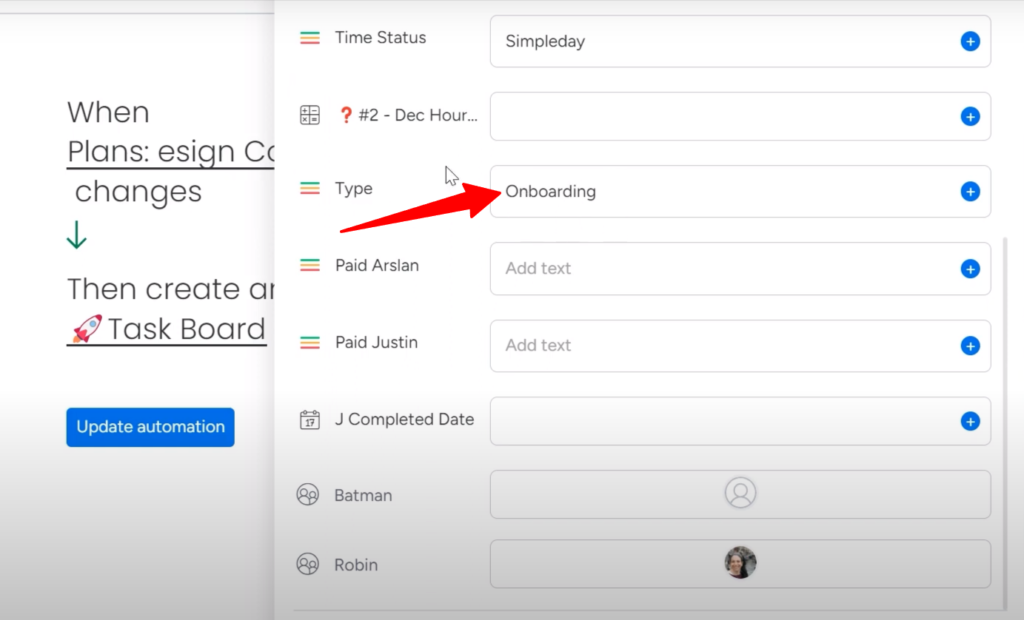
-
- Send welcome email
-
- Create email address
-
- Assign office space
-
- Schedule new hire orientation
-
- Add to company health insurance
Adding to the Billing Board
This automation populates the billing board with your new addition’s info like name, email, plan details, etc.
Setting up the Automations for Connecting Boards
When setting up my billing board, I made sure to connect it to my CRM, so client details appears there automatically. That way, I don’t have to manually type out their company name, contract details, etc. every single month when it’s time to invoice. To really understand how this works, it’s helpful to look at the specific automations I set up on the task and billing boards. Over on my task board, I’ve set things up to auto-generate subtasks for onboarding new clients.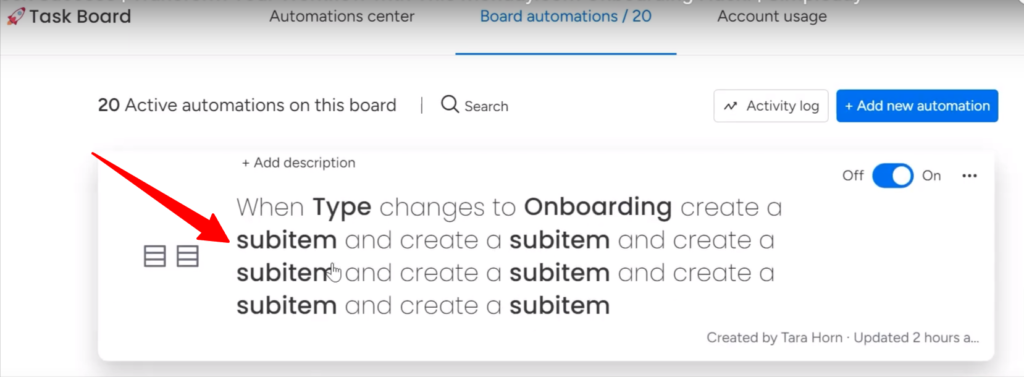
What Happens After Setting up the Automations?
You must be curious about learning what the automations actually do to make your workflow easier and less time-consuming. For example, I’ll explain what happens when I onboard a new client. So, when a new client signs their contract online (I use an e-signature app called GetSign for this purpose), the automations I set earlier spring into action. The status of their contract in the CRM board changes to “Completed.”
-
- The new client goes to the “Current Clients” group, so you can keep tabs on active accounts.
-
- On the task board, a predefined set of onboarding tasks gets generated with their name, ready to be assigned and completed.
-
- They also get added to the billing board, so their invoices can be prepared each month.
You can watch the entire process in this video:
