Have you ever planned an event and had a bunch of tasks to finish beforehand? Like emails to send, vendors to contact, photos to organize – all needing to get done weeks or days before the big day. It’s easy to lose track of due dates and forget something important. Wouldn’t it be nice if there’s a tool that could remember dates for you? Great news is you can automate due dates for an event on monday.com.
I’ll discuss the whole process of automation setup in this blog post. But if you prefer watching a tutorial, check this video instead:
How to Automate an Event Dues Dates on monday.com
For this blog post, I’ll use the example of a board made for a wedding planner. The board has different events listed out, like the rehearsal dinner, the main reception, and then a whole bunch of tasks that need organizing before the big day.
The tasks, for example, could be arranging the flowers six weeks before the rehearsal dinner or booking the hall five months before the wedding day. We can stay on schedule by setting the due dates in relation to the actual event dates. So, if the wedding was on June 15th, then the flowers would need to be ordered by April 30th. This helped break down the big project into smaller steps.
There is nothing complicated about setting up the due date automation. You’ll find it even easier by following these steps:
Setting Up the Fields
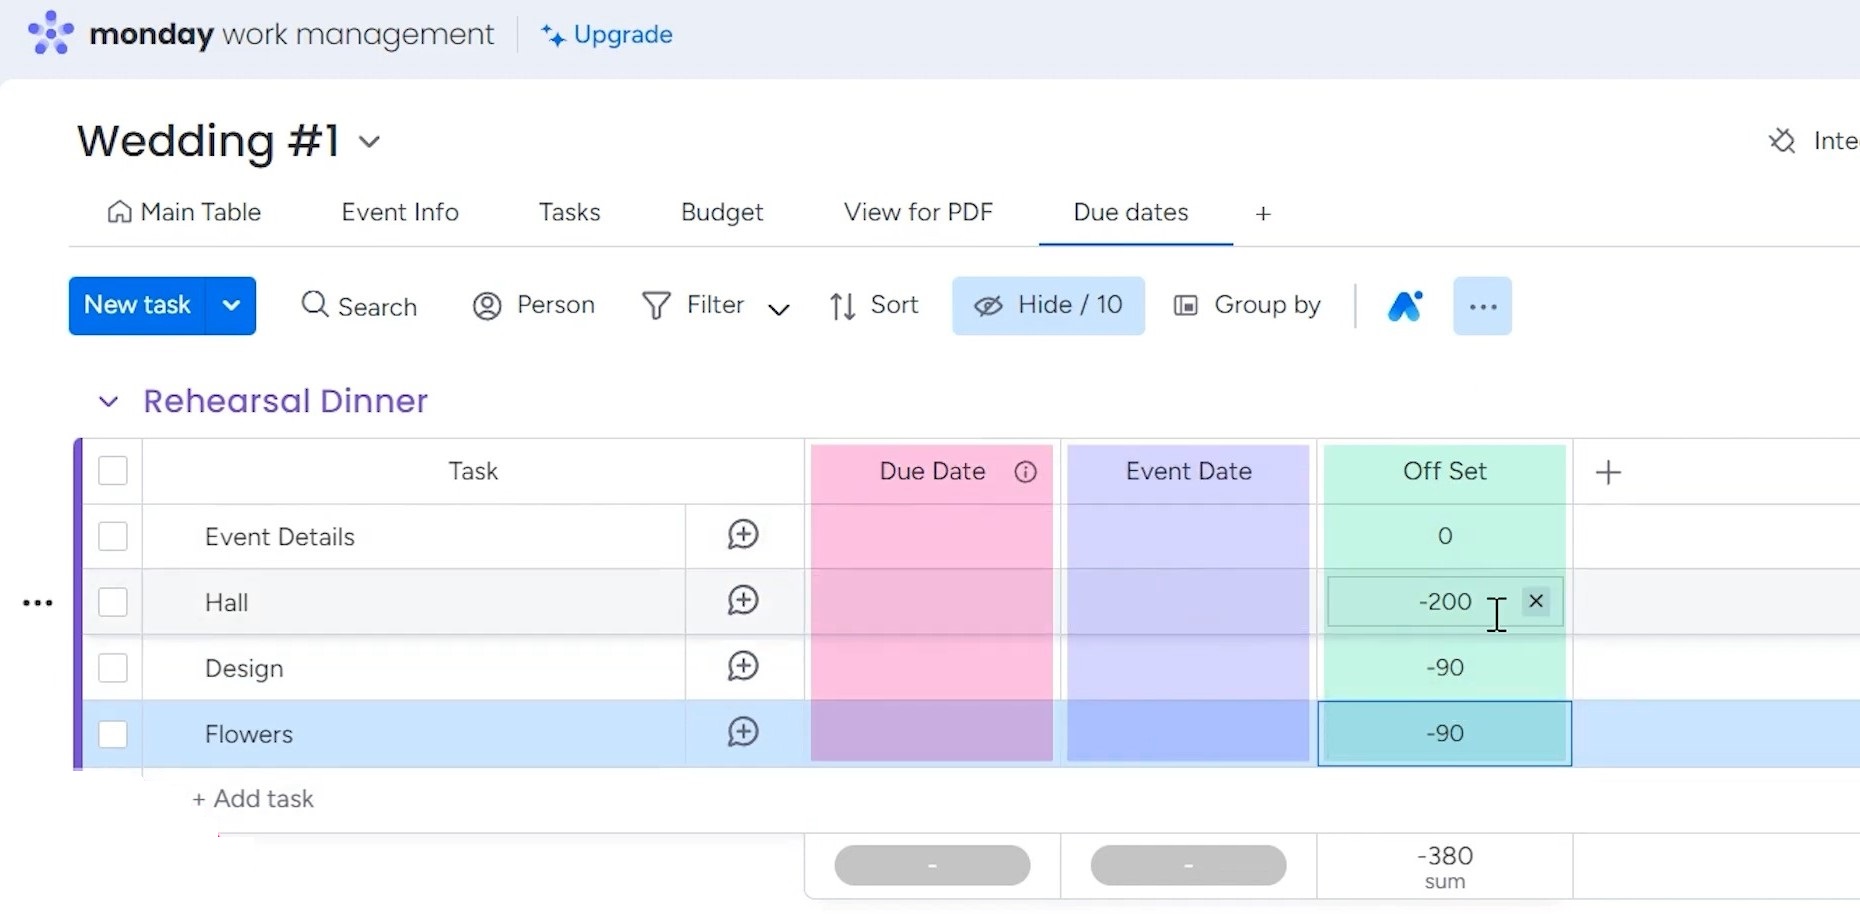
At first, we need to set up the board with three important columns:
- Due Date
- Event Date
- Off Set Date
The Event Date column lists the dates of upcoming events. However, you also need to account for tasks that need to be completed by a certain “Due Date,” which is typically set before the event itself.
To bridge this gap, you can introduce an “Off Set Date” column that calculates the due dates based on a predetermined offset from the event dates. This simple, effective approach ensures that you never miss a crucial deadline, allowing you to stay organized and prepared for every event on your calendar.
Let’s walk through an example scenario. For a wedding, you might want the venue (“Haul”) booked 200 days in advance, the dress/suit designs finalized 90 days before the big day, and the floral arrangements ordered 90 days out as well. By entering these negative offset values (-200, -90, and -90), you’re essentially specifying how many days prior to the event date each task needs to be completed.

Once you’ve defined the event date and populated the off set column with the appropriate lead times for each task, it’s time to set up the automation.
Creating the Automation
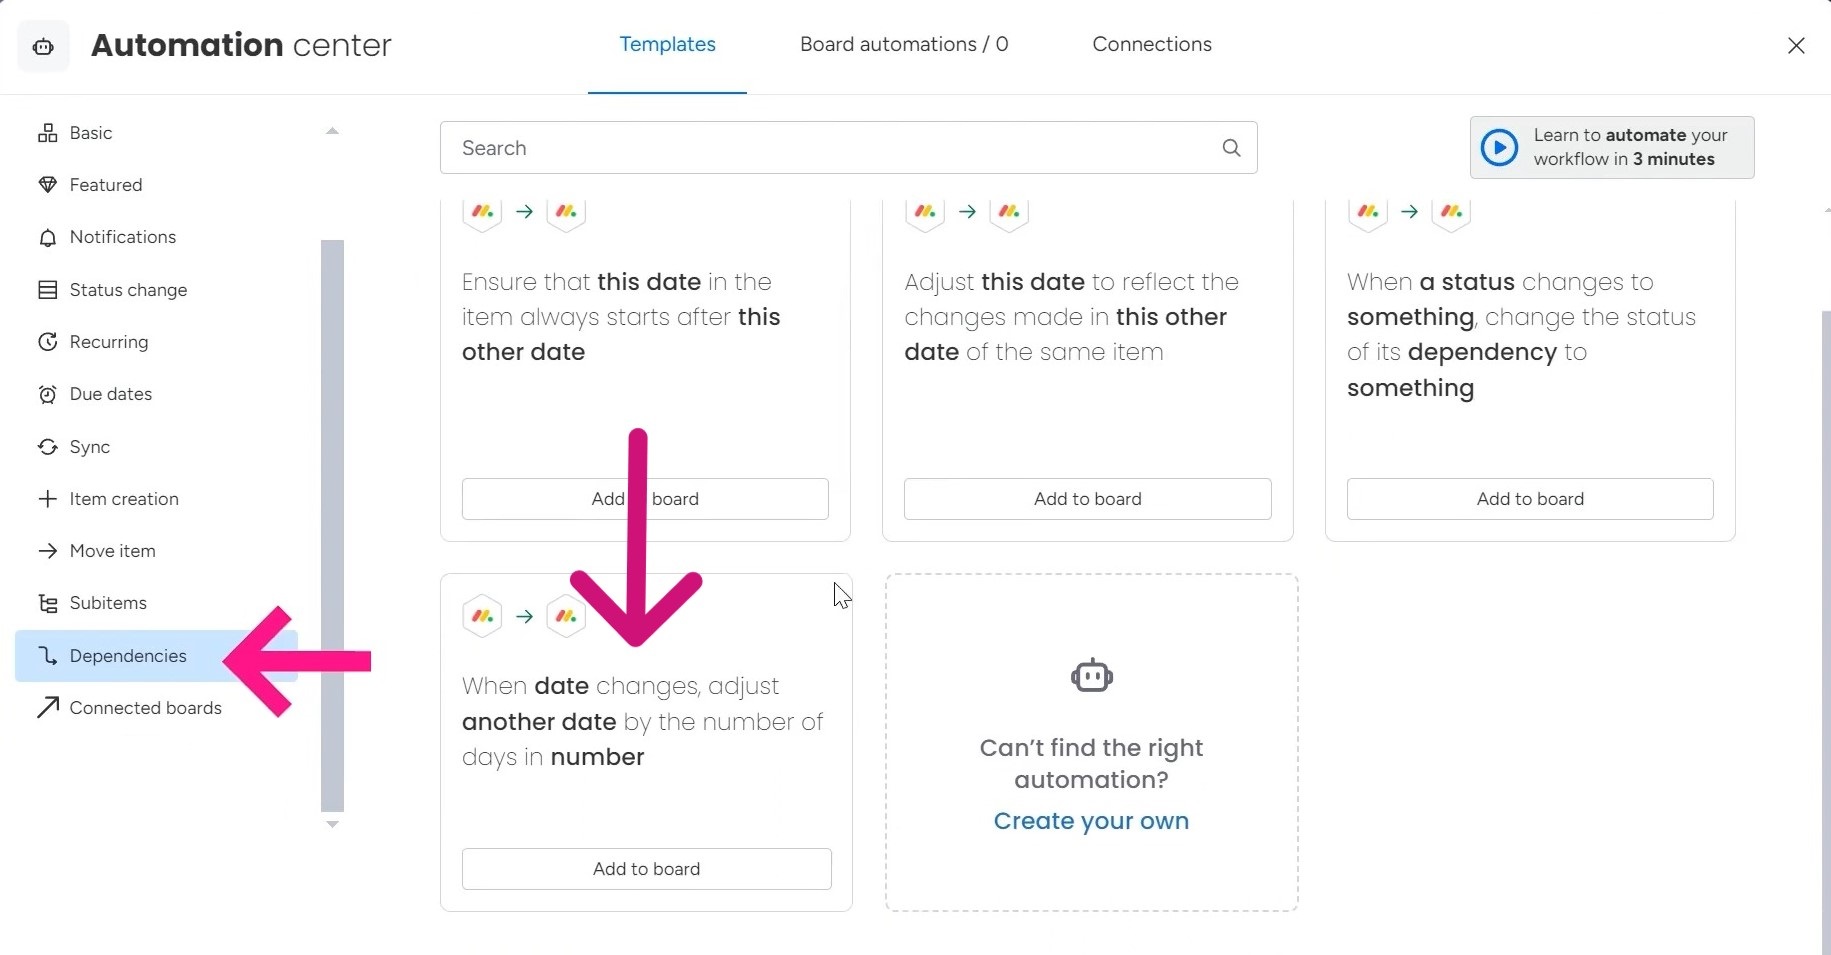
Setting up the automation to calculate due dates is a straightforward process. Navigate to the Automation Center, and under the “Dependencies” section on the left, you’ll find the relevant option.
The automation you need is called “When date changes, adjust another date by the number of days in number.” Select this automation, and specify that when the “Event Date” changes, the system should adjust the “Due Date” by the number of days in your “Off Set” column.

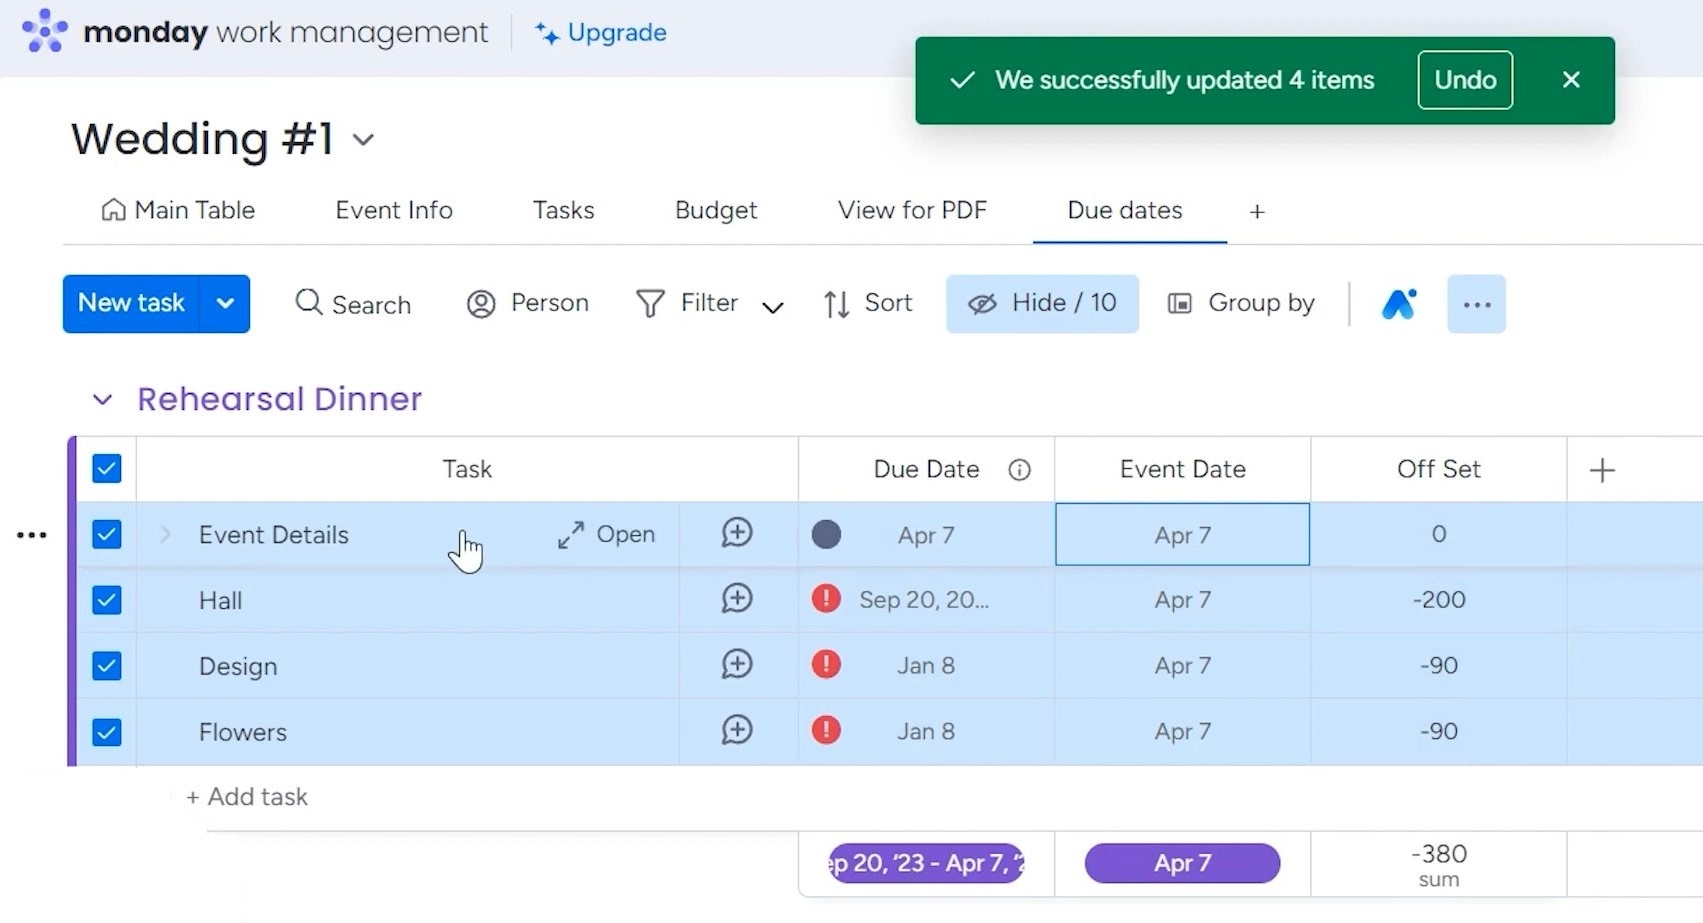
Now, let’s see the automation in action. Suppose you have an event like the hall booking scheduled for April 7 (the day of making this tutorial).
The “Event Date” column will then show April 7, while the “Off Set” column for tasks like finalizing venue details will show 0, which means the due date is on the same day.

Depending on your event dates and off set parameters, the automation will calculate the correct due dates for all entries. With this feature, you can take the guesswork out of your event planning.
The power of this date automation extends far beyond event planning scenarios. Whether you’re organizing a webinar, launching a new product, or tackling any project with a fixed deadline, this approach can streamline your workflow.
Want to simplify your projects and tasks with monday.com’s powerful features? Book a free 30-minute session with a Simpleday expert to learn how the platform works and get help implementing it for your specific needs.


