
Having a ton of info on your monday.com board can be overwhelming. It’s like trying to find a needle in a haystack, except the haystack is made up of tasks, deadlines, and client details.
That’s where the filtering feature becomes highly useful. It lets you find the information you’re looking for with ease.
How to Use the Filtering Feature on monday.com
There are two ways to filter your data on monday.com:
- Quick filter (suitable for a simple, straightforward search)
- Advanced filter (good for a board with plenty of data)
Let’s find out how to apply these features on your board.
If you like to watch a video tutorial, check this out:
Applying the Quick Filter
With this feature, you can filter your board based on specific column values. Click the “Filter” button on top of the board to enter the filter menu. From there, you can select which columns you want to filter.
Let’s just say you only need to see tasks for Client #1 today. In that case, click on the “Client #1” filter and your board will show you only those relevant items.
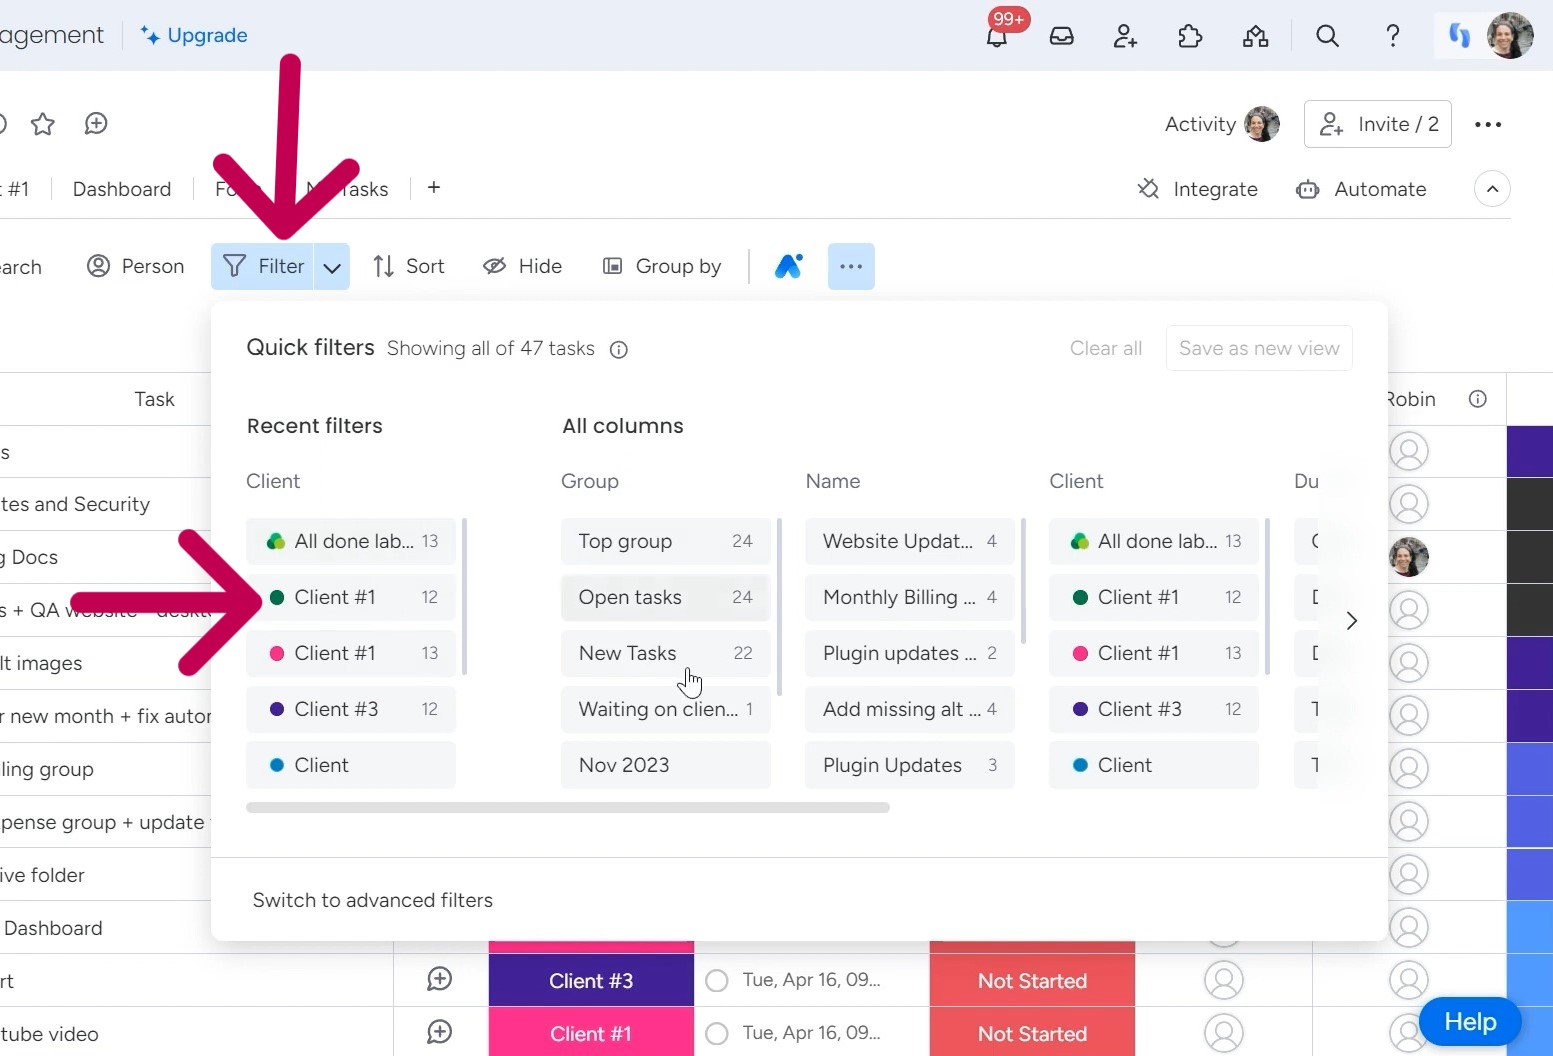
There are two options, “Clear all” and “save as new view”, for clearing that filter or saving it as a custom view for easy access later on.
You can also use this option for layering on additional filters. For example, if you want to see only the “Top group” for Client #1, just click on these two filters to display this information on the board.
So, when should you opt for quick filters? Generally, they’re the way to go for smaller, less complex boards where you just need to see a few key pieces of information.
Applying Advanced Filters
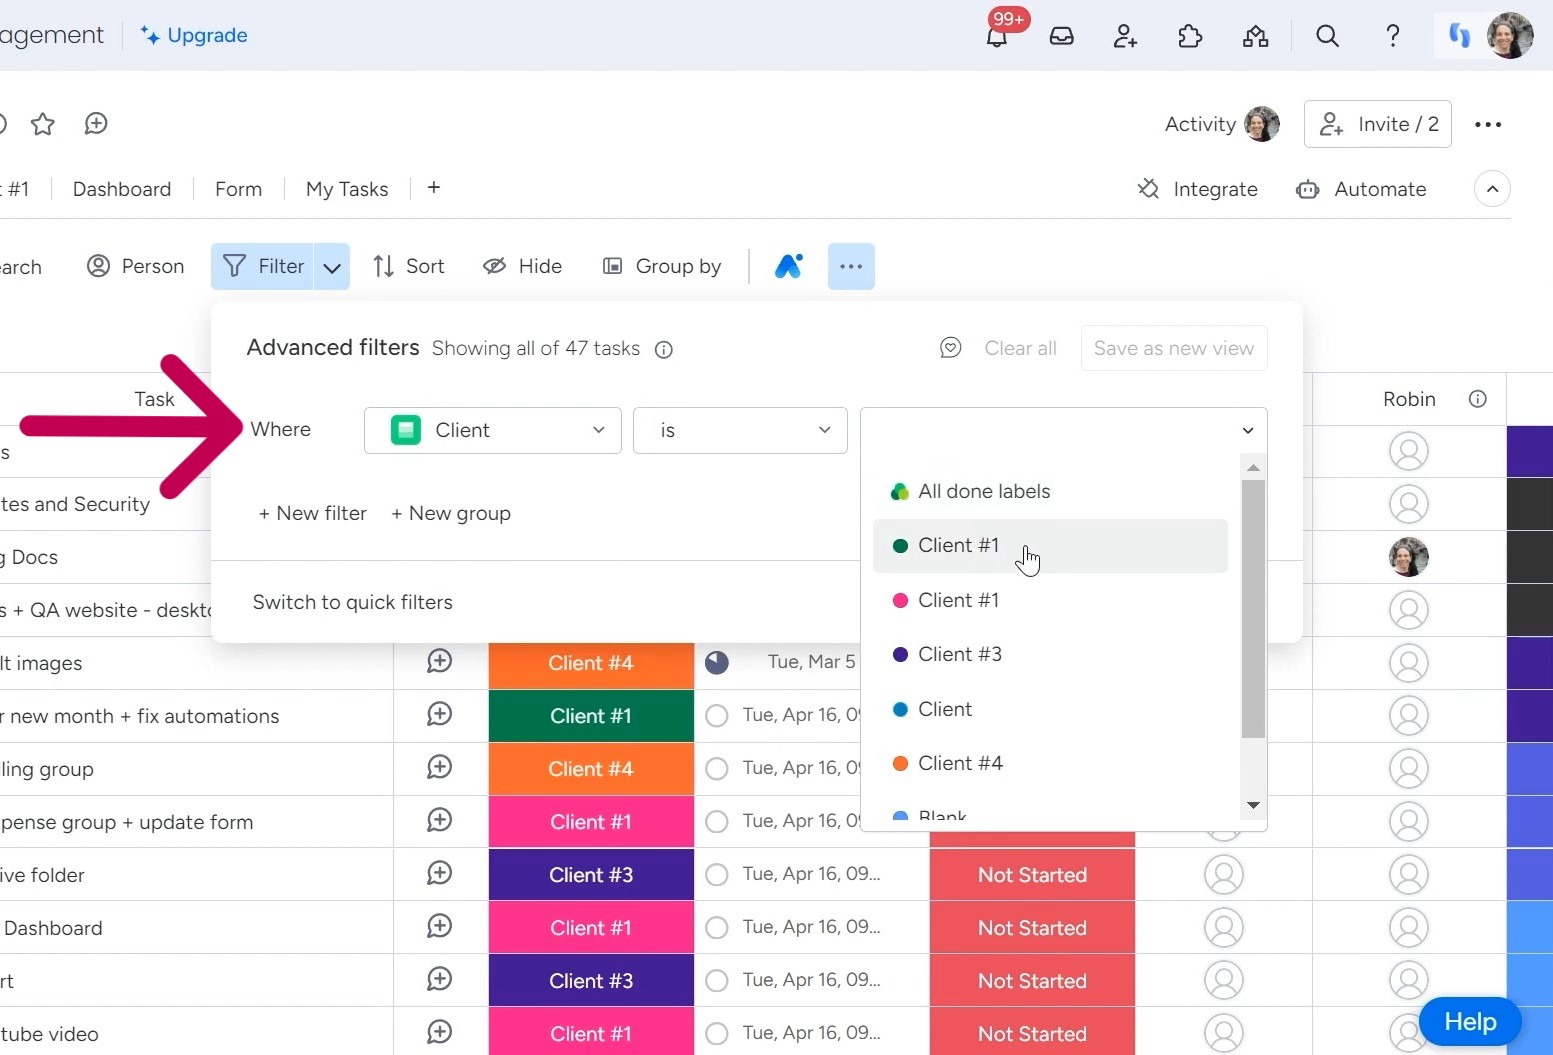
If you’re working with a complex board, the advanced filter can be really effective. To access, go to the Filter option and click the “Switch to advanced filters” button at the bottom or the little down arrow beside the Filter option.

Once you’re in the advanced filters, you’ll have many options to choose from. What’s really cool is that you can set a condition for a filtering option and layer it up by adding several new filters to it.
You can customize each filter by three options:
- Column: This is where you will choose a column from the board, like “Client,” “Due Date,” “Status,” etc.
- Condition: You will set a condition for the column, such as “is,” “is not,” “is empty.” or “is not empty.”
- Value: This option is for setting up the column’s value. Like is this for “Client #1,” “Client #2,” or something else.
You can also combine multiple filters for narrowed results. Click on the “New filter” option and choose whether they’re connected by “And” or “Or.” Then, set up the filter options.
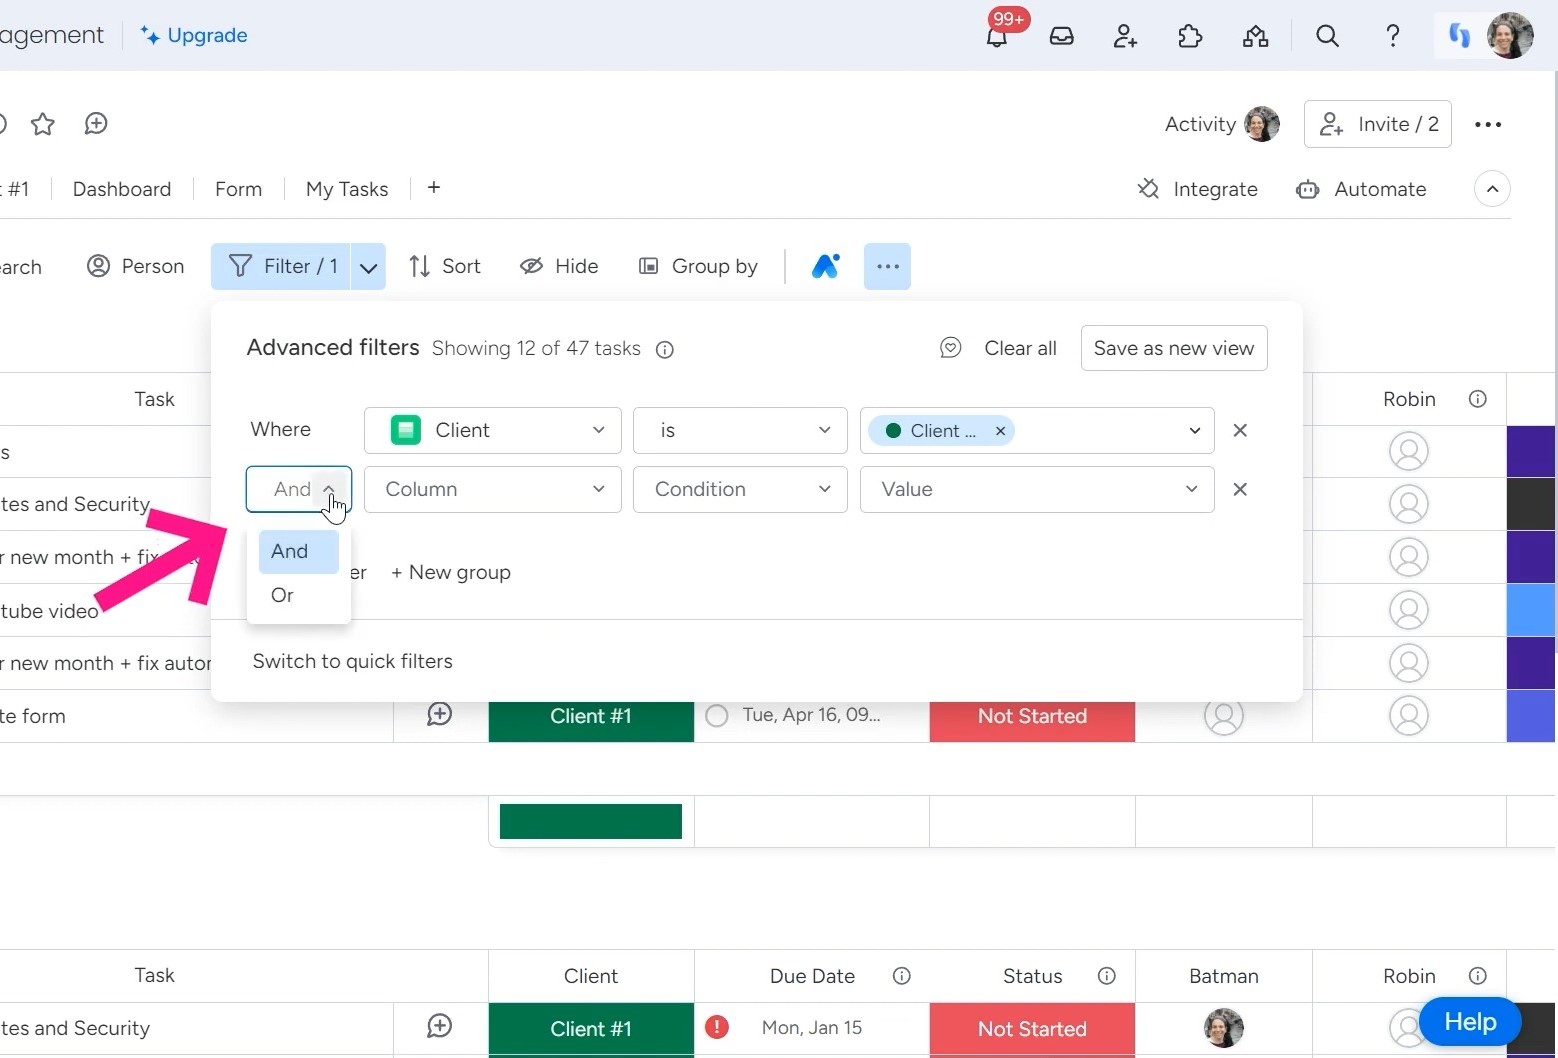
For example, you could do “client is X and group is top group.” Or you could do “client is X or client is Y” to see a broader set of results. If you don’t need a filter, just click on the “X” sign beside it.
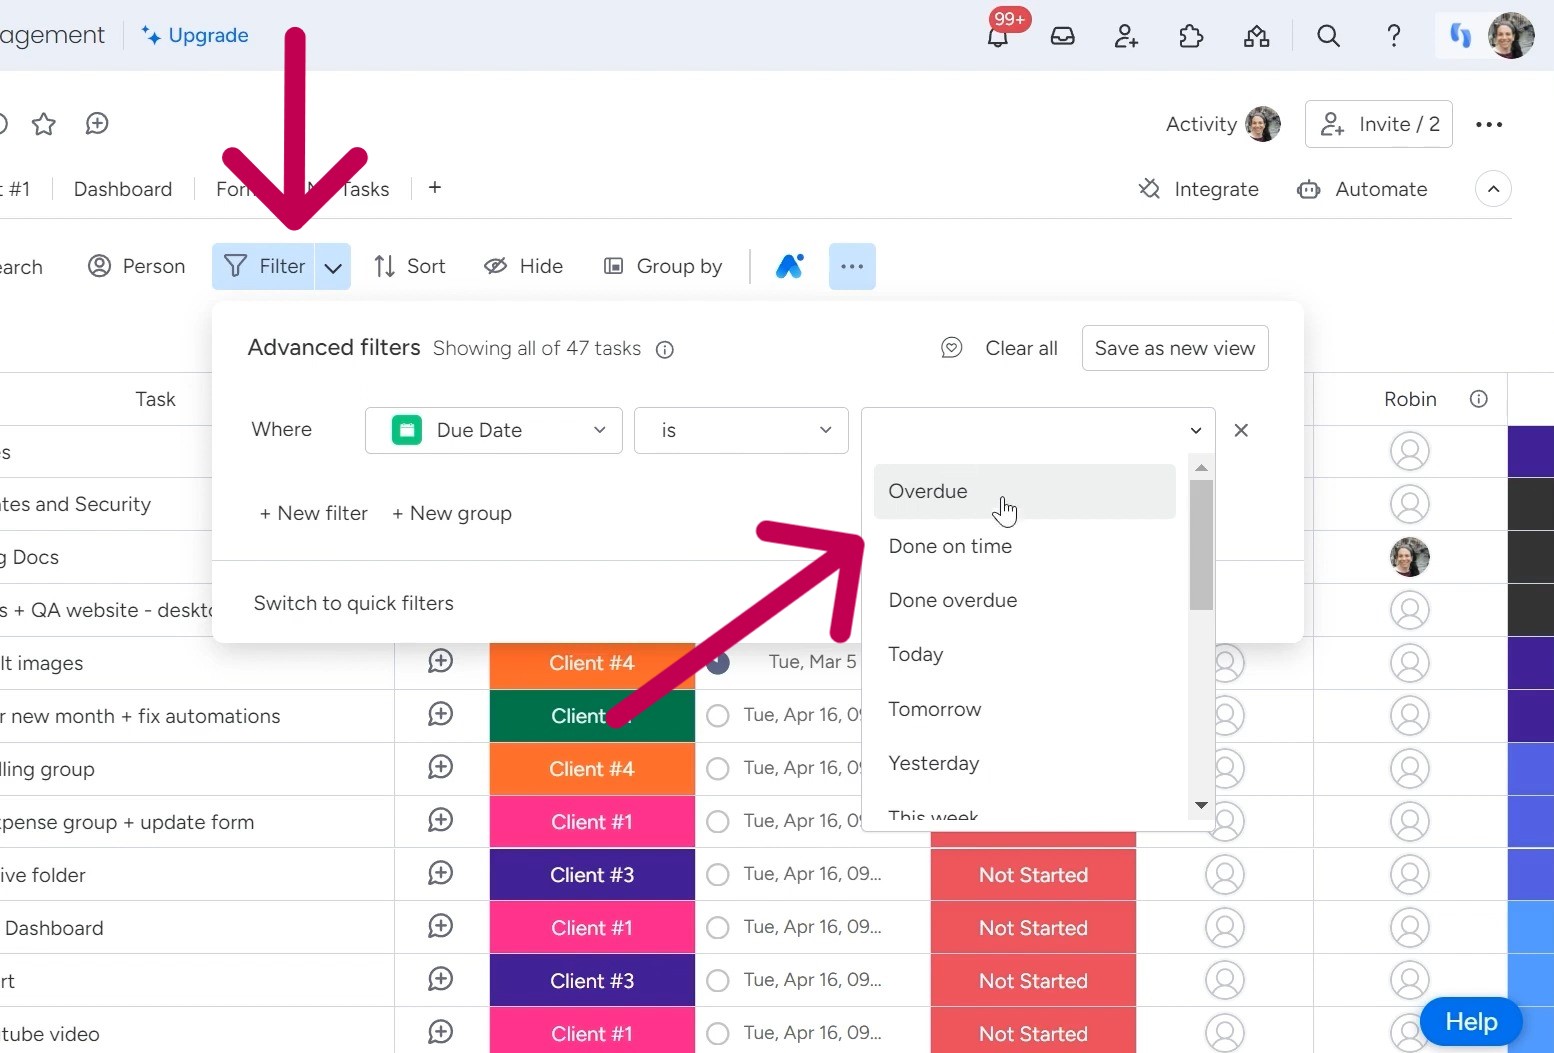
One of my favorite advanced filter features is the deadline tracking. When you click on a date column, you’ll see some icons that show you the status of each item, like past due, coming up soon, plenty of time left, and so on.
Then, you can sort out the deadlines by “Overdue,” “Done on time,” and other parameters from the filter option.
Are you struggling to manage the data in your monday.com boards? Let Simpleday’s experts be your guides. With our customized training and implementation services, you’ll be at the peak of your productivity. Check our services to learn more.