One useful feature in monday.com is the ability to create map views. These views allow you to visually see location data on a map, right within your boards.
If you need to plan and schedule deliveries, the map view can be incredibly helpful. Instead of just seeing a list of addresses, you can actually view them on a map. This makes it easy to optimize routes and organize the deliveries efficiently.
Let’s find out how to create these map views on monday.com.
The Benefits of Using the Map Views
Map views offer some really useful benefits that can organize your workflow and logistics planning. Here are a few of the key reasons you may want to use it:
a. Spatial Connection of Addresses
You can see the connection between different addresses at a glance. The visual rendering of each location makes it clear which addresses are near each other versus far apart.
b. Easier Logistical Planning
It becomes easier to plan efficient routes. For delivering packages, visiting clients, or any other travel-based tasks, you can optimize the order and flow to minimize mileage and time spent on the road.
c. Filtering Data
It allows focusing on specific data points. For example, you can filter the map to only show locations that need to be visited by a certain date. Or filter by assignee to see the locations assigned to a particular person. There are a variety of filters you can apply based on status, date, person, etc.
How to Create the Map Views on monday.com
Creating a map view in monday.com is pretty straightforward, just follow these steps:
1. Add a Location Column
You’ll want to add a location column to your board instead of just a regular text column for the address.
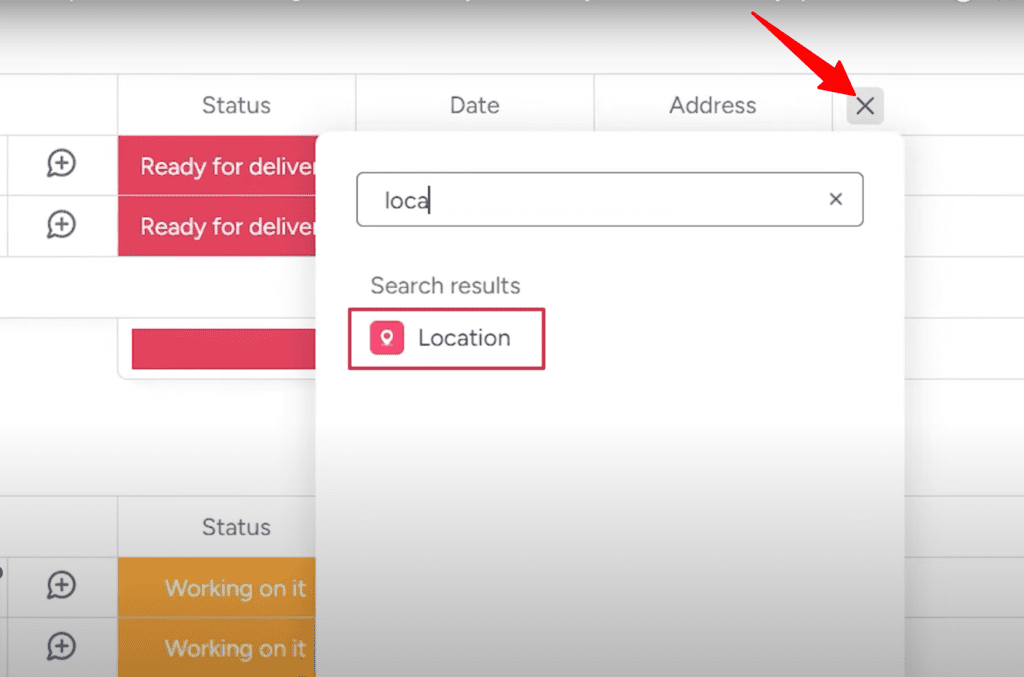
Click on the plus button on an empty column and search for location. Then, add a location column to this board.
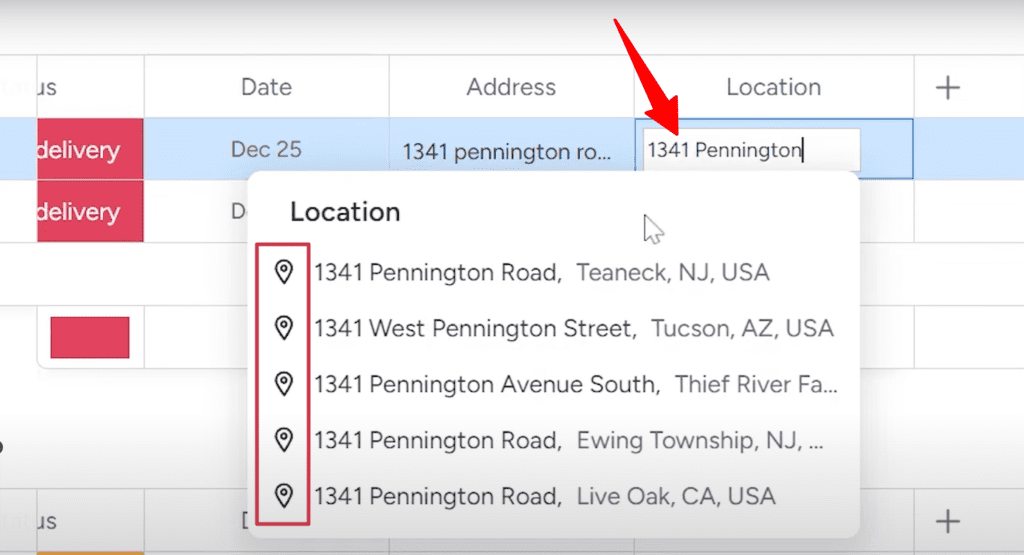
As you start typing in an address, monday.com will automatically suggest locations to choose from.
For example, if I start entering “1341 Pennington Road,” there will be suggestions of various addresses with this name. You just have to select the right one from the dropdown option.
Choosing the location this way ensures the address will show up right on the map.
Watch the video to understand how to create the map views:
2. Create a New Map View
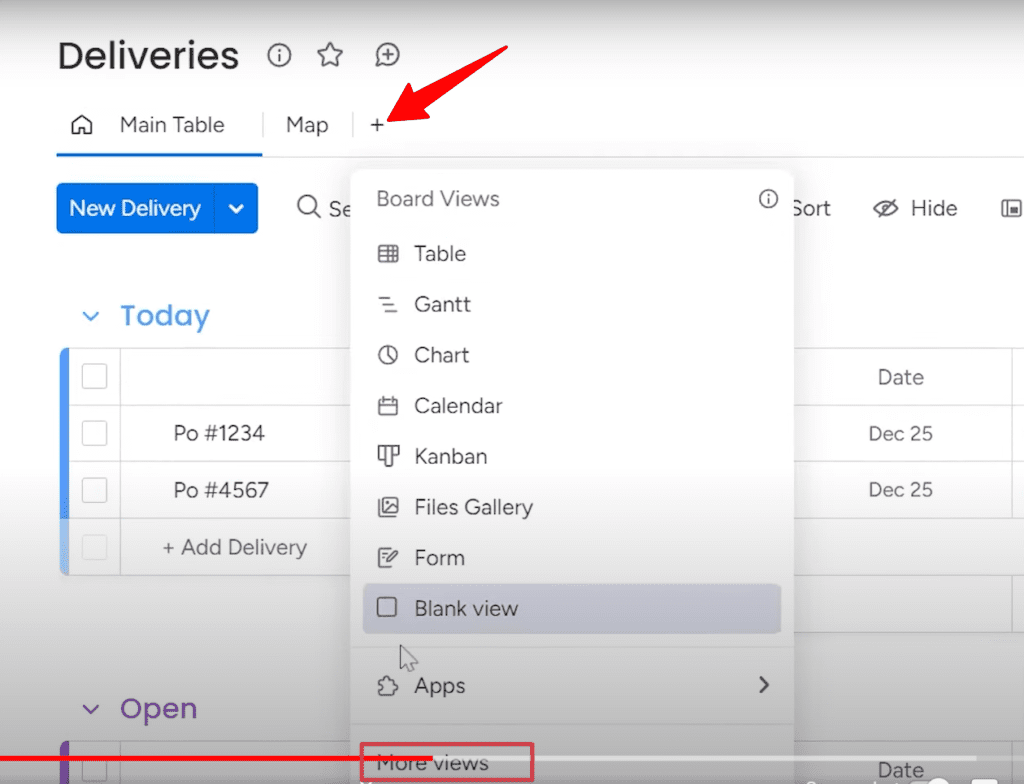
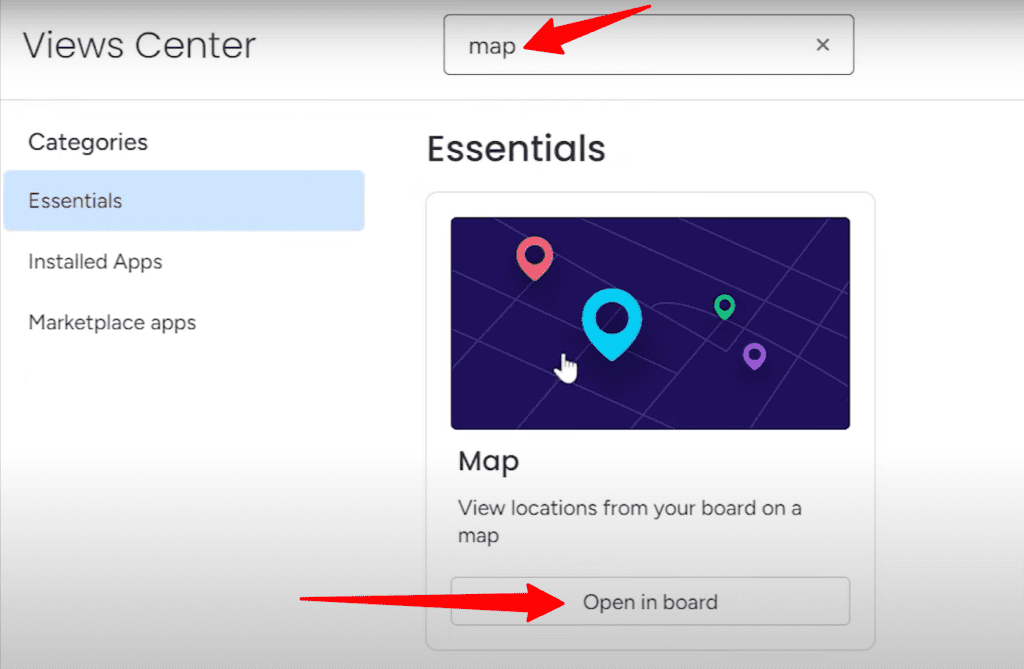
Once you have the location column populated, go to the top of your board and click the “+” button (Add View) and then choose “More Views” and select the “Map” view.
This will open up the map view for your board.
3. Customize Map Settings
Now you can customize the map settings by clicking on the three dots in the upper right corner of the board. Here, you will find several options to customize the view.
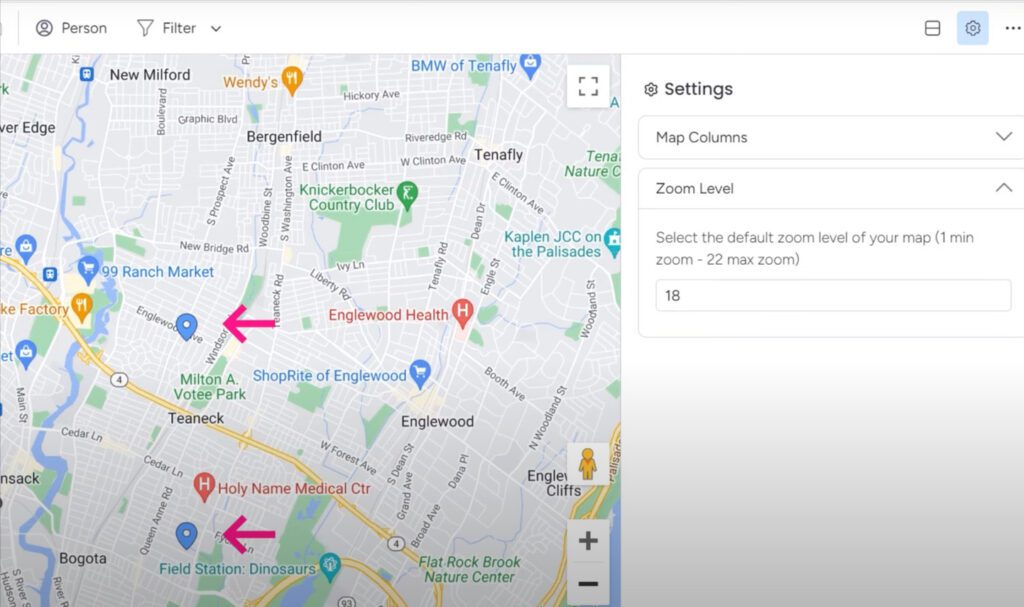
a. Zoom Level
Take some time to play around with the zoom level. This lets you toggle between a micro and macro view as needed.
For example, I can zoom in to see each individual address and surrounding street. But what if I want to see the bigger picture? I’ll zoom out a bit to see the entire street for my input addresses.
In the image above, I can see how my two addresses compare on the map and get a sense of the distance between them.
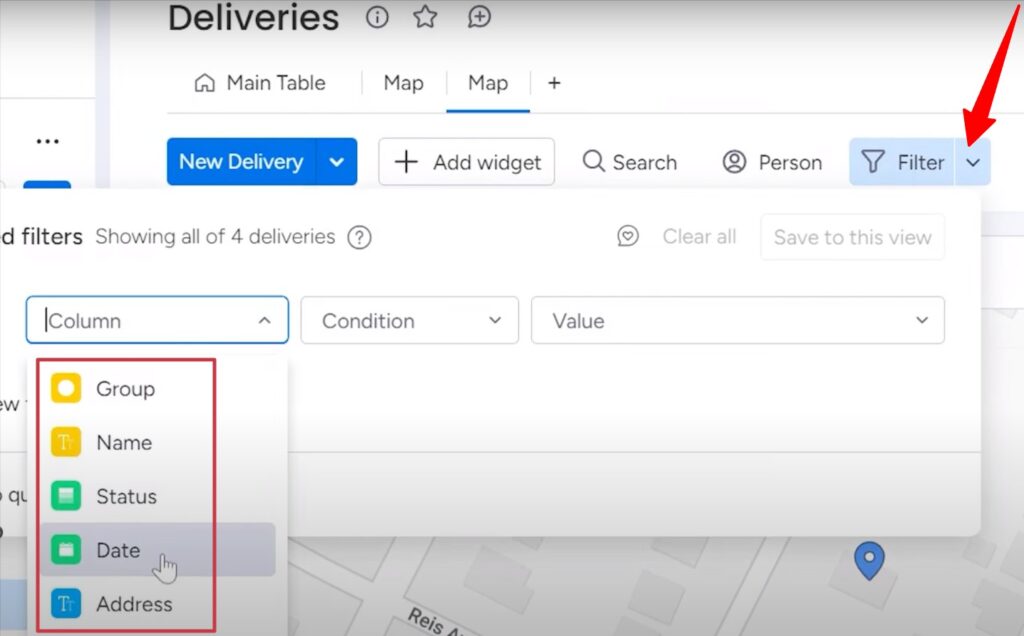
b. Filter Option
Filter makes it easier to view a specific data group.
Say you want to plan deliveries for a specific sales rep. You can filter the map to only show their assignments.
Or maybe you need to prioritize order shipping today. Filter by date to view just today’s shipments on the map.
The possibilities are endless. Filter by status to see pending orders, filter by product type to check stock, or filter by due date to schedule urgently. Whatever you need to analyze or action, filters help focus in.
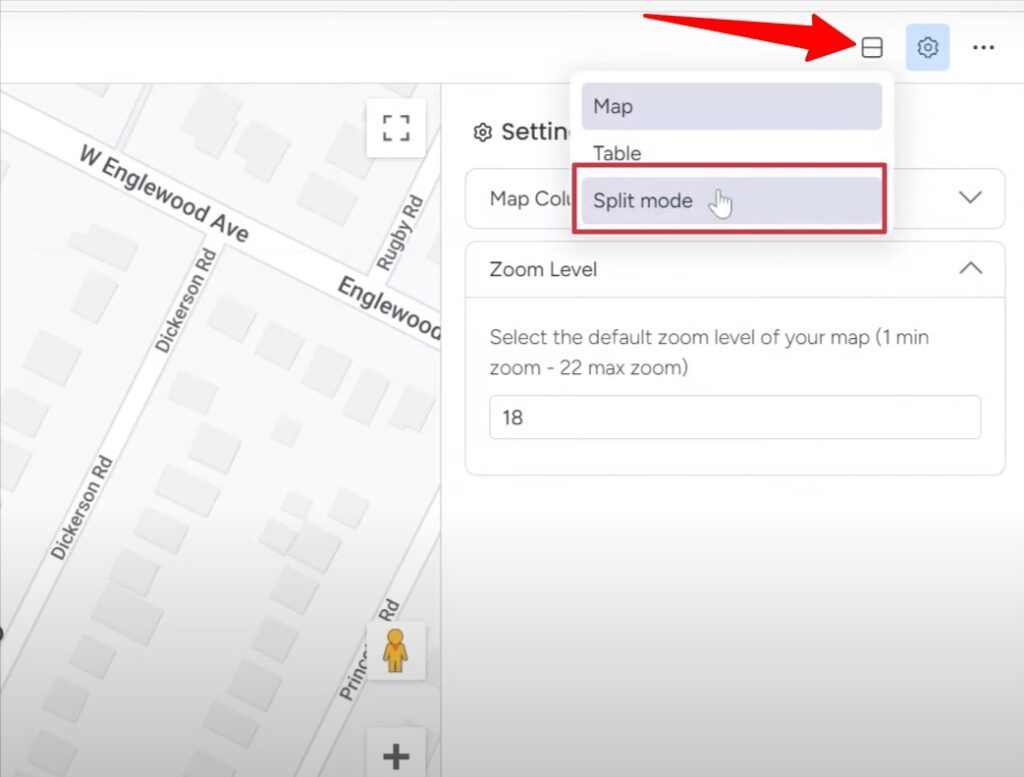
c. Split Mode
Don’t overlook the split view mode in your map’s settings. This lets you have the map up top with your board view right below it.
I often use split when I want the visual of the map, but also need to reference important order details. For example, when routing deliveries, you can scan the map while also checking order numbers, addresses, and other specifics.
If monday.com and map views seem like they could be a game-changer for your workflow, let the experts at Simpleday help you implement this powerful tool. Our team can guide you through setting up boards, automations, views, and integrations tailored specifically to your business needs.
Contact us to discuss how we can help you capitalize on these capabilities.


 I often use split when I want the visual of the map, but also need to reference important order details. For example, when routing deliveries, you can scan the map while also checking order numbers, addresses, and other specifics.